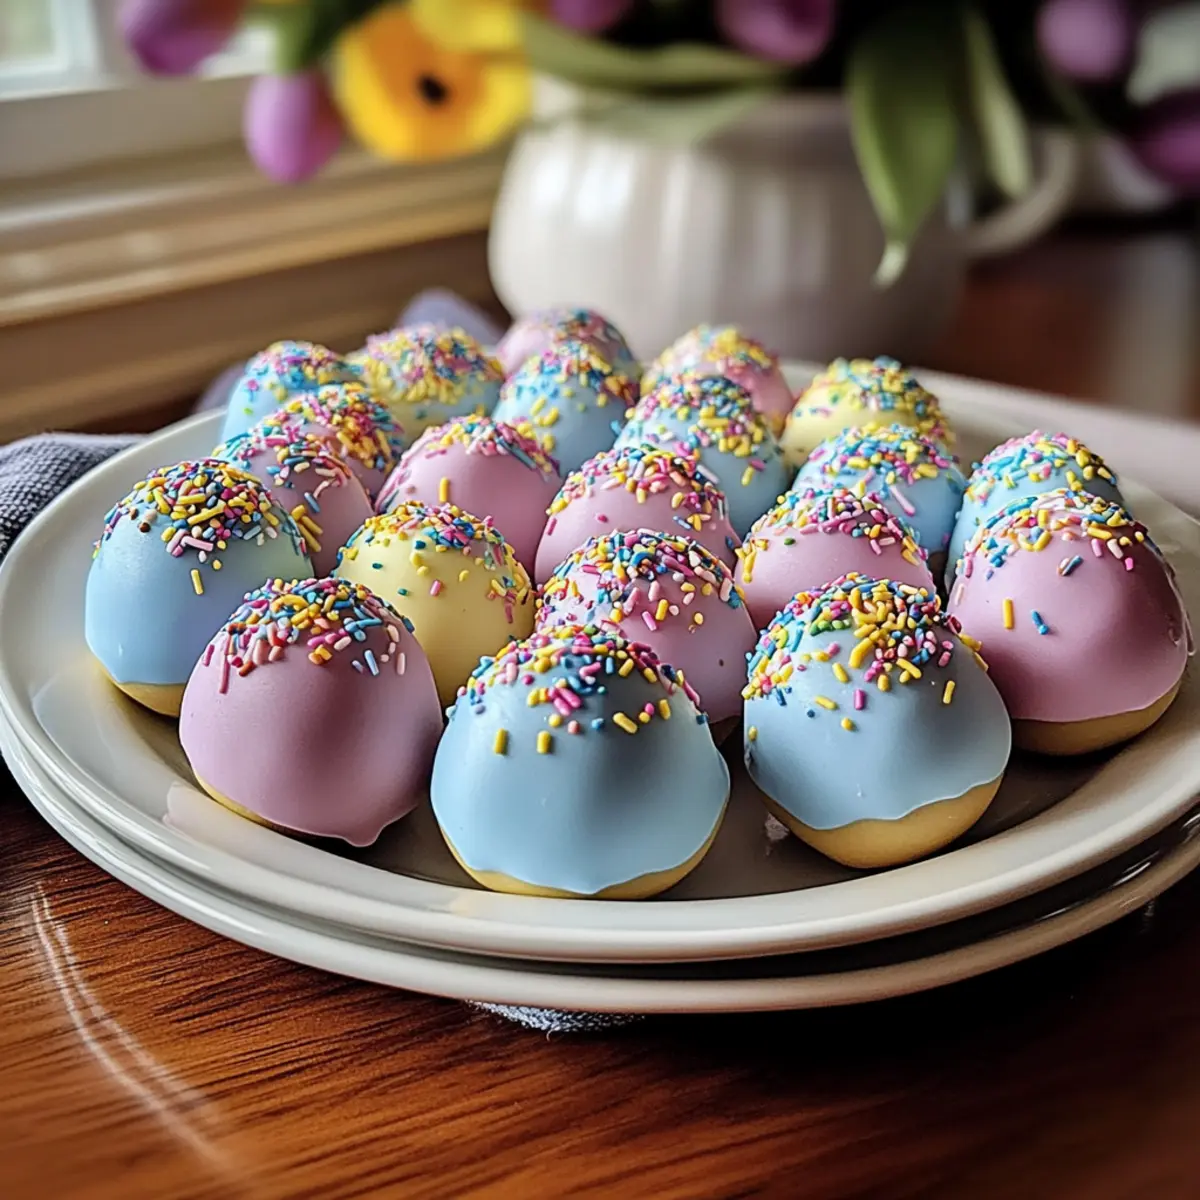
As I stood in my kitchen, the scent of crushed Oreos wafted through the air, instantly sparking nostalgia for sweet childhood treats. This Easter season, I’m excited to share my recipe for Festive No-Bake Easter Egg Oreo Balls—an irresistible treat that’s sure to delight both kids and adults alike! These adorable confections are not only quick to whip up, making them perfect for last-minute celebrations, but they also offer endless customization options to suit any taste or occasion. Picture a creamy, chocolatey center enveloped in a colorful candy coating, creating a festive feel for your gatherings or simply a fun activity to do with family. Are you ready to embrace your creative side and bring a bit of joy to your dessert table? Let’s dive into the world of these enchanting Easter treats!
Why Love Easter Egg Oreo Balls?
Simplicity: No-bake means minimal mess and easy preparation, perfect for anyone, even novice bakers.
Customizable Creations: You can play around with different coatings, like dark chocolate or colorful candy melts, making each batch uniquely yours.
Family Fun: Involve the kids! Rolling and decorating these balls is a delightful way to spend time together during the Easter festivities.
Crowd-Pleasing Treat: With their visually appealing design and rich flavors, these Oreo balls will be the star of any dessert table.
Quick and Easy: You can whip up a batch in under an hour, making them an excellent last-minute treat for gatherings or celebrations.
If you’re in the mood for more seasonal desserts, check out my Sausage Egg Breakfast or try some delightful Turkey Stuffing Balls for your holiday feasts!
Easter Egg Oreo Balls Ingredients
• Get ready to create delicious fun!
For the Filling
- Oreo cookies – The classic base for a rich chocolatey flavor; you can switch it with Graham crackers or Golden Oreos for a delightful twist.
- Cream cheese – This essential binds the ingredients and adds a creamy texture; try reduced-fat or dairy-free cream cheese for lighter options.
- Vanilla extract – Adds a wonderful depth of flavor; optional but recommended!
For the Coating
- White candy melts – Create a sweet, glossy exterior that’s perfect for decoration; substitute with white chocolate chips mixed with a touch of coconut oil for a smooth finish.
- Pastel food coloring – Transform your candy coating into vibrant shades; gel food coloring works best to achieve rich colors without thinning the mixture.
For Decorating
- Sprinkles/Sanding sugar – Use these to add that festive touch; they’re optional, but who can resist a little sparkle?
Step‑by‑Step Instructions for Easter Egg Oreo Balls
Step 1: Crush Oreos
Start by crushing the Oreo cookies into fine crumbs. You can use a food processor for a quick, smooth texture or place them in a zip-top bag and crush with a rolling pin for a more hands-on approach. The crumbs should be very fine to ensure a smooth filling, making about 2 cups of crumbs.
Step 2: Mix Filling
In a mixing bowl, combine the crushed Oreos with softened cream cheese. Use a spatula or mixer to blend until the mixture is homogeneous, smooth, and no white streaks of cream cheese remain. This should take about 2-3 minutes of mixing. The filling will have a rich, fudgy texture, perfect for shaping.
Step 3: Shape Eggs
Scoop out tablespoon-sized portions of the Oreo mixture and roll them into oval egg shapes with your hands. Aim for a uniform size to ensure even coating later. Place each shaped egg on a parchment-lined baking sheet, making sure they are spaced apart to prevent sticking. You should be able to form around 20 balls.
Step 4: Chill
Once shaped, refrigerate the Oreo eggs for about 30 minutes, or freeze them for 15 minutes if you’re short on time. This chilling step is crucial for firming up the eggs, making them easier to dip into the coating without losing shape.
Step 5: Melt Coating
While the eggs are chilling, melt the white candy melts in a microwave-safe bowl. Heat in 30-second intervals, stirring after each, until completely smooth and melted, which should take about 1-2 minutes total. If using chocolate chips, add a teaspoon of coconut oil to achieve a smoother consistency.
Step 6: Color Coating
Divide the melted coating into small bowls and add a few drops of pastel food coloring to each, stirring until you reach your desired shades. This step adds a fun and vibrant touch to the Easter Egg Oreo Balls, enhancing their festive appearance for your celebration.
Step 7: Dip Eggs
Carefully dip each chilled Oreo egg into the melted coating using a fork, ensuring the entire egg is covered. Allow the excess coating to drip off before placing them back on the parchment-lined sheet. This method keeps your fingers clean and the finish smooth, giving each egg a polished look.
Step 8: Decorate
While the coating is still wet, sprinkle colorful sprinkles or sanding sugar over the tops of the eggs for a festive decoration. Alternatively, you can drizzle additional colors of melted coating over them for a more artistic appearance. Get creative and have fun with this step!
Step 9: Set
Let the coated eggs sit at room temperature for about 10 minutes to harden, or place them back in the fridge to speed up the setting process. They should be firm to the touch and glossy, ready to showcase your delicious homemade Easter Egg Oreo Balls at your dessert table!
Make Ahead Options
These Easter Egg Oreo Balls are perfect for busy home cooks looking to save time! You can prepare the filling (crushed Oreos mixed with cream cheese) up to 24 hours in advance. Simply roll the mixture into egg shapes and refrigerate them. When you’re ready to serve, melt the candy coating and dip the chilled eggs, allowing a quick setting time. Additionally, you can also coat and decorate the Oreo Balls up to 3 days ahead—just store them in an airtight container in the refrigerator to maintain their freshness. This way, you’ll have a delicious and festive treat ready to shine at your gathering with minimal last-minute fuss!
What to Serve with Easter Egg Oreo Balls
Create a beautiful spread to complement your delightful no-bake treats and charm your guests this Easter!
- Creamy Vanilla Ice Cream: The cool, creamy texture with a hint of vanilla enhances the rich chocolatey flavor of the Oreo balls.
- Fruit Salad: A refreshing blend of seasonal fruits adds a vibrant and juicy contrast. Consider using strawberries and blueberries for an extra festive touch.
- Chocolate Dipped Strawberries: Indulgent yet refreshing, these berries blend perfectly with the sweetness of the Oreo balls and add a touch of elegance to your dessert table.
- Decadent Brownies: Serve alongside fudgy brownies for a delightful chocolate overload. The contrasting textures will have everyone raving.
- Minty Mojito: The light, refreshing flavors of this cocktail will balance the sweetness of the Oreo treats beautifully, making for a perfect spring sip.
- Festive Cupcakes: Colorful cupcakes with cream cheese frosting can harmonize perfectly with the Oreo balls, adding variety and a cheerful aesthetic to your dessert spread.
- Coffee or Hot Cocoa: A warm drink can round off the sweetness of the treats, offering a cozy touch perfect for spring gatherings.
- Carrot Cake: Rich in spices and a classic Easter favorite, the flavors will enhance the overall festive menu and deliver nostalgia too!
- Pineapple Upside-Down Cake: The fruity, caramelized goodness brings a delightful balance of flavors and textures that complements the rich Oreo balls so well.
Each of these delightful pairings emphasizes the festive spirit while creating a joyful, colorful table that every guest will love!
Easter Egg Oreo Balls Variations
Embrace your creativity and make these delightful treats uniquely yours with some tasty twists!
-
Flavored Cream Cheese: Swap in different cream cheese flavors, like strawberry or chocolate, for an exciting surprise inside.
-
Nutty Crunch: Add chopped nuts or crushed pretzels to the filling for an unexpected crunch. The combination of flavors creates a delightful contrast to the creamy center.
-
Dark Chocolate Coating: For a richer taste, use dark chocolate instead of white candy melts. This adds a luxurious depth that chocolate lovers will adore.
-
Coconut Topping: Roll the coated Oreo balls in shredded coconut for a tropical touch. It’s a fun way to introduce new textures and flavors, transporting you to a sunny paradise with each bite!
-
Add Heat: Mix a pinch of cayenne pepper into the filling for a spicy kick. The heat balances out the sweetness, making it an adventurous treat.
-
Sprinkles Galore: Customize your decoration—try seasonal sprinkles like bunny or egg shapes for Easter, or even swap in colorful nonpareils for a fun pop!
-
Caramel Drizzle: Drizzle melted caramel over the chilled Oreo balls for added sweetness and a striking presentation. It gives them a decadent finish that everyone will love!
-
Flavor Infusion: Experiment with flavored extracts like orange or peppermint in the filling for a fresh twist. Just a few drops can entirely transform the delightful experience.
These variations ensure everyone can find their favorite Easter Egg Oreo Balls recipe, making your gatherings even more special. For more creative ideas, don’t miss my Sausage Egg Casserole or the satisfying Turkey Stuffing Balls for your celebrations!
Storage Tips for Easter Egg Oreo Balls
Fridge: Store your Easter Egg Oreo Balls in an airtight container for up to 5 days. This will keep them fresh and maintain that delightful creamy texture.
Freezer: If you want to make these treats ahead of time, freeze them for up to 2 months. Place them in a single layer on a baking sheet until solid, then transfer to an airtight container.
Reheating: No reheating required! Just let the frozen Oreo Balls thaw in the fridge overnight before serving. Enjoy the delightful taste whenever you’re ready!
Wrapping: For added protection against freezer burn, wrap each egg individually in plastic wrap before storing them in an airtight container.
Tips for the Best Easter Egg Oreo Balls
Mix Well: Ensure the Oreo and cream cheese mixture is blended thoroughly. Incomplete mixing can lead to crumbly egg shapes that won’t hold together.
Freezer for Firmness: If you’re short on time, freeze the shaped egg mixture for 15 minutes instead of refrigerating for 30. This quick chill helps maintain shape during dipping.
Dip with Care: Use a fork to dip the eggs into the melted coating. This keeps your hands clean and creates a smooth, even finish.
Avoid Overheating: When melting the coating, heat in short intervals and stir often. Overheating can cause the chocolate to seize or become grainy, affecting your Easter Egg Oreo Balls.
Experiment with Coatings: Don’t shy away from trying different coatings or colors! Using dark chocolate or colored candy melts adds fun variety, making each batch unique and festive.

Easter Egg Oreo Balls Recipe FAQs
How do I choose ripe ingredients for my Easter Egg Oreo Balls?
Absolutely! When selecting your Oreo cookies, look for packs without dark spots and ensure they’re within their expiration date for optimal freshness. For cream cheese, check that it’s soft and smooth, free from any off-putting smells.
How should I store my Easter Egg Oreo Balls, and for how long?
I recommend storing your Easter Egg Oreo Balls in an airtight container in the refrigerator for up to 5 days. This keeps them delectable and fresh! If you plan to enjoy them later, pop them in the freezer, where they will stay delightful for up to 2 months.
Can I freeze Easter Egg Oreo Balls? If so, how?
Yes, indeed! To freeze your Easter Egg Oreo Balls, first, allow them to chill in the fridge. After they’re set, place them in a single layer on a baking sheet in the freezer until they’re solid. Then, transfer them into an airtight container or zip-top bag, separating layers with parchment paper if desired. Remember, thaw them in the fridge overnight for the best experience when you’re ready to enjoy!
What should I do if my Easter Egg Oreo Balls are crumbly?
Very! If your mixture is crumbly, it might be that the cream cheese wasn’t mixed in thoroughly. To remedy this, try adding an extra tablespoon of softened cream cheese, blend until smooth, and then shape your eggs. Ensuring a proper texture is key for perfect success!
Are there any dietary considerations I should keep in mind?
Absolutely! For those with allergies, ensure you’re using gluten-free Oreo cookies if needed. Additionally, check that your cream cheese aligns with any dietary restrictions, like using dairy-free alternatives for lactose sensitivity. Always pay attention to ingredients for the best experience for everyone in your gathering!
Easter Egg Oreo Balls: Delightfully Easy No-Bake Treats
Ingredients
Equipment
Method
- Start by crushing the Oreo cookies into fine crumbs.
- In a mixing bowl, combine the crushed Oreos with softened cream cheese.
- Scoop out tablespoon-sized portions of the Oreo mixture and roll them into oval egg shapes.
- Refrigerate the Oreo eggs for about 30 minutes, or freeze for 15 minutes.
- Melt the white candy melts in a microwave-safe bowl.
- Divide the melted coating into small bowls and add pastel food coloring.
- Carefully dip each chilled Oreo egg into the melted coating.
- While the coating is still wet, sprinkle colorful sprinkles or sanding sugar.
- Let the coated eggs sit at room temperature for about 10 minutes to harden.
Leave a Reply