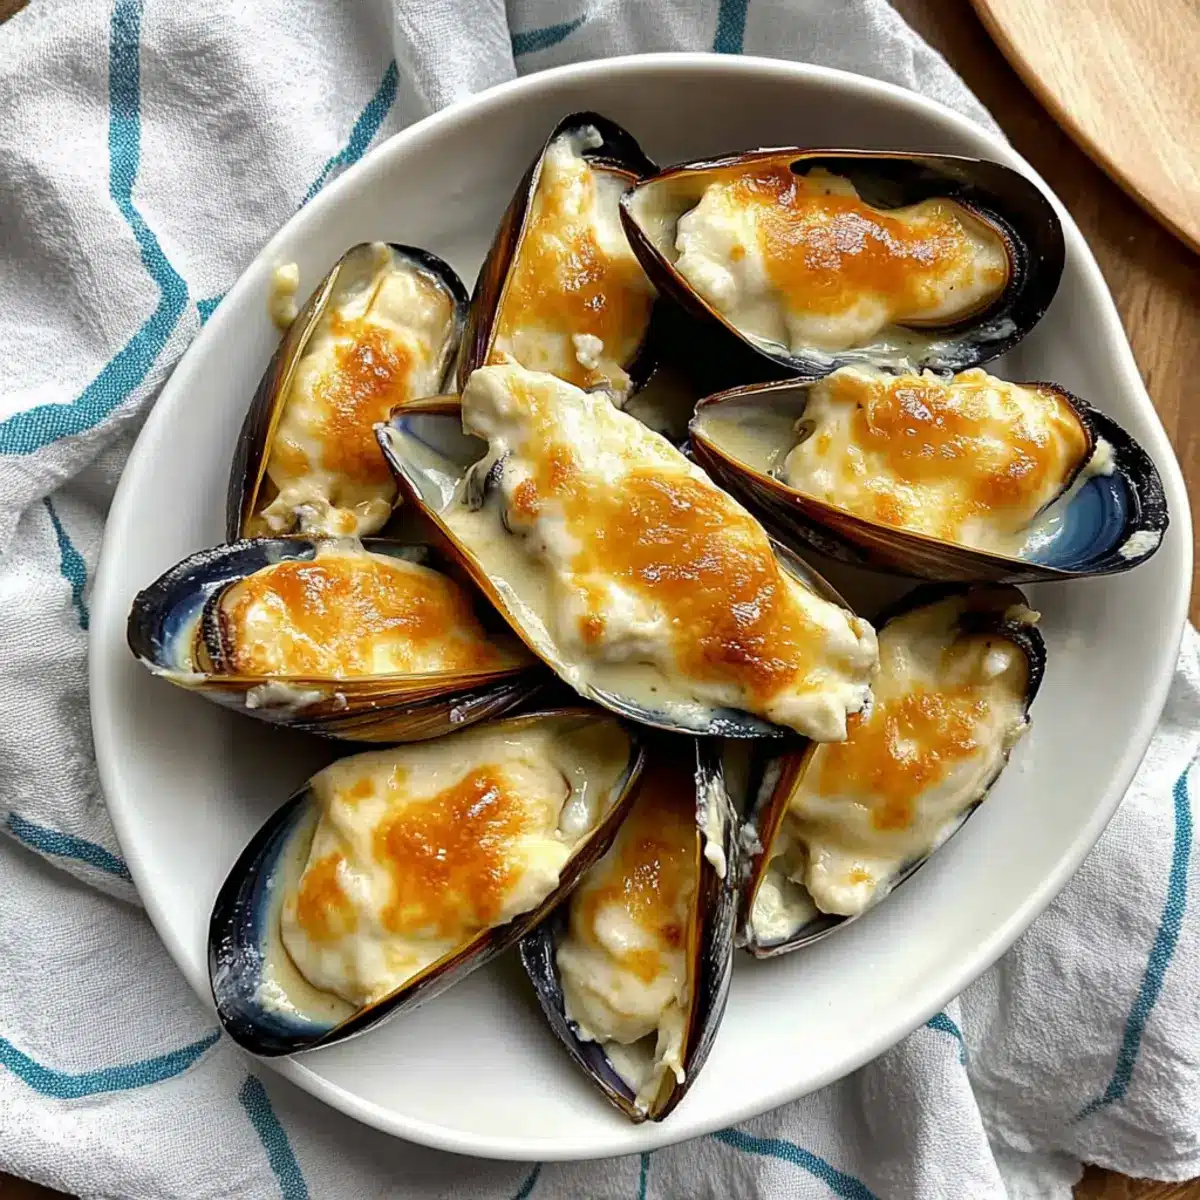
As I sank my fork into the creamy goodness of these Cheesy Mayo Mussels, I couldn’t help but feel transported to my favorite Chinese buffet, where delicious flavors abound. This quick and easy recipe brings that cherished comfort right into my kitchen. In just 20 minutes, you’ll have a dish that not only satisfies seafood cravings but is also perfect for impressing friends at your next gathering. Whether you’re enjoying it as an appetizer or a light main course alongside a breezy salad, these mussels deliver a delightful cheesy twist that will keep everyone coming back for seconds. Curious how to make this restaurant-style treat at home? Let’s dive in!
Why are Cheesy Mayo Mussels a Must-Try?
Quick and Easy: With just 20 minutes from preparation to the oven, these mussels deliver a gourmet experience at lightning speed.
Flavor Explosion: The creamy and cheesy topping brings a savory richness that elevates the natural umami of the mussels.
Versatile Option: They can be served as an appetizer or paired with a fresh salad for a delightful light meal—perfect for any occasion!
Crowd-Pleaser: Impress your guests with this Chinese buffet-style dish that guarantees an unforgettable flavor experience, reminiscent of your favorite buffet treats.
For more cheese-infused ideas, check out my recipes for Oven Baked Cheesy Tacos and Cheesy Ranch Potatoes!
Cheesy Mayo Mussels Ingredients
Let’s gather what you need to create these delicious and easy Cheesy Mayo Mussels!
For the Creamy Mixture
- Mayonnaise – Adds creaminess and moisture; using Kewpie Japanese mayo enhances flavor.
- Garlic (minced) – Introduces aromatic flavor; fresh is best for maximum taste.
- Garlic Powder – Intensifies the garlic flavor without added texture; can be omitted if using fresh generously.
- Onion Powder – Contributes sweetness and depth; optional but recommended for extra flavor.
- Sugar – Balances the overall taste; can be omitted if desired.
- Lemon Juice (or vinegar) – Adds brightness and acidity to elevate the seafood; fresh lemon juice is preferable.
For the Mussels
- Mussels (in the half-shell) – Main protein and source of umami; use frozen New Zealand green mussels, blanched for convenience.
For the Topping
- Shredded Mozzarella Cheese – Provides a cheesy, gooey topping; other cheeses like cheddar can add a different flavor profile.
With these simple ingredients, you’ll bring the taste of your favorite Chinese buffet right into your home kitchen!
Step‑by‑Step Instructions for Cheesy Mayo Mussels
Step 1: Preheat the Oven
Begin by preheating your oven to 425°F (220°C) and positioning the rack in the middle. This temperature ensures the cheese topping will become perfectly melted and slightly golden, enhancing the flavor of the Cheesy Mayo Mussels. While waiting for the oven to heat up, gather your ingredients to streamline the preparation process.
Step 2: Make the Creamy Mixture
In a small mixing bowl, combine mayonnaise, minced garlic, garlic powder, onion powder, sugar (if using), and lemon juice (or vinegar). Stir the mixture until smooth and well-blended. This creamy concoction is the star of your Cheesy Mayo Mussels, bringing a rich flavor that beautifully complements the seafood. Set aside once combined.
Step 3: Arrange the Mussels
Take your frozen New Zealand green mussels and arrange them on a baking sheet with the shell side facing down. Ensure they are spaced apart for even cooking. If you’re using blanched mussels, they should be prepped and ready to go straight into the oven. This creates a sturdy base for the delicious toppings to come.
Step 4: Add the Toppings
Generously spoon the creamy mayo mixture over each mussel, ensuring an ample layer atop each one. Follow this by sprinkling a generous amount of shredded mozzarella cheese over the mayo-coated mussels. The cheese will melt and create a bubbly, golden crust, bringing out the best flavors in this quick dish.
Step 5: Bake to Perfection
Place the baking sheet in your preheated oven and bake for 8-10 minutes. Keep an eye on the mussels, watching as the cheese begins to melt and turn lightly golden. Once the topping is bubbly and the mussels reach an internal temperature of at least 145°F, they are ready to be taken out and served.
Step 6: Serve
Carefully remove the baking sheet from the oven and allow the Cheesy Mayo Mussels to cool for a minute. Transfer them to a serving platter, and enjoy this dish warm. The combination of creamy, cheesy exteriors and tender mussels is sure to delight your guests or family members, making this a memorable meal for any occasion.
Expert Tips for Cheesy Mayo Mussels
-
Fresh Ingredients: Use fresh garlic and high-quality mayonnaise like Kewpie for a richer taste in your Cheesy Mayo Mussels.
-
Cooking Temperature: Ensure your oven is properly preheated to 425°F to achieve that perfect cheesy crust and tender mussels.
-
Mussel Preparation: Don’t thaw frozen mussels before baking to save time and preserve their texture; they can go straight into the oven.
-
Variations Allowed: Feel free to mix and match cheeses; cheddar or gouda can add exciting flavor twists to your Cheesy Mayo Mussels.
-
Watch the Timing: Keep an eye on the baking time to avoid overcooking, which can lead to tough mussels; 8-10 minutes is perfect.
How to Store and Freeze Cheesy Mayo Mussels
Fridge: Store any leftover Cheesy Mayo Mussels in an airtight container in the refrigerator for up to 3 days to maintain freshness and flavor.
Freezer: For longer storage, freeze the unbaked mussels in an airtight container for up to 2 months. Thaw in the fridge overnight before baking.
Reheating: To reheat, bake thawed Cheesy Mayo Mussels at 425°F for about 10 minutes until heated through and the cheese is bubbly.
Make-Ahead: Prepare the mayo mixture and combine with mussels; store in the fridge for up to a day before baking for an easy, quick meal!
Cheesy Mayo Mussels Variations & Substitutions
Feel free to personalize these Cheesy Mayo Mussels to suit your taste buds and dietary needs.
-
Seafood Swap: Replace mussels with clams or shrimp for a delightful twist on the seafood experience.
-
Cheese Options: Try gouda, cheddar, or pepper jack for a flavor-packed topping that adds an exciting twist.
-
Dairy-Free: Use a vegan mayonnaise and dairy-free cheese to create a cheese-less version that’s still decadent.
-
Herb Boost: Add fresh herbs like parsley or chives to the mayo mixture for a vibrant burst of flavor.
-
Spicy Kick: Mix in some sriracha or red pepper flakes to the mayo for an enticing heat that’ll thrill your taste buds.
-
Crispy Topping: For added texture, crush some crispy breadcrumbs or fried onions on top before baking for a crunchy finish.
-
Asian Flair: Stir in a dash of oyster sauce or soy sauce for an extra layer of umami that enhances the dish’s roots.
-
Mini Portions: Serve these mussels as bite-sized appetizers by using smaller shellfish or quail eggs in place of larger mussels.
For more cheesy fun, try out my Cheesy Christmas Tree Bread or indulge in a side of Cheesy Ranch Potatoes for a fuller, comforting meal experience!
What to Serve with Cheesy Mayo Mussels
These delectable Cheesy Mayo Mussels create a feast of flavors, and pairing them with the right sides will elevate your dining experience.
-
Crispy Garlic Bread: A crunchy side that will soak up the creamy goodness of the mussels, adding a satisfying texture to each bite. Serve it warm with a sprinkle of parsley for freshness.
-
Light Green Salad: A mix of fresh greens with a zesty vinaigrette adds a refreshing contrast to the rich cheese and mayo, balancing the meal beautifully.
-
Stir-Fried Veggies: A vibrant medley of colorful vegetables, lightly tossed in soy sauce, can bring a touch of umami while offering a crisp, healthy element.
-
Steamed Jasmine Rice: This fluffy, aromatic rice acts as a perfect canvas for the cheesy mussels, soaking up the delightful flavors of the dish. It’s pure comfort!
-
Chilled Rosé Wine: A glass of this refreshing wine complements the seafood wonderfully, enhancing the overall dining experience with its fruity notes.
-
Honeydew Melon Skewers: These sweet and juicy bites bring a naturally refreshing profile, cleansing the palate between mouthfuls of cheesy goodness.
With each of these pairs, you will create a meal that’s not just quick but an unforgettable adventure for your taste buds!
Make Ahead Options
These Cheesy Mayo Mussels are perfect for meal prep, making them a great choice for busy weeknights! You can prepare the creamy mayo mixture and spoon it over the frozen mussels, storing the assembled tray in the fridge for up to 24 hours. This allows the flavors to meld beautifully while keeping the mussels fresh. When you’re ready to serve, just preheat your oven to 425°F and bake for 8-10 minutes until the cheese is bubbly and golden. To maintain that delightful texture, avoid thawing the mussels before baking; they can go straight from the fridge to the oven. Enjoy effortless, restaurant-quality results with minimal effort!
Cheesy Mayo Mussels Recipe FAQs
How do I select the best mussels?
When choosing mussels, opt for fresh, live mussels that are tightly closed. If you notice any that are open, gently tap them; if they don’t close, discard them as they may be dead. You can also use frozen New Zealand green mussels, which are pre-cooked and ready to use straight from the package.
How should I store leftover Cheesy Mayo Mussels?
Store any leftover Cheesy Mayo Mussels in an airtight container in the refrigerator for up to 3 days. To maintain their creaminess and flavor, it’s best to consume them within this timeframe. Reheating is simple—just bake them at 425°F for about 10 minutes until warmed through.
Can I freeze Cheesy Mayo Mussels?
Absolutely! You can freeze the unbaked Cheesy Mayo Mussels in an airtight container or freezer bag for up to 2 months. To freeze, arrange the mussels on a baking sheet to flash freeze them first, then transfer them to the container. When you’re ready to enjoy, thaw them overnight in the refrigerator before baking as directed.
What if the cheese doesn’t melt properly?
If your cheese isn’t melting properly, it could be due to the type of cheese you’re using. Opt for cheeses that are known for their melting qualities, such as mozzarella or gouda. Also, make sure your oven is preheated to 425°F and that the mussels cook for the full 8-10 minutes — check to ensure the cheese is bubbly and lightly browned for that perfect finish!
Are these mussels safe for those with seafood allergies?
If you or your guests have seafood allergies, it’s best to avoid this recipe altogether, as mussels are shellfish and can trigger severe reactions. Always consult with those who have allergies and communicate clearly about the ingredients used in your dish.
Can I make Cheesy Mayo Mussels ahead of time?
Yes! You can prepare the mayo sauce and mix it with the mussels up to a day in advance. Store them in the refrigerator in an airtight container. When you’re ready to bake, just pop them in the oven without needing to thaw, allowing for an easy and quick meal!
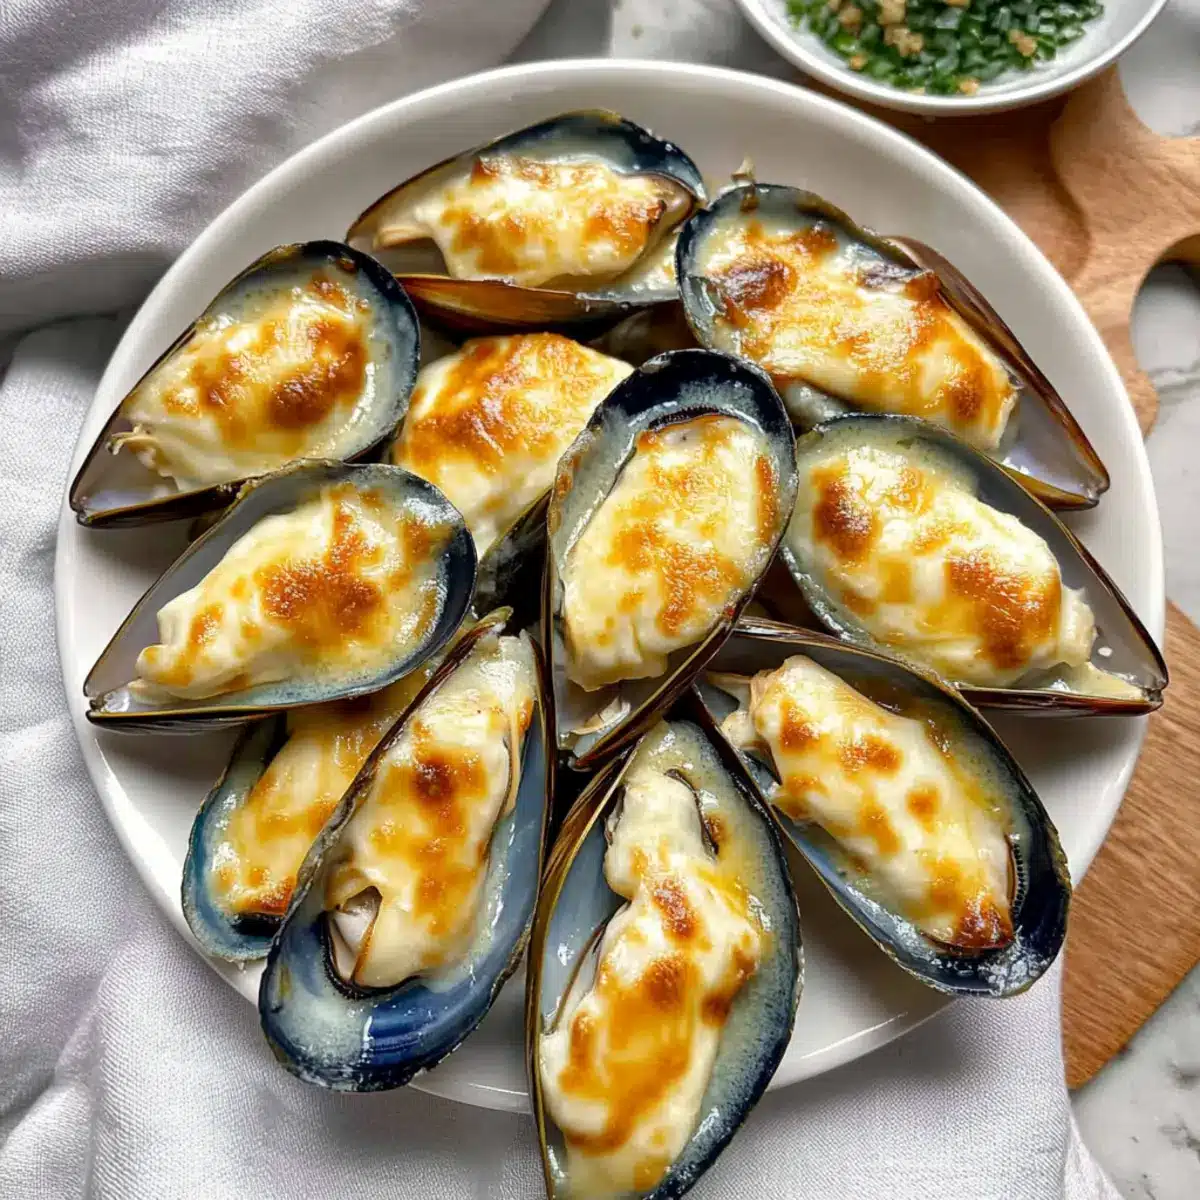
Cheesy Mayo Mussels: The Ultimate Comfort Seafood Snack
Ingredients
Equipment
Method
- Preheat your oven to 425°F (220°C) and position the rack in the middle.
- In a small mixing bowl, combine mayonnaise, minced garlic, garlic powder, onion powder, sugar (if using), and lemon juice (or vinegar). Stir until smooth and well-blended.
- Arrange the frozen New Zealand green mussels on a baking sheet with the shell side facing down.
- Generously spoon the creamy mayo mixture over each mussel and sprinkle shredded mozzarella on top.
- Bake in the preheated oven for 8-10 minutes until the cheese is melted and bubbly.
- Remove from the oven and let cool for a minute before serving warm.
Leave a Reply