Tucked away in my kitchen this week, I had a lightbulb moment that transformed my dinner plans. While I was sifting through my pantry for gluten-free options, the idea of making rice tortillas struck me like a culinary spark. These rice tortillas are not just easy to whip up; they are a revelation in the world of homemade wraps – soft, pliable, and utterly versatile! Perfect for tacos, burritos, or even as the base for savory creations, they cater to both gluten-free and vegan diets effortlessly. With simple ingredients and no flour or yeast involved, this recipe is all about wholesome goodness without compromising on flavor. Curious to see how easy it is to make irresistible rice tortillas that will elevate your meals? Let’s dive in!
Why Choose Rice Tortillas?
Versatile Delight: These rice tortillas can be a canvas for all your favorite fillings, from hearty burritos to creative veggie wraps. Diet-Friendly: With gluten-free, vegan, and dairy-free properties, they cater to a wide array of dietary needs. Quick Prep: Made with just a few simple ingredients, you’ll have fresh tortillas in no time! Unique Texture: Soft and pliable, they’re reminiscent of traditional tortillas but with a distinct twist. Plus, they store beautifully, just like my Pumpkin Wild Rice recipe! Enjoy a healthier alternative to fast food and impress your friends and family with your culinary skills!
Rice Tortilla Ingredients
• To make these delightful rice tortillas, gather simple ingredients that bring flavor and texture without gluten!
For the Tortillas
- Sushi Rice – The star of the show, providing structure and a chewy texture; short-grain rice can be substituted.
- Water – Needed to cook the rice and achieve the perfect dough consistency; use filtered water for the best taste.
- Salt – Enhances the overall flavor; feel free to adjust according to your dietary needs.
- Oil – A light touch helps prevent sticking while cooking; any neutral oil will do!
For Serving (Optional)
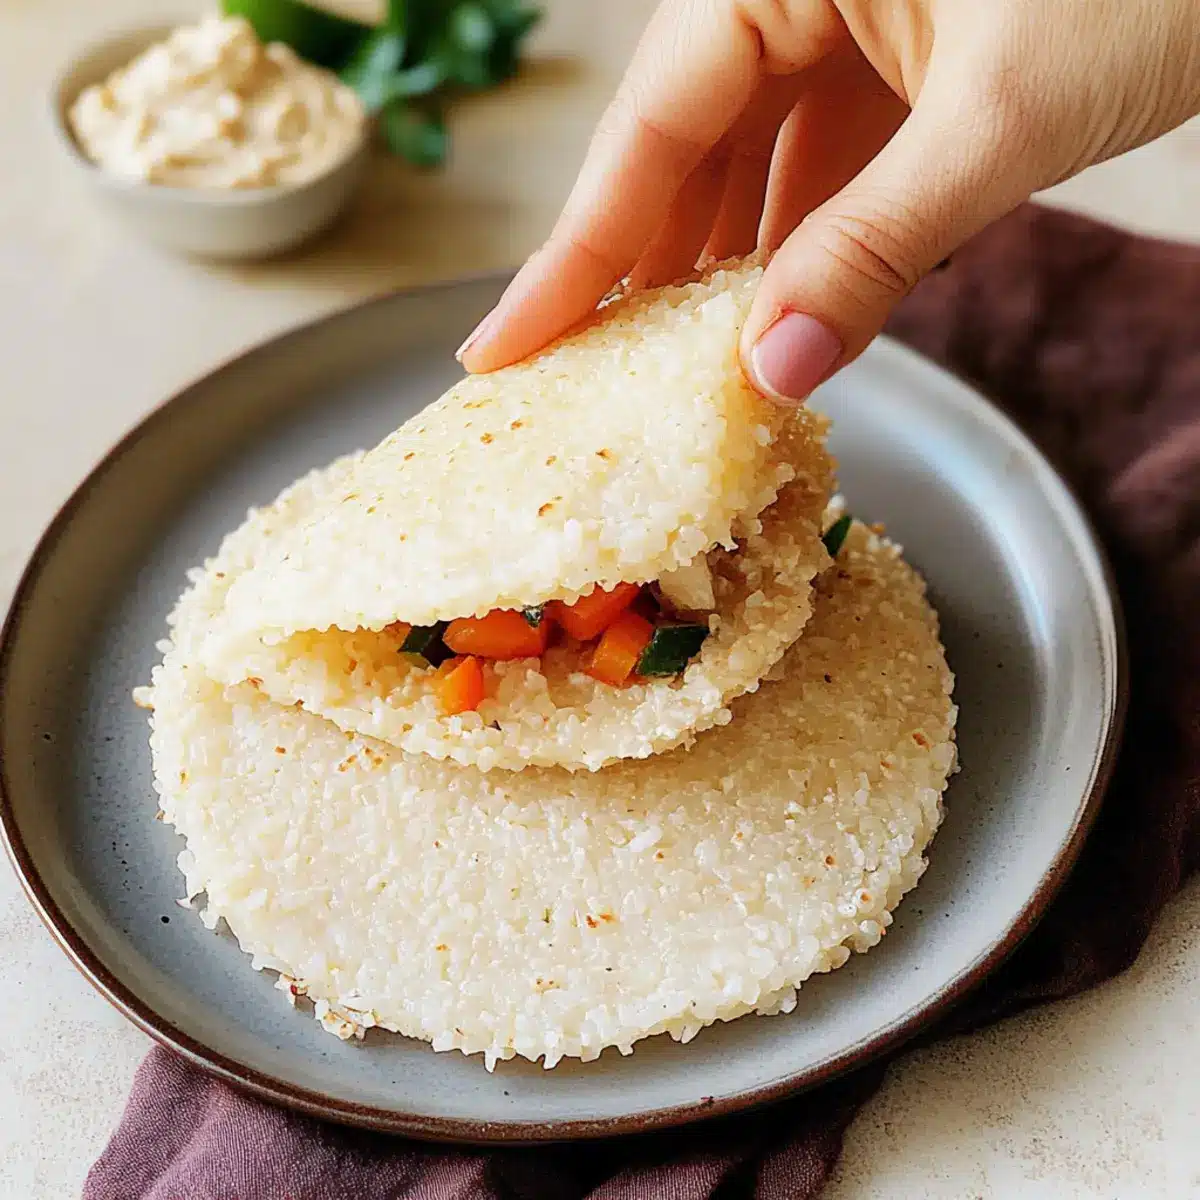
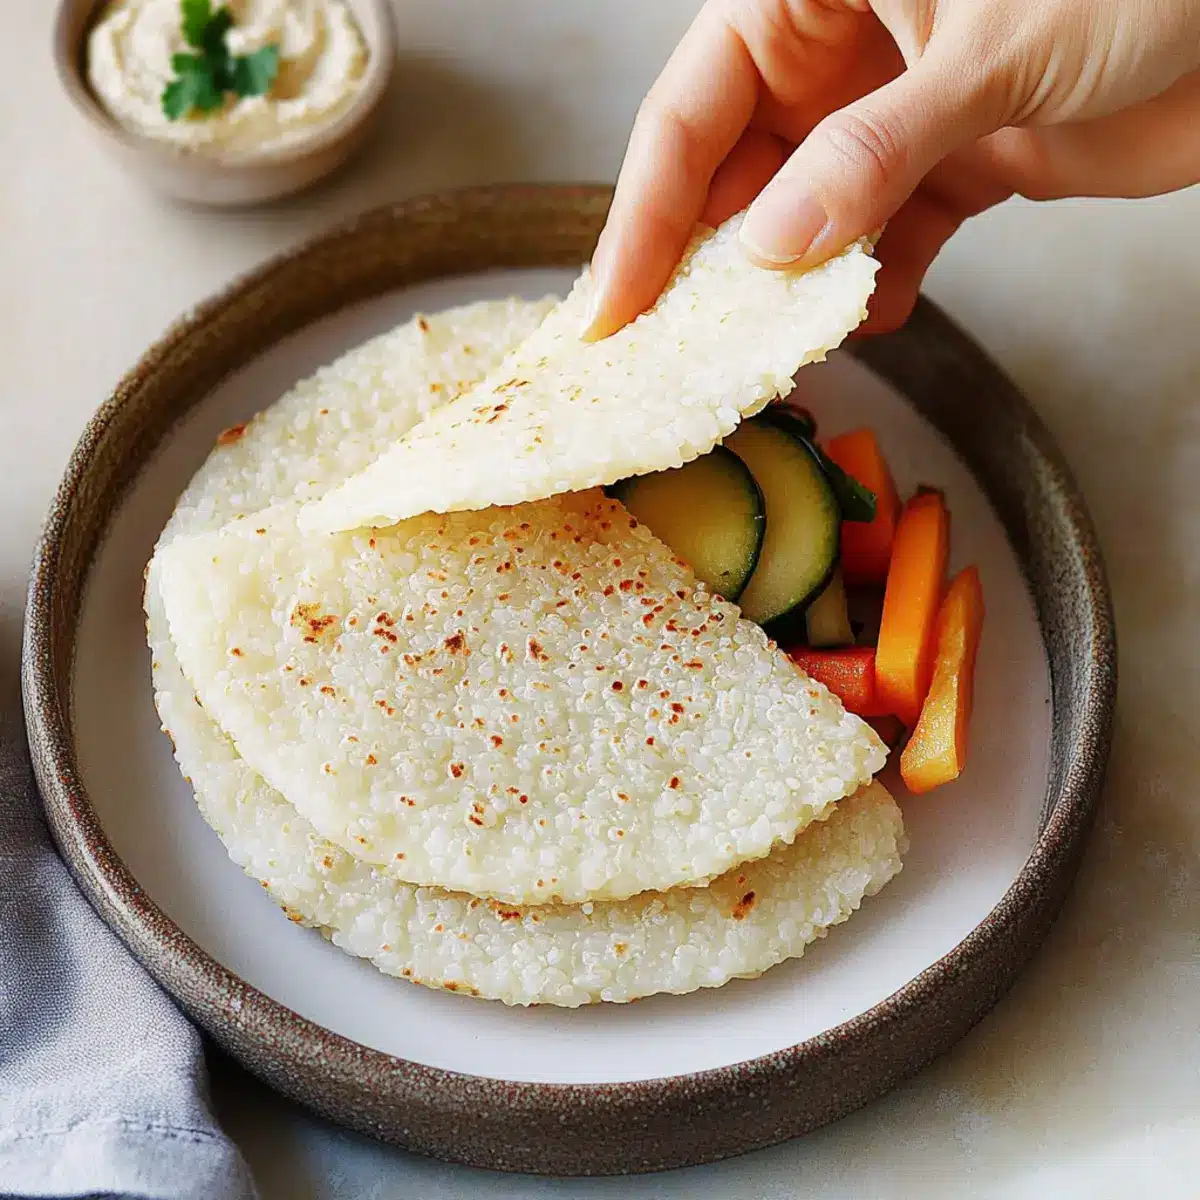
- Fresh Vegetables – Add a vibrant crunch as fillings; think lettuce, bell peppers, or avocado!
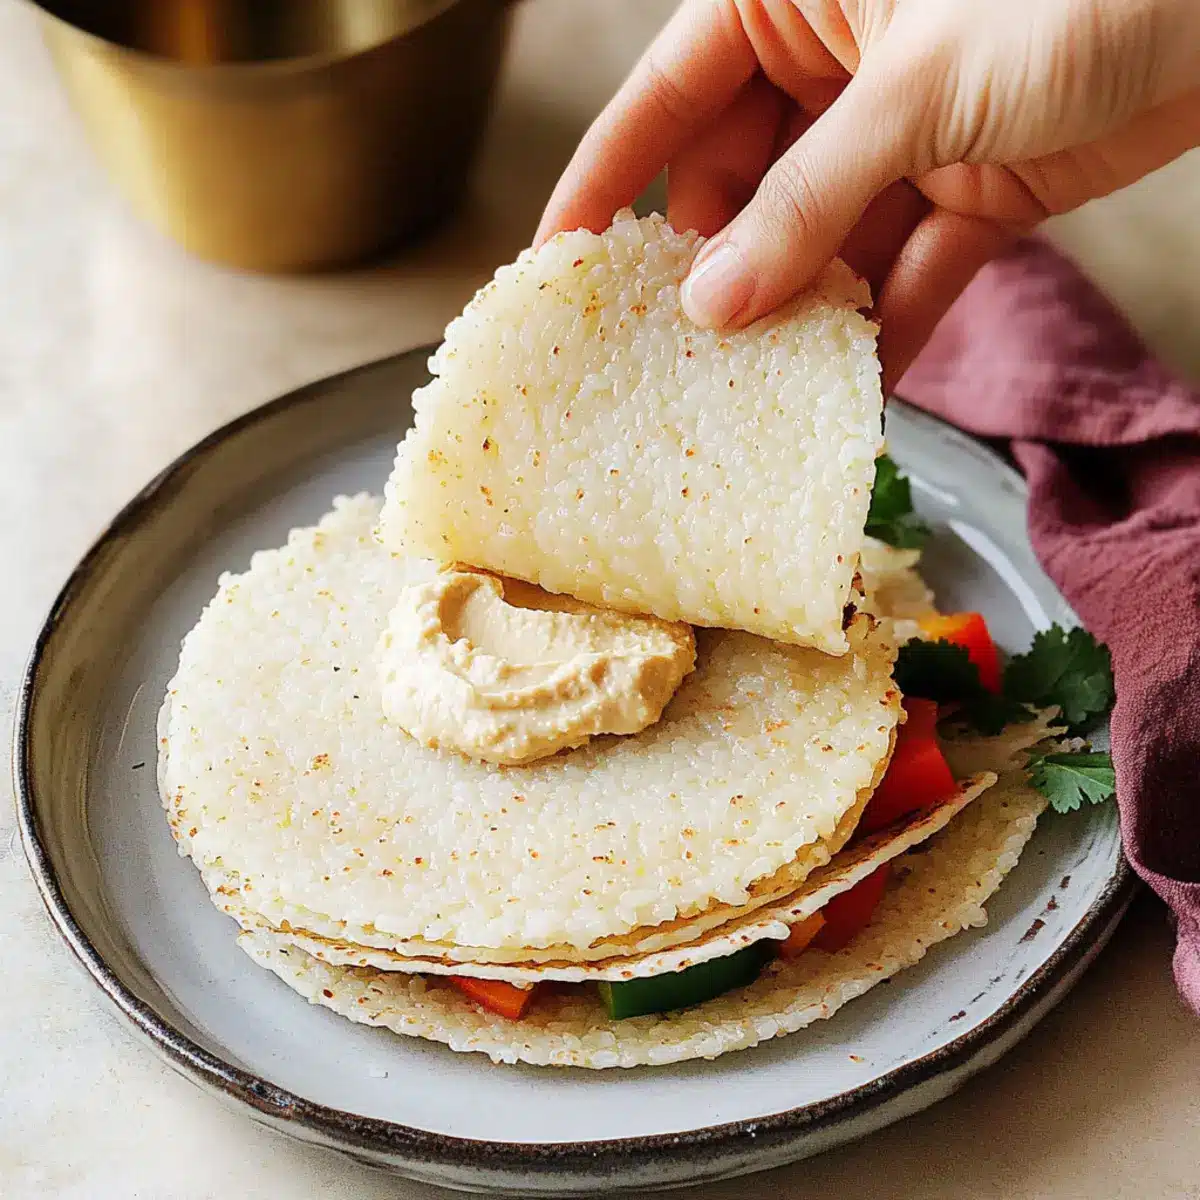
- Hummus or Spreads – Elevate your tortillas with creamy flavors; perfect for an extra delicious twist.
- Sauces – Consider salsa, guacamole, or a yogurt-based sauce for added zest to your wraps.
These rice tortillas are not only quick to make but also a fantastic way to enjoy wholesome, gluten-free goodness!
Step‑by‑Step Instructions for Rice Tortillas
Step 1: Rinse the Rice
Begin by rinsing 1 cup of sushi rice under cold running water. Use your hands to gently agitate the rice, ensuring the water runs clear; this process takes about 2-3 minutes. Rinsing removes excess starch, which helps the rice achieve the perfect texture for your rice tortillas.
Step 2: Cook the Rice
In a medium saucepan, combine the rinsed rice with 2 cups of water and ½ teaspoon of salt. Bring the mixture to a boil over high heat. Once boiling, reduce the heat to low, cover the pot, and simmer for 15-16 minutes. You’ll know it’s done when the water is absorbed and the rice is tender yet slightly sticky.
Step 3: Let the Rice Rest
After cooking, remove the saucepan from heat but keep it covered for an additional 10-15 minutes. This resting period allows the rice to steam, ensuring it’s fully cooked and fluffy—an essential step for creating the ideal texture in your rice tortillas.
Step 4: Mash the Rice
Once the rice has cooled completely, transfer it to a large mixing bowl. Use a fork to mash the rice thoroughly, or process it in a food processor until smooth. This will create a pliable dough suitable for forming your rice tortillas, making sure to achieve a mix that isn’t too sticky.
Step 5: Portion the Dough
Divide the mashed rice into 8 equal portions and roll each portion into a ball. Keep your hands slightly greased with oil to prevent sticking. Each rice ball will eventually turn into one of your delicious, gluten-free rice tortillas, so ensure they are uniform for even cooking.
Step 6: Shape the Tortillas
Place one rice ball between two sheets of wax or parchment paper. Using a flat-bottom plate or a rolling pin, press down firmly to flatten it into a tortilla shape, about 1/4 inch thick. Repeat this process for each rice ball, maintaining even thickness for all your rice tortillas.
Step 7: Preheat the Skillet
Heat a medium skillet over medium-high heat. Once the skillet is hot, add a small drizzle of oil to prevent sticking. This quick heating step is vital for cooking your rice tortillas perfectly, allowing them to puff slightly as they cook.
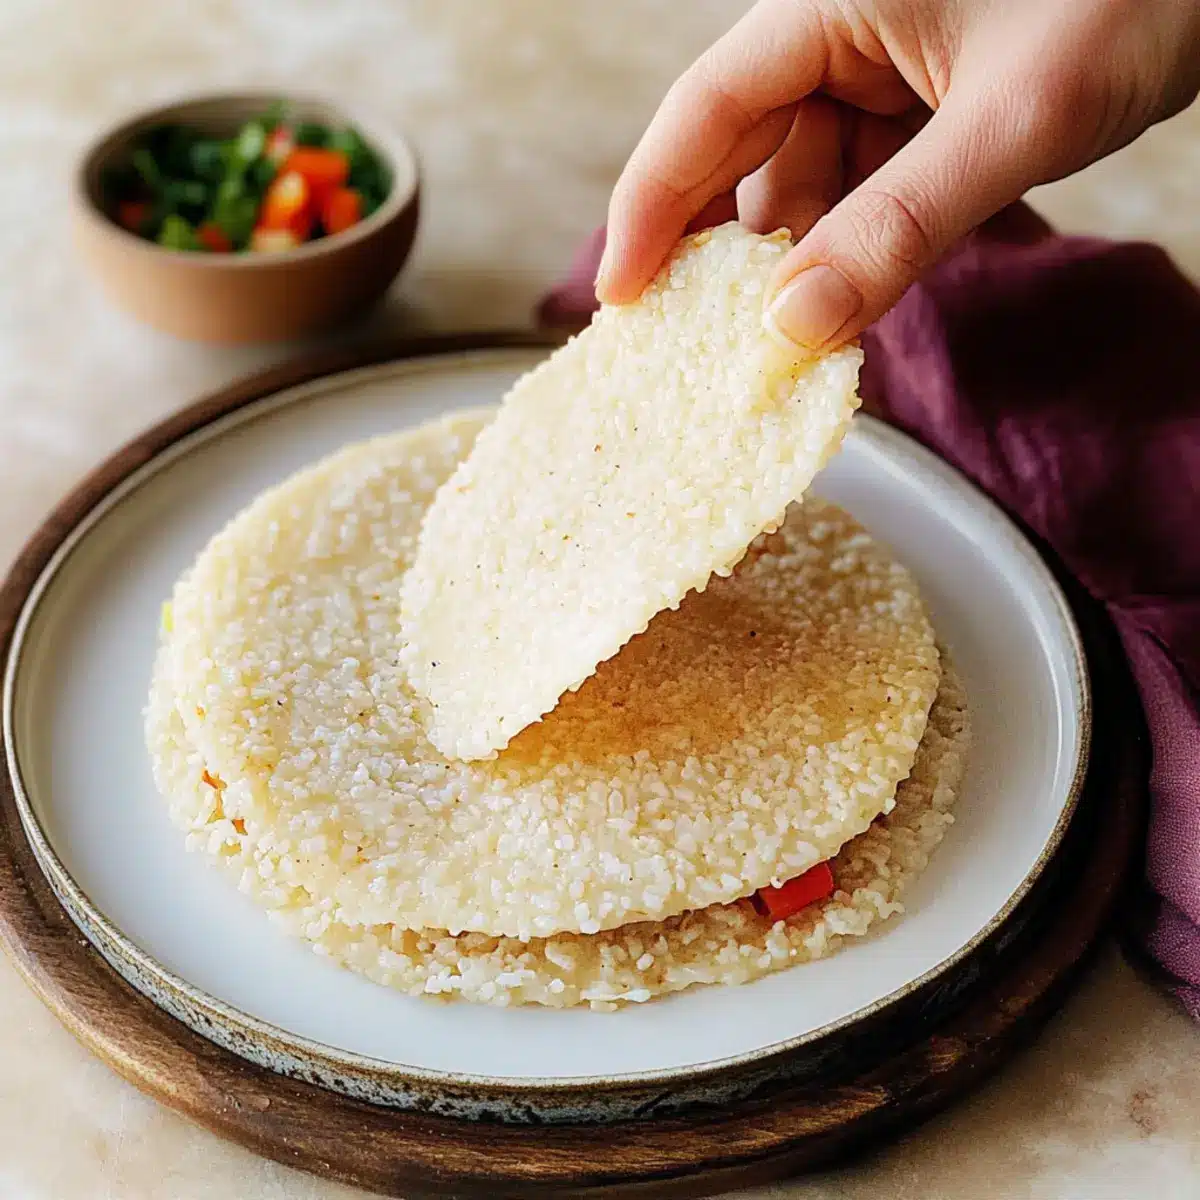
Step 8: Cook the Tortillas
Carefully transfer a flattened tortilla to the hot skillet. Cook for 1-2 minutes until the bottom is lightly golden and slightly firm. Flip the tortilla and cook for another minute. The finished rice tortilla should be pliable and slightly chewy, ready for your favorite fillings.
Step 9: Keep Warm
As you cook each tortilla, place them in a warm stack under a clean kitchen towel. This keeps them warm and soft while you finish cooking the rest. Repeat the cooking process for all tortillas, enjoying the fragrant aroma that fills your kitchen.
Step 10: Serve Your Rice Tortillas
Once all tortillas are cooked, serve them warm with a variety of fillings like fresh vegetables, spreads, or sauces. These rice tortillas are perfect for tacos, wraps, or any savory dish you’d like. Delight in how easy they are to enjoy homemade, gluten-free goodness!
What to Serve with Gluten-Free Rice Tortillas?
Imagine a vibrant, colorful meal that brings families together around the table, where every bite is filled with flavor and texture.
- Fresh Guacamole: Creamy and zesty, this avocado delight adds a luscious touch, perfect for dipping or spreading on your tortillas.
- Spicy Black Beans: Flavor-packed and nutritious, these beans infuse your meal with protein and bold seasoning that perfectly compliment the rice tortillas.
- Crunchy Slaw: A bright mix of cabbage and carrots brings a refreshing crunch, balancing the softness of the tortillas with added texture and color.
- Roasted Vegetables: Tender and caramelized, a mix of seasonal vegetables enhances the heartiness of your wraps, bringing their natural sweetness to the forefront.
- Zesty Salsa: With its juicy tomatoes and tangy flavors, salsa adds a kick that elevates your tortillas, drenching your meal in vibrant freshness.
- Cilantro-Lime Rice: Extra rice adds a burst of flavor with every bite, making it a satisfying side that harmonizes with the rice tortillas themselves.
- Margaritas or Mocktails: Sip on refreshing beverages like a classic margarita or a fruity mocktail to enhance the dining experience with a celebratory touch.
- Chocolate-Dipped Fruit: For dessert, try some chocolate-dipped strawberries or bananas to wrap the meal on a sweet note, creating a perfect balance of flavors.
Storage Tips for Rice Tortillas
Room Temperature: Store freshly made rice tortillas in a clean kitchen towel to keep them warm and pliable for up to 2 hours. Avoid stacking them directly to prevent sticking.
Fridge: Place leftover rice tortillas in an airtight container with parchment paper between each tortilla. They’ll stay fresh in the fridge for up to 3 days, maintaining their delightful texture.
Freezer: For longer storage, freeze rice tortillas in a single layer with parchment paper in between. They can be frozen for up to 2 months. Just wrap them tightly to avoid freezer burn.
Reheating: To enjoy reheated rice tortillas, warm them gently in a skillet over low heat for about 30 seconds on each side, or microwave them wrapped in a damp paper towel for 10-15 seconds until heated through.
Expert Tips for Rice Tortillas
-
Avoid Overcooking: Ensure the rice isn’t overcooked; it should be fluffy and sticky, not mushy, to create perfect rice tortillas.
-
Adjust Dough Consistency: If your dough feels too wet, sprinkle in a small amount of rice flour to mold it better and maintain shape during cooking.
-
Cook for Crispiness: For a crispier texture, slightly increase the heat during the final seconds of cooking each rice tortilla and extend the cooking time a bit.
-
Uniform Thickness: When shaping the tortillas, ensure they’re of even thickness for consistent cooking. Thinner tortillas yield a crispier finish.
-
Experiment with Flavors: Don’t hesitate to add herbs or spices to the mashed rice for added flavor—transform your rice tortillas into a culinary delight!
Make Ahead Options
These gluten-free rice tortillas are perfect for meal prep, allowing busy home cooks to save time while enjoying homemade goodness! You can prepare the rice dough up to 24 hours in advance by mashing the cooked sushi rice and shaping it into balls. Store the rice balls in an airtight container in the refrigerator to maintain quality; this will prevent them from drying out. When you’re ready to serve, simply take the dough out, shape into tortillas, and cook each one in a heated skillet for 1-2 minutes on each side. Trust me, your homemade rice tortillas will be just as delicious as if made fresh!
Rice Tortillas: Delicious Options Await
Feel free to let your creativity shine in the kitchen with these delightful twists on rice tortillas, sure to ignite your culinary passion!
-
Herb-Infused: Mix in fresh chopped herbs like cilantro or basil into the rice before mashing, adding a fragrant burst of flavor.
-
Spicy Kick: Add a pinch of cayenne or chili powder to the mashed rice for a delightful heat that’ll elevate your tortillas.
-
Brown Rice Flour: Use brown rice flour instead of sushi rice for a nuttier flavor and a texture that’s equally delightful.
-
Vegetable Puree: Incorporate a bit of pureed spinach or beet for a colorful tortilla that carries nutrients and unique taste.
-
Cheesy Delight: Sprinkle some nutritional yeast into the dough to give your rice tortillas a cheesy, savory flavor without the dairy.
-
Sweet Twist: Blend in a tablespoon of coconut sugar with the rice for sweet tortillas, perfect for dessert fillings or breakfast wraps.
With all these flavorful variations, you might enjoy pairing these tortillas with a vibrant filling like fresh vegetables or hummus. As an enticing option, check out my take on Bbq Chicken Rice that makes a hearty, delicious wrap! Choose your favorite combination and watch your meals transform into delicious experiences!
Rice Tortillas Recipe FAQs
What type of rice should I use for rice tortillas?
Absolutely! Sushi rice is ideal for making these tortillas because it gives a chewy and soft structure. If you don’t have sushi rice, any short-grain rice will work well. Just ensure it’s sticky enough to mold!
How do I store leftover rice tortillas?
Very! To keep your rice tortillas fresh, place them in an airtight container with parchment paper between each one to prevent sticking. They will stay good in the fridge for up to 3 days.
Can I freeze rice tortillas?
Yes, you can! To freeze them, lay the tortillas in a single layer on a baking sheet, placing parchment paper between each one. Once they’re frozen solid, transfer them to a freezer bag. These can be stored in the freezer for up to 2 months. When ready to use, just thaw them in the fridge overnight.
What should I do if my dough is too wet?
Great question! If your dough feels sticky or too wet, you can sprinkle in a small amount of rice flour gradually until the consistency is suitable for molding. Make sure to mix well to avoid clumps. You want a dough that holds its shape but isn’t overly dry!
Can I add flavors to my rice tortillas?
Absolutely! Feel free to experiment with adding spices or herbs while mashing the rice, like cumin, parsley, or even garlic powder. This can enhance their taste and make for a delightful twist on the traditional tortilla.
Can pets eat rice tortillas?
Yes, generally! Plain rice tortillas without any added seasonings or toppings can be a nice treat for dogs, but always check for allergies first. However, avoid sharing any fillings or sauces that may not be safe for them.
Delicious Rice Tortillas: Soft, Gluten-Free Wraps for Everyone
Ingredients
Equipment
Method
- Rinse the sushi rice under cold running water for 2-3 minutes until the water runs clear.
- In a medium saucepan, combine rinsed rice with 2 cups of water and ½ teaspoon salt. Bring to a boil, then lower heat and simmer for 15-16 minutes.
- Remove saucepan from heat and let it covered for 10-15 minutes.
- Transfer cooled rice to a large mixing bowl and mash with a fork or process until smooth.
- Divide the mashed rice into 8 equal portions and roll each into a ball.
- Place a rice ball between two sheets of parchment paper and flatten into a tortilla shape, about 1/4 inch thick.
- Preheat a skillet over medium-high heat with a drizzle of oil.
- Cook each tortilla for 1-2 minutes on one side, flipping to cook for another minute until pliable and slightly chewy.
- Keep cooked tortillas warm under a clean kitchen towel until ready to serve.
- Serve warm with your choice of fillings.
Leave a Reply