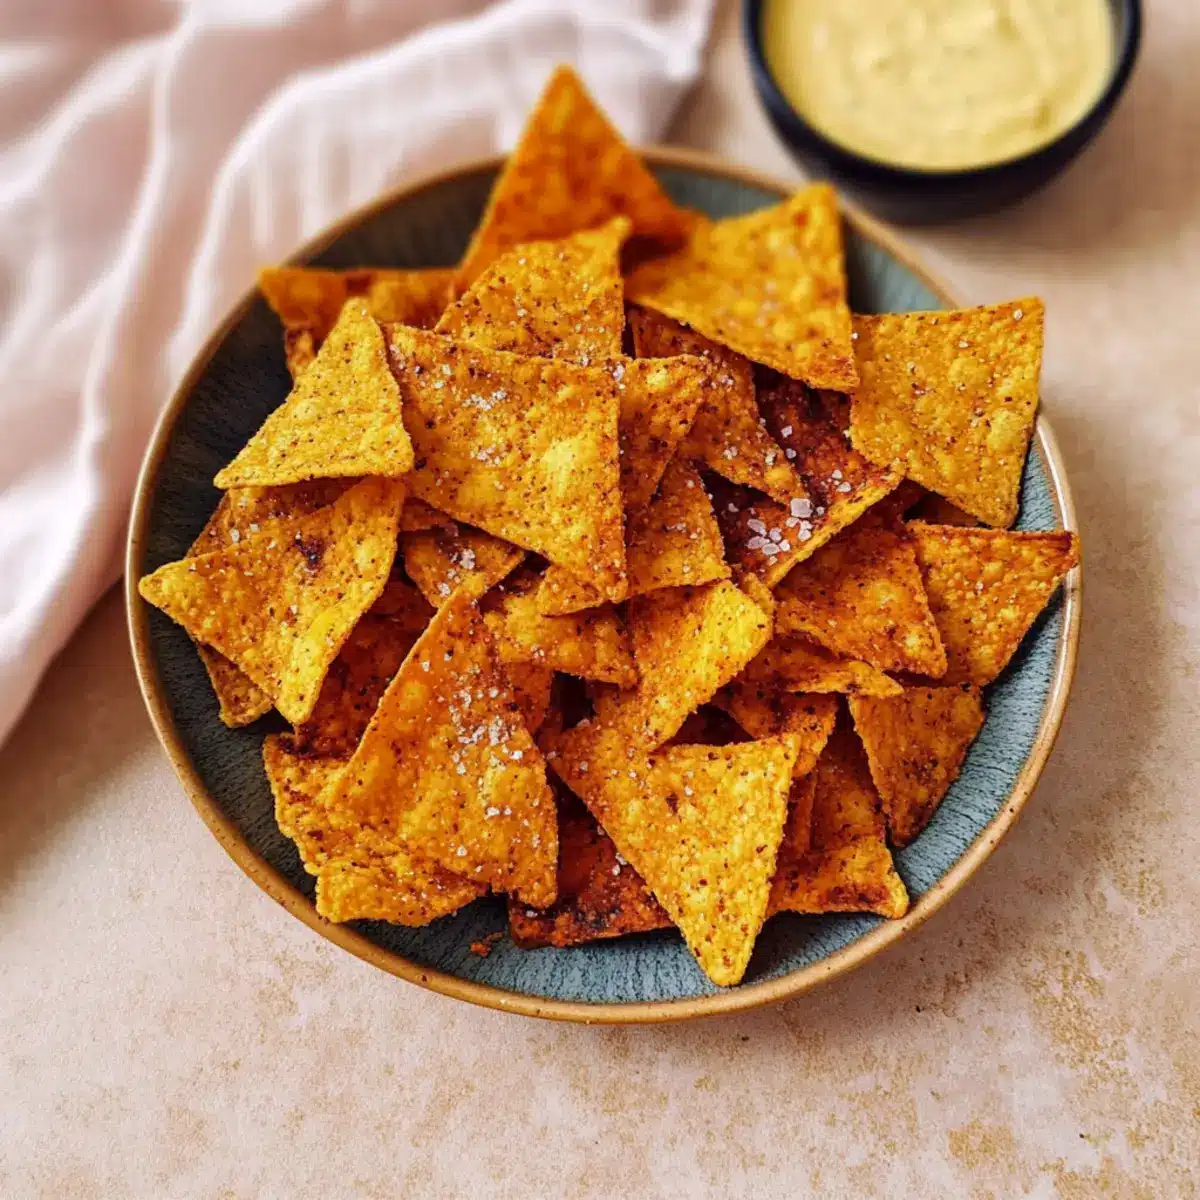
As I stood in my kitchen, the delightful aroma of spices wafted through the air, bringing me back to my favorite snack-filled childhood afternoons. Today, I’m excited to share my recipe for Homemade Doritos: healthy and crunchy tortilla chips that you can whip up in just 20 minutes! These snacks are perfect for those moments when you’re craving something savory and satisfying, without compromising on health. Made from simple, wholesome ingredients, these homemade chips are not only a guilt-free delight but also incredibly versatile. Ideal for pairing with your favorite dips or enjoying solo, I can promise that this recipe will become a staple in your snack repertoire. So, are you ready to make your own delicious batch? Let’s get started!
Why Make Homemade Doritos?
Healthier Option: You can indulge in your snack cravings without the guilt as these homemade Doritos use real, wholesome ingredients.
Quick Preparation: With just 20 minutes from start to finish, you’ll have a tasty treat ready in no time!
Bursting with Flavor: The unique blend of chili powder, smoked paprika, and nutritional yeast creates an irresistible taste.
Versatile Snacking: Perfect for dipping into guacamole or salsa, or simply munching on their own.
Great for Sharing: These crunchy chips will impress your friends and family during game nights or gatherings, making them the ultimate crowd pleaser!
Homemade Doritos Ingredients
For the Chips
• Corn Tortillas – Base ingredient for the chips; opt for organic for the best flavor and texture.
• Avocado Oil – Provides necessary fats for crispiness; can be substituted with olive oil for a different flavor.
• Salt – Essential for flavor balance; sea salt is recommended, adjust to taste for lower sodium options.
For the Seasoning
• Chili Powder – Adds spiciness and tradition; adjust based on heat preference or replace with cayenne for more heat.
• Smoked Paprika – Contributes a smoky flavor; omit if not preferred, or substitute with regular paprika.
• Garlic Powder – Enhances flavor profile; fresh garlic can be used for a bolder taste when powdered is unavailable.
• Nutritional Yeast – Adds a cheesy flavor and is a great vegan source of vitamins; optional, but enhances the flavor profile.
Feel free to get creative, and enjoy crafting your own Homemade Doritos!
Step‑by‑Step Instructions for Homemade Doritos
Step 1: Preheat and Prepare
Begin by preheating your oven to 360°F (180°C). While the oven warms up, line a baking sheet with parchment paper to prevent sticking. This setup is essential for creating evenly baked, crunchy tortillas. Having the right equipment ready makes your homemade Doritos-making process smoother and ensures your chips come out perfectly crisp.
Step 2: Cut the Tortillas
Using scissors or a pizza cutter, slice the corn tortillas into 6 or 8 triangles. Aim for uniform sizes to ensure even cooking. As you cut, place the triangles in a large mixing bowl, preparing them for the delicious seasoning and oil that will give your homemade Doritos their wonderful flavor and crunch.
Step 3: Toss with Oil
Drizzle the cut tortillas with avocado oil, ensuring each piece is lightly coated. Use your hands or a spatula to toss the triangles gently, making sure they are evenly coated without tearing. This step is crucial, as the oil will help your homemade Doritos become nice and crispy when baked in the oven.
Step 4: Mix Seasoning
In a separate bowl, combine chili powder, smoked paprika, garlic powder, and salt. Stir the spices well to create an even blend. Once mixed, sprinkle this flavorful seasoning onto the oiled tortillas, tossing them again to ensure every triangle is generously coated with this aromatic blend for that signature Dorito taste.
Step 5: Arrange on Baking Sheet
Spread the seasoned tortilla triangles across the prepared baking sheet in a single layer, ensuring they aren’t overlapping. This step is key to achieving perfect crunchiness and golden-brown edges. Make sure to leave a little space between each chip to allow for even airflow in the oven during baking.
Step 6: Bake to Perfection
Place the baking sheet in the preheated oven and bake for approximately 15 minutes. Halfway through, flip the tortilla chips to ensure even cooking. Keep a close eye on them after the 10-minute mark, looking for a lovely golden color to gauge doneness. This visual cue ensures your homemade Doritos are crisp without burning.
Step 7: Cool and Store
Once baked, remove the homemade Doritos from the oven and cool them completely on the baking sheet. Allowing them to cool ensures that they reach their ideal crunchy texture. After cooling, transfer the chips to an airtight container for storage, where they will stay deliciously crisp for up to a week.
Make Ahead Options
These Homemade Doritos are perfect for busy weeknights and meal prepping! You can cut the corn tortillas into triangles and store them in an airtight container for up to 3 days before baking. Just be sure to keep the oil and seasoning separate—mix them just before baking to maintain that fresh flavor and crunch. When you’re ready to enjoy your healthy snack, simply drizzle the tortilla triangles with avocado oil, toss with the seasoning, and bake as directed for about 15 minutes. This way, your homemade Doritos will come out just as delicious, saving you precious time when you’re craving a savory snack!
What to Serve with Homemade Doritos
Imagine a lively gathering filled with laughter and the enticing aroma of delicious snacks wafting through the air, inviting everyone to indulge.
- Salsa Fresca: Perfectly fresh and zesty, this chunky tomato salsa complements the salty crunch of the chips while adding a vibrant burst of flavor.
- Guacamole: Creamy and rich, guacamole’s smooth texture pairs wonderfully with the crunchy Doritos, elevating your snacking experience to a new level of satisfaction.
- Chili Con Queso: This warm, cheesy dip creates an irresistible harmony with the spiced chips, delivering comfort and a touch of indulgence to every bite.
- Black Bean Hummus: A hearty and nutritious option, this hummus not only provides a delightful contrast in texture but also enhances your dipping journey with its earthy flavor.
- Pico de Gallo: Fresh, bright, and slightly spicy, the balance of tomatoes, onions, and cilantro creates a refreshing contrast to the richness of the homemade chips.
- Crisp Veggie Sticks: Carrots, cucumbers, and bell peppers offer a refreshing crunch and colorful addition to your spread, providing a healthy complement to your indulgent snacking.
- Sweet & Spicy Pickles: Their tangy crunch adds an unexpected twist, with a blend of sweetness and spice that dances beautifully with savory homemade Doritos.
- Craft Beer: A crisp, refreshing beer enhances the overall flavor profile, making it an ideal companion for a delightful snacking experience.
- Light White Wine: A chilled Sauvignon Blanc or Pinot Grigio perfectly complements the seasoned chips, enhancing your gathering with a touch of elegance.
- Chocolate Avocado Mousse: Satisfy your sweet tooth with this rich dessert that provides a delightful contrast to the savory chips, completing your meal with a luscious finish.
Homemade Doritos: Flavorful Variations
Feel free to unleash your creativity and make this recipe your own with these tasty twists!
- Herb-Infused: Add dried oregano or thyme to the seasoning for an aromatic touch. It elevates the flavor profile to new heights!
- Cheesy Flavor: Mix in some nutritional yeast for a cheesy, savory note. This optional step truly enhances the classic Dorito taste.
- Spicy Kick: Toss in cayenne pepper along with the chili powder for a fiery twist. Perfect for those who crave heat in their snacks!
- Zesty Lime: Squeeze some lime juice over the chips before serving to brighten the flavors. The citrus adds a refreshing zing that is unforgettable.
- Oil-Free Option: Lightly spray the tortillas with water or vegetable broth for a healthier, oil-free snack. They still turn out crispy and delicious!
- Ranch Seasoning: Swap the chili powder for ranch dressing mix for a different punch of flavor. Serve these at your next gathering for a crowd-pleasing snack.
- Sweet Twist: Sprinkle cinnamon and light brown sugar for a sweet version of homemade Doritos. Enjoy them as a decadent dessert alternative!
- Accompaniments: Pair your homemade chips with refreshing guacamole or zesty salsa, like this delightful Cranberry Bliss Bars for a balanced snack plate.
With these variations, you can enjoy endless flavors, making every batch of Homemade Doritos a new adventure in snacking!
Storage Tips for Homemade Doritos
Room Temperature: Store your homemade Doritos in an airtight container at room temperature. This way, they can stay fresh for up to one week while maintaining their crunchy texture.
Fridge: If you prefer, you can also keep your chips in the refrigerator, although they may lose some crunchiness. They’ll stay good for around 1-2 weeks.
Freezer: For long-term storage, freeze the homemade Doritos in a freezer-safe bag or container for up to 3 months. Reheating is easy—just bake them on a tray in a preheated oven to revive their crunch.
Reheating: To enjoy the chips fresh again, simply reheat them in an oven or air fryer for a few minutes. This will help restore that delightful crispiness, making them just as good as when freshly baked!
Tips for the Best Homemade Doritos
- Watch Closely: Monitor your chips closely after the 10-minute mark to prevent burning; you’ll want them golden and crispy, not charred.
- Cool Completely: Allow your homemade Doritos to cool fully before storing; this step ensures they maintain optimal crunchiness.
- Uniform Cutting: Cut your corn tortillas into equal-sized triangles to ensure even baking and consistent texture throughout.
- Season Generously: Don’t skimp on the seasoning blend; a generous coating of spices enhances the flavor of your homemade Doritos tremendously.
- Experiment Freely: Feel free to try out different spices or seasoning blends to cater to your taste preferences and create unique flavors.
Homemade Doritos Recipe FAQs
How do I select the best corn tortillas?
Absolutely! For the best flavor and texture, I recommend choosing organic corn tortillas. Look for ones that are fresh, without dark spots or tears. This will ensure your homemade Doritos are delightful and crispy.
What is the best way to store homemade Doritos?
Store your homemade Doritos in an airtight container at room temperature. They can stay fresh for up to one week while maintaining their crunch. If they lose crispness, a quick reheat in the oven can revive them beautifully!
Can I freeze homemade Doritos? How?
Very! To freeze your homemade Doritos, let them cool completely and place them in a freezer-safe bag or container, sealing tightly. They will keep well for up to 3 months. When you’re ready to enjoy them again, reheat in a preheated oven at 350°F (175°C) for about 5-7 minutes to restore their crunchy texture.
What should I do if my Doritos don’t turn out crispy enough?
If your homemade Doritos are lacking crunch, there are a few culprits to consider. First, ensure you’ve cut your tortillas into uniform pieces to promote even baking. Secondly, make sure to coat them lightly with oil without overloading them. Lastly, monitor the baking time closely—remove them from the oven only when they turn golden brown, as they will become crunchier once cooled.
Are homemade Doritos suitable for any dietary restrictions?
Absolutely! This recipe is vegan and can be tailored for various dietary needs. For those with gluten allergies, ensure you select corn tortillas that are certified gluten-free. Additionally, you can adjust the spice levels according to taste preferences or dietary restrictions. Enjoy them guilt-free!
Homemade Doritos: Crunchy, Guilt-Free Snack You’ll Love
Ingredients
Equipment
Method
- Preheat your oven to 360°F (180°C) and line a baking sheet with parchment paper.
- Cut the corn tortillas into 6 or 8 triangles and place them in a large mixing bowl.
- Drizzle the cut tortillas with avocado oil and toss gently to coat.
- In a separate bowl, mix chili powder, smoked paprika, garlic powder, and salt, then sprinkle on the tortillas.
- Arrange the seasoned tortilla triangles in a single layer on the baking sheet.
- Bake for approximately 15 minutes, flipping halfway, until golden brown.
- Allow to cool completely on the baking sheet before storing in an airtight container.
Leave a Reply