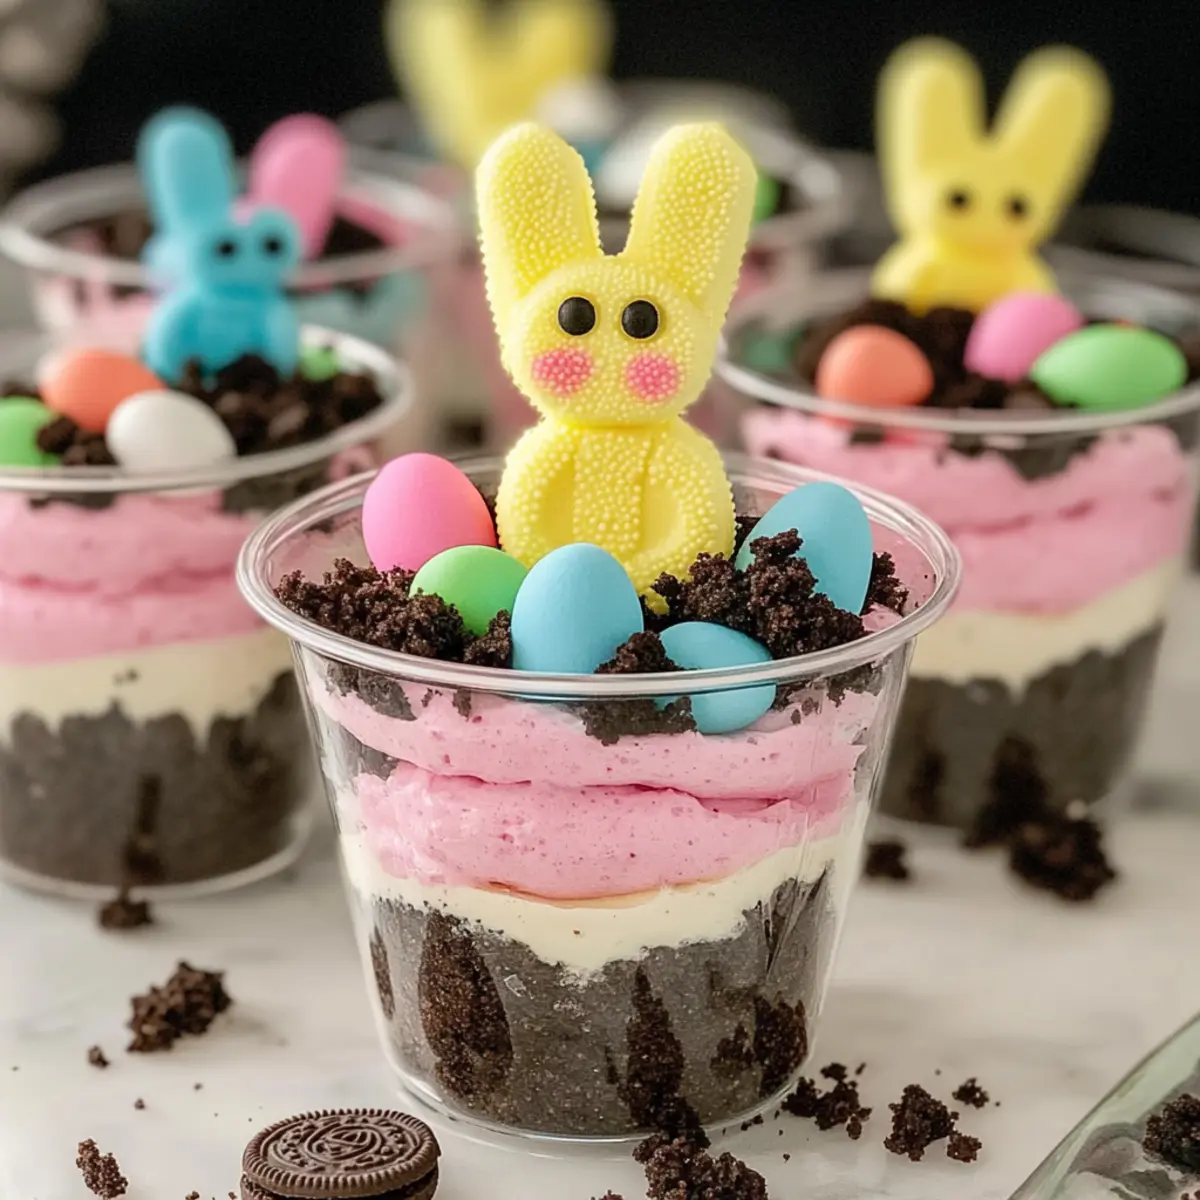
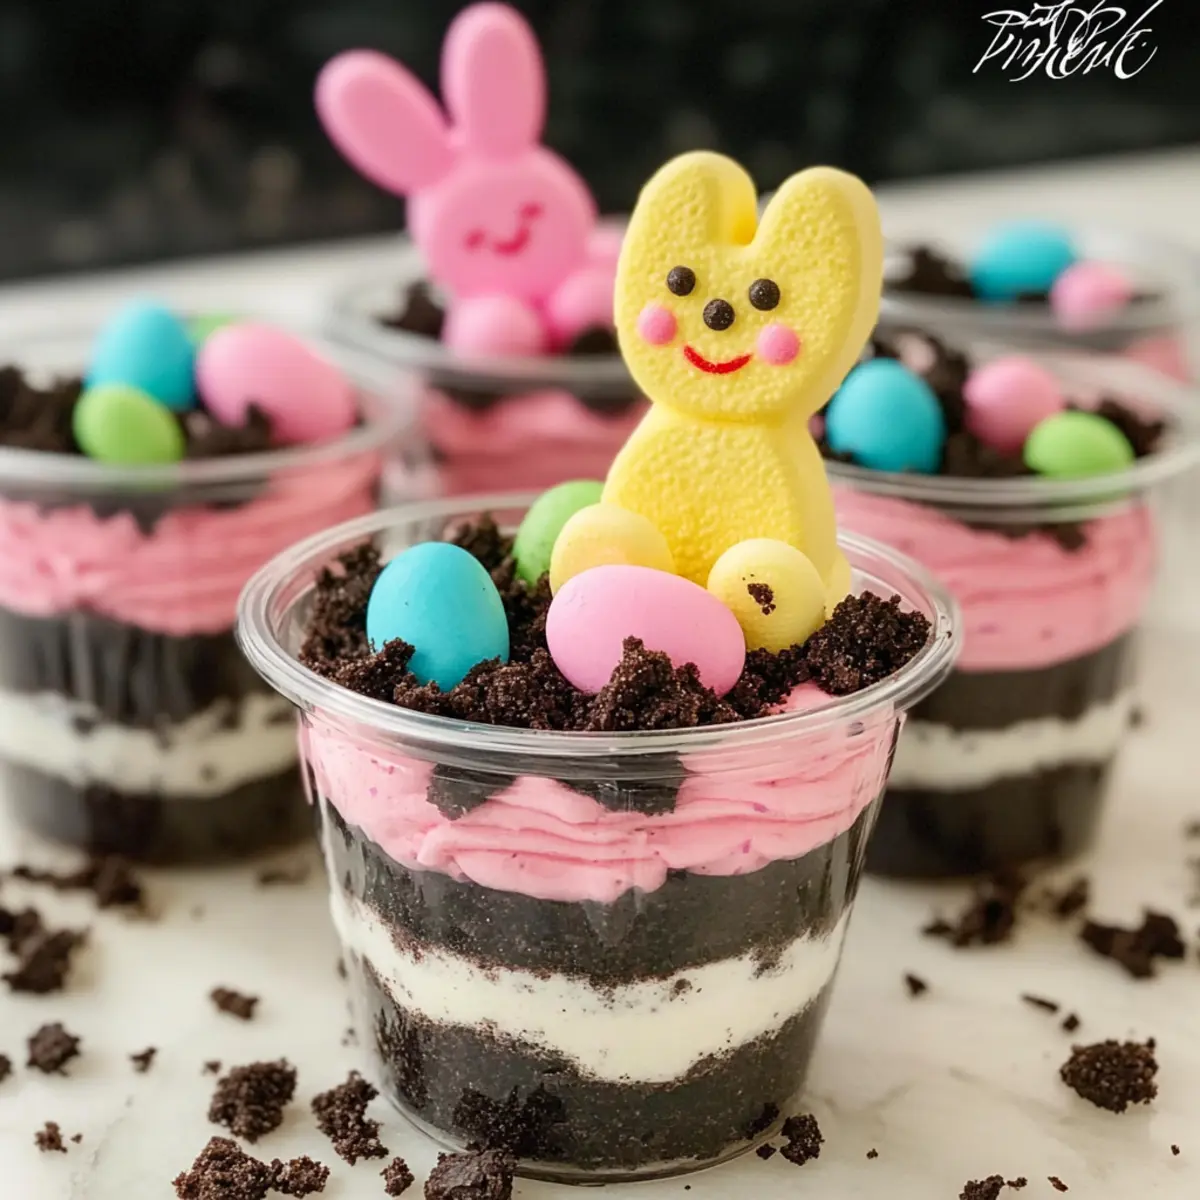
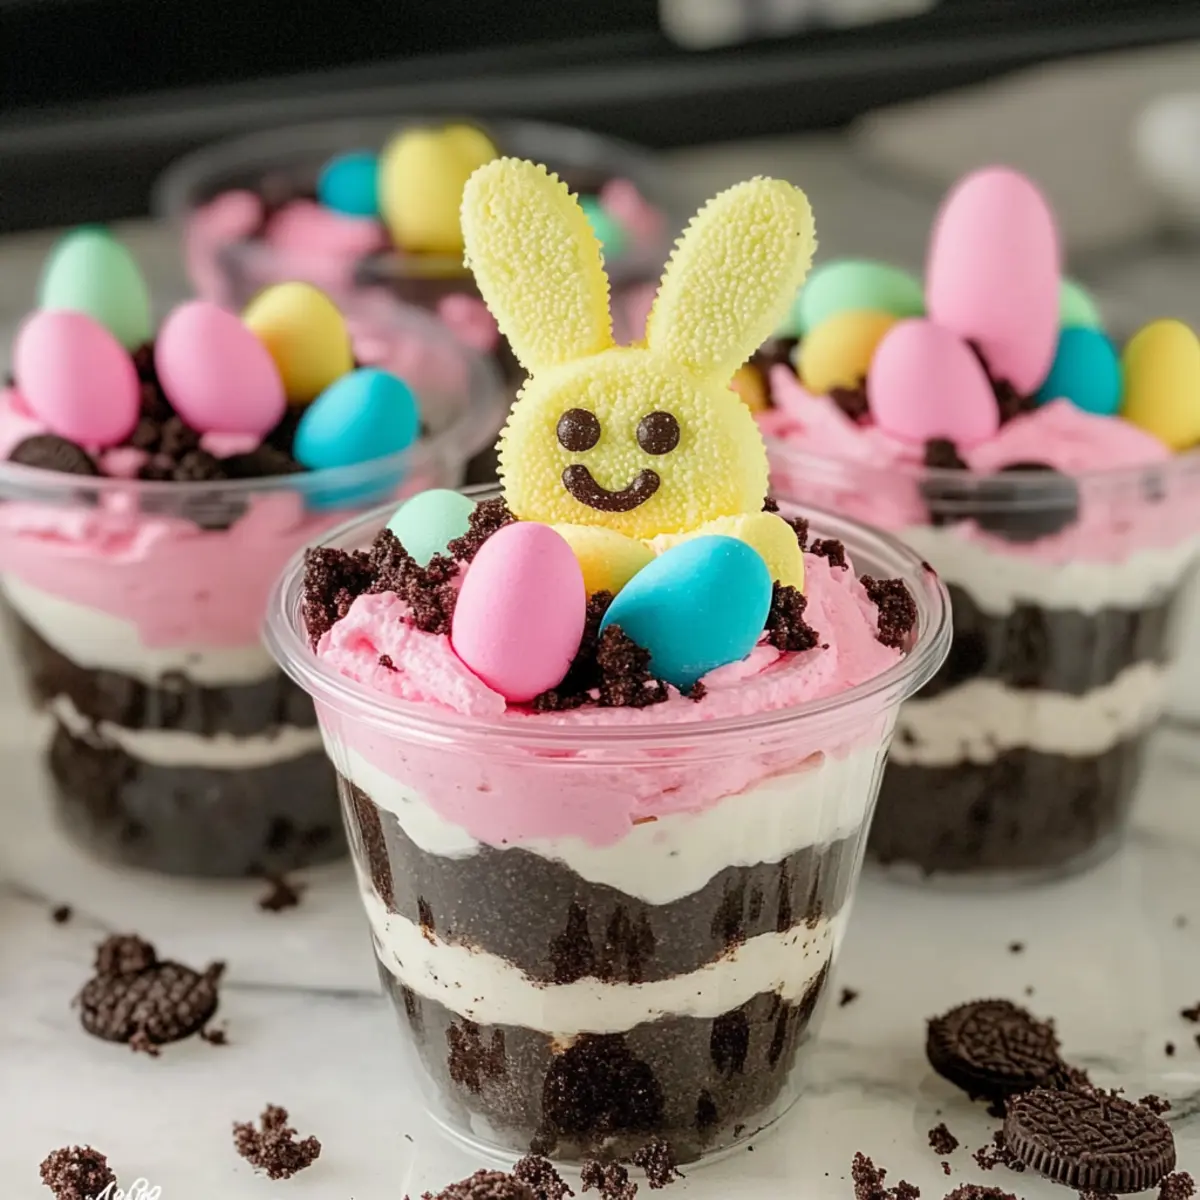
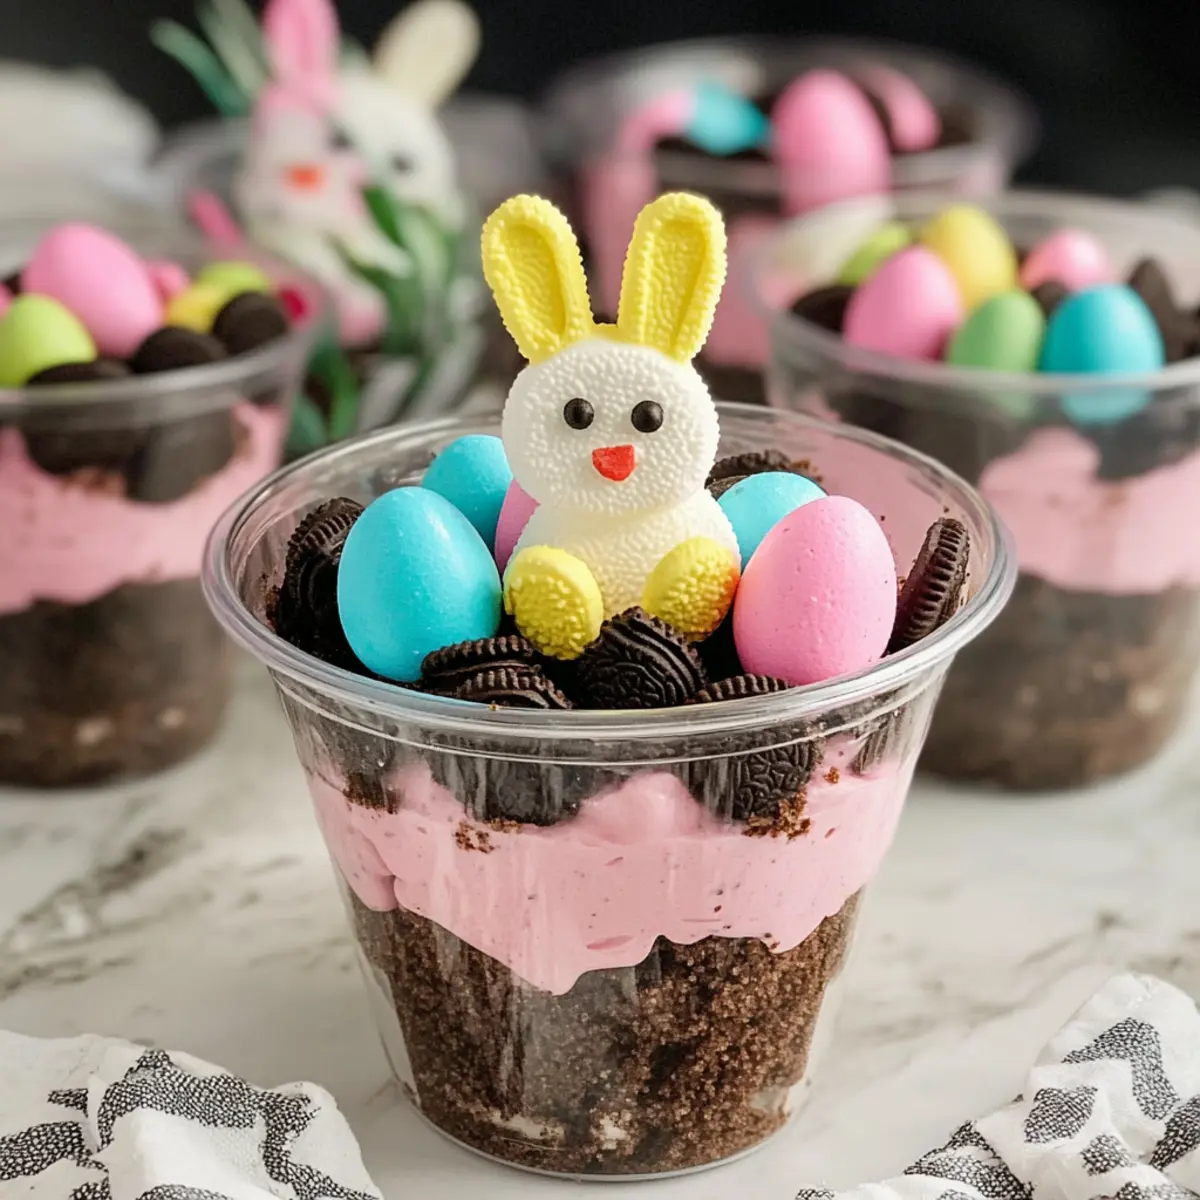
As I stirred the fluffy layers of creamy pudding and crushed Oreo crumbs, I couldn’t help but smile at how simple moments in the kitchen can spark creativity. With Easter right around the corner, these delightful Easter Dirt Cups are the perfect kid-friendly dessert that’s both fun to make and even more enjoyable to eat. This easy dessert combines playful elements like colorful Peeps and mini chocolate eggs, making it an ideal addition to your festive celebrations. Plus, the customizable flavors mean you can tailor it to all your loved ones’ tastes, whether you prefer classic vanilla or a rich chocolate twist. So, are you ready to create some sweet memories in your kitchen this holiday?
Why Are Easter Dirt Cups a Must-Try?
Fun, Kid-Friendly: These adorable Easter Dirt Cups are not just desserts; they are an interactive culinary experience your kids will love!
Customizable Flavors: Feel free to swap the vanilla pudding for chocolate or banana to suit everyone’s taste preferences in your family.
Effortless Preparation: With no baking involved, this easy dessert can be whipped up in no time, allowing you to focus on celebrating.
Eye-Catching Presentation: The vibrant colors of the Peeps and mini chocolate eggs make these cups a stunning centerpiece for your Easter table.
Delightful Texture: Enjoy the perfect balance of creamy pudding and crunchy Oreos that create a satisfying bite every time.
These Easter Dirt Cups are sure to bring joy to your gathering, making them a great addition to your celebrations, just like Make-Ahead Tips for ease!
Easter Dirt Cups Ingredients
These delightful Easter Dirt Cups are as easy to make as they are scrumptious!
For the Base
- Oreos – A classic must-have for a crunchy texture and rich flavor; finely pulse them for even coverage.
- Whole Milk – Necessary for hydrating the pudding mix; use cold milk for the best consistency.
For the Pudding Mixture
- Vanilla Pudding – Provides a creamy, sweet base; feel free to substitute with chocolate or banana pudding for a twist.
- Cool Whip – Adds a fluffy, airy texture; remember to thaw it before mixing for the best results.
For Decoration
- Mini Eggs – These colorful treats add a delightful crunch and fun appeal; adjust the quantity based on your preference.
- Peeps – A whimsical addition that makes the dessert festive; consider using chocolate-covered strawberries for a unique decoration option.
With these ingredients in hand, you’re all set to create your Easter Dirt Cups that will delight everyone at your gathering!
Step‑by‑Step Instructions for Easter Dirt Cups
Step 1: Prepare the Cups
Begin by prepping twelve 8-ounce cups. Add 1½ tablespoons of crushed Oreos to the bottom of each cup, creating a solid base layer. Make sure the Oreo crumbs are finely pulsed for optimal coverage. Once completed, set aside the prepared cups; this will anchor the layers of your delightful Easter Dirt Cups.
Step 2: Mix the Pudding
In a large mixing bowl, combine the vanilla pudding mix with 2 cups of cold whole milk. Using a hand mixer, whisk the mixture on medium speed for about 2 minutes until it thickens and becomes smooth. You should see a defined texture forming that will create the creamy, luscious layers in your Easter Dirt Cups.
Step 3: Add the Cool Whip
Gently fold in the thawed Cool Whip with a spatula into the pudding mixture, taking care not to overmix. Continue folding until the combination is smooth and creamy without any visible streaks. This airy blend will give your Easter Dirt Cups a light and fluffy texture that pairs beautifully with the crunchy layers.
Step 4: Layer the Mixture
Using a heaping spoon, add two spoonfuls of the pudding mixture into each cup, spreading it evenly over the Oreo base. Follow this with another layer of 1½ tablespoons of crushed Oreos for added crunch. Repeat this layering process two more times to build height in your Easter Dirt Cups, ensuring an appealing display.
Step 5: Final Touch with Oreo Crumbs
Once you’ve completed the layers, add a final touch with about 1 tablespoon of Oreo crumbs on top of each cup. This topping not only looks delightful but also enhances the crunchiness associated with these cute dessert cups.
Step 6: Chill to Set
Cover the cups loosely with plastic wrap and place them in the refrigerator. Allow them to chill for a minimum of 1 hour, letting the flavors marry and the pudding to set properly. This step is crucial to achieve the perfect texture that makes your Easter Dirt Cups irresistible.
Step 7: Decorate Before Serving
Before serving, bring out the chilled cups and adorn each one with at least three mini chocolate eggs and a charming Peeps bunny on top. This festive decoration not only adds color but also brings a playful spirit to your Easter Dirt Cups, making them even more appealing for your guests.
Make Ahead Options
These adorable Easter Dirt Cups are perfect for meal prep, saving you time on the big day! You can prepare the pudding mixture and layer it in the cups up to 24 hours in advance, allowing the flavors to meld beautifully. To do this, simply follow the layering instructions, but hold off on adding the decorative toppings until you’re ready to serve—this keeps them looking fresh and vibrant. Just store the cups in the refrigerator, covered tightly. When you’re ready to impress your guests, finish by adding the mini eggs and Peeps on top for a delightful presentation that’s just as delicious as when freshly made!
What to Serve with Adorable Easter Dirt Cups?
As you gather around the table to enjoy these delightful treats, consider complementing them with a few tasty additions that will elevate your Easter celebration.
- Fruity Yogurt Parfaits: Light and refreshing, they contrast the rich pudding with bright, fruity flavors, making a colorful balance.
- Mini Fruit Cups: Brighten the table with a mix of seasonal fruits; their tartness and sweetness offer a lovely contrast to the creamy cups.
- Homemade Lemonade: This zesty drink refreshes the palate and adds a citrusy note that pairs beautifully with the sweet dirt cups.
- Chocolate-Dipped Strawberries: Luxurious and indulgent, they bring an elegant touch to the table while adding a delightful sweetness.
- Carrot Sticks with Hummus: For a crunchy, healthy option that echoes the Easter theme, this pairing will delight both kids and adults alike.
- Coconut Macaroons: These chewy treats complement the textural contrasts of your Easter Dirt Cups and add a hint of tropical flavor.
With these accompaniments, your Easter celebration will be even more memorable and satisfying for everyone at the table!
Storage Tips for Easter Dirt Cups
-
Fridge: Keep your Easter Dirt Cups tightly covered in the refrigerator for up to 2-3 days for optimal freshness and flavor retention.
-
Make-Ahead Storage: You can prepare the cups a day in advance. Just wait to add the decorations until right before serving to maintain their vibrant look.
-
Freezer: Though not recommended for this dessert, if you must freeze them, place in an airtight container for up to 1 month. Thaw in the fridge and consume quickly after thawing as the texture may change.
-
Reheating: There’s no need to reheat these cups, as they are best enjoyed chilled.
Easter Dirt Cups Variations & Substitutions
Get creative with your Easter Dirt Cups by exploring these fun and delicious twists!
- Chocolate Pudding: Swap out the vanilla pudding for rich chocolate pudding to satisfy chocolate lovers in your family.
- Graham Cracker Crust: Replace Oreo crumbs with crushed graham crackers for a lighter, cookie-like crunch.
- Fruit Layer: Add a layer of fresh strawberries or raspberries between pudding layers for a burst of fruity flavor and color.
- Peanut Butter Swirl: Fold in a few tablespoons of creamy peanut butter with the pudding for a nutty, decadent twist.
- Coconut Cream: Use coconut milk or cream instead of whole milk for a tropical vibe that’s bound to be a hit.
- Spicy Heat: A sprinkle of cayenne pepper or chili powder in the pudding adds an unexpected yet delightful kick for adventurous eaters.
- Nut Toppings: Top with chopped nuts, like pecans or walnuts, for extra crunch and a satisfying contrast to the creamy pudding.
- Seasonal Sprinkles: Customize your Easter theme by using a variety of pastel or themed sprinkles for a festive look—perfect for kids of all ages!
Feel free to mix and match these variations to create a dessert that’s uniquely yours! Want to simplify the process? Check out these Make-Ahead Storage tips that will save you time during your busy holiday preparation!
Expert Tips for Easter Dirt Cups
-
Whipping Cream Care: Be gentle when folding in the Cool Whip; overmixing can deflate its lightness, affecting the airy texture of your Easter Dirt Cups.
-
Crushed Cookie Precision: Ensure your Oreo crumbs are finely pulsed for an even texture and sufficient coverage; larger pieces can disrupt the layering effect.
-
Flavor Swaps: Don’t hesitate to experiment! Substituting vanilla pudding with chocolate or banana can provide your family’s favorite flavor variations for these delightful cups.
-
Chill Time: Allow the Easter Dirt Cups to chill for at least 1 hour; this step is crucial for flavors to meld and the pudding to properly set, enhancing the overall experience.
-
Festive Decor: Get creative with your decorations! Aside from Peeps, consider using seasonal fruits or themed sprinkles to personalize each cup and make them more festive.
Easter Dirt Cups Recipe FAQs
What type of Oreos should I use for Easter Dirt Cups?
I recommend using standard Oreo cookies for the best texture and flavor. If you prefer, you can try flavored varieties like peanut butter or mint Oreos to give your dessert a unique twist!
How should I store leftover Easter Dirt Cups?
Keep your Easter Dirt Cups covered in the refrigerator for up to 2-3 days. This ensures they stay fresh and delicious. If you need, you can prepare them a day in advance, just remember to add the toppings just before serving for that eye-catching appeal.
Can I freeze Easter Dirt Cups?
While I wouldn’t recommend freezing these cups due to potential texture changes, if you’re in a pinch, you can do so! Place them in an airtight container for up to 1 month. To thaw, move them to the fridge overnight and consume them quickly after thawing for the best experience.
What if my pudding mixture doesn’t thicken?
If your pudding mixture doesn’t thicken after whisking for the recommended 2 minutes, make sure your milk was cold enough, as warm milk can hinder the thickening process. Alternatively, try whisking for an additional minute. It should come together nicely for those fluffy layers!
Can pets eat Easter Dirt Cups?
No, I wouldn’t recommend sharing your Easter Dirt Cups with pets. The chocolate in Oreos is toxic to dogs, and many dessert ingredients aren’t suitable for them. It’s best to keep these delightful treats just for the humans in the family!
What are some alternatives for decorating Easter Dirt Cups?
Absolutely! If you’re looking to change things up, consider swapping Peeps for chocolate-covered strawberries or colorful fruit slices. Seasonal themed sprinkles can also add a fun flair while maintaining that festive spirit!
Easter Dirt Cups: Fun, Easy Dessert for a Joyful Celebration
Ingredients
Equipment
Method
- Prepare twelve 8-ounce cups by adding 1½ tablespoons of crushed Oreos to the bottom of each cup.
- In a large bowl, combine the vanilla pudding mix with 2 cups of cold whole milk and whisk for about 2 minutes until thick.
- Gently fold in the thawed Cool Whip until smooth and creamy.
- Layer two spoonfuls of the pudding mixture into each cup, followed by 1½ tablespoons of crushed Oreos, repeating for height.
- Top each cup with about 1 tablespoon of Oreo crumbs for added crunch.
- Cover loosely with plastic wrap and chill in the refrigerator for at least 1 hour.
- Before serving, decorate each cup with at least three mini chocolate eggs and a Peeps bunny.
Leave a Reply