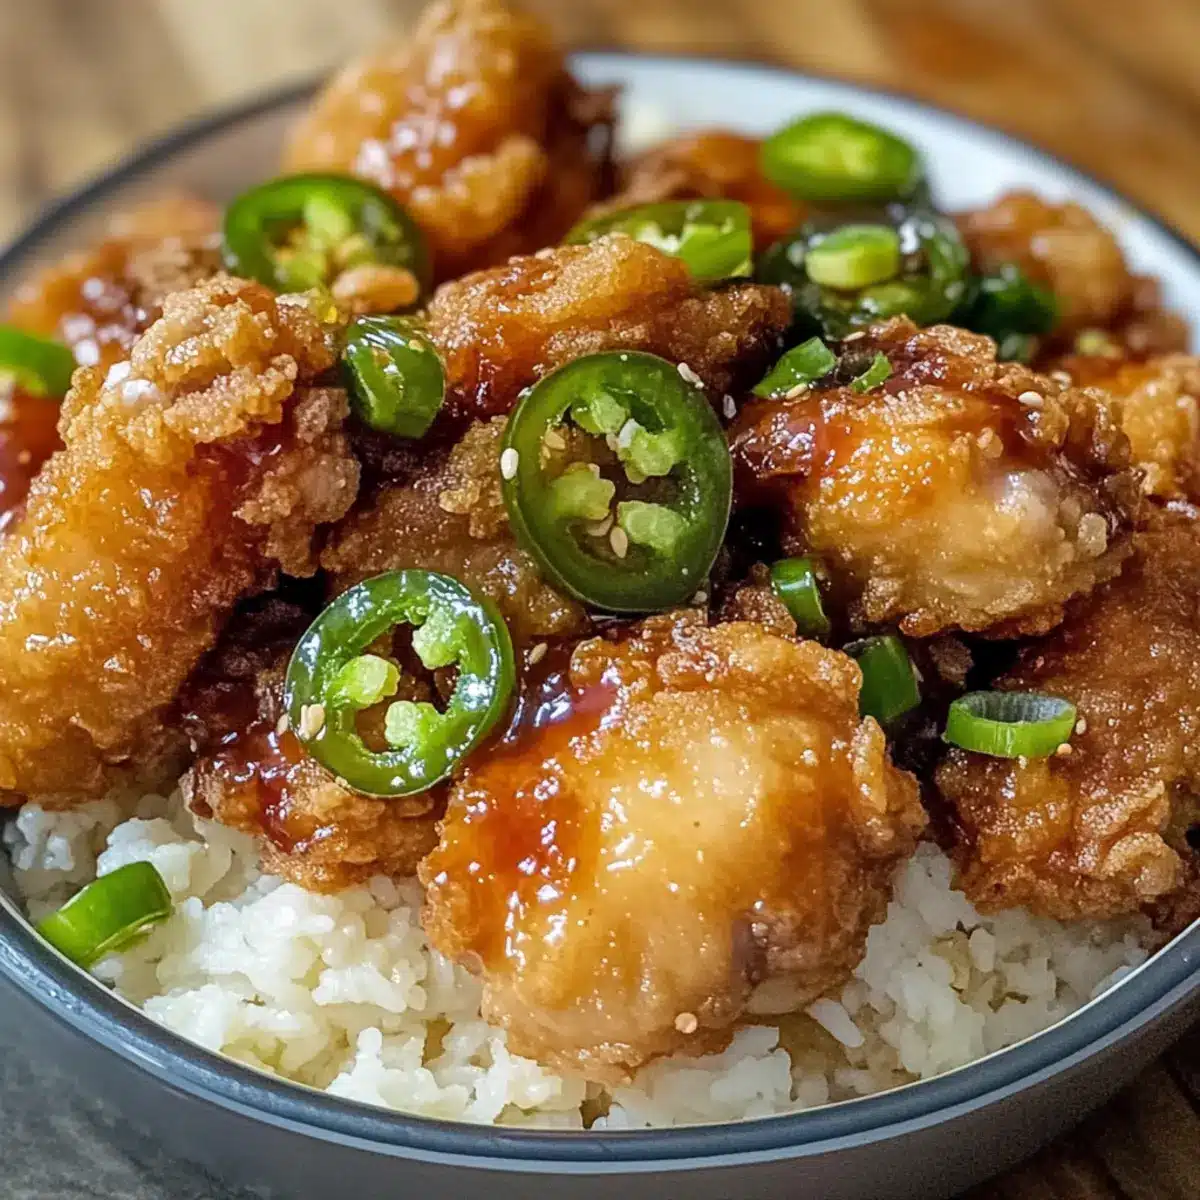
The aroma of sizzling garlic wafts through the air, instantly transporting me to the vibrant shores of Hawaii. In just under an hour, you can recreate this tropical getaway in your kitchen with my Crispy Hawaiian Garlic Chicken. This easy dinner recipe boasts an irresistible crunchy coating infused with a savory soy garlic sauce, enhanced by a spicy kick from fried jalapeños. Not only does it satisfy your cravings for something savory, but it’s also a crowd-pleaser that’s sure to impress friends and family alike. Plus, cleanup is a breeze, allowing you to enjoy the festivities without worry! Are you ready to bring these island flavors to your table? Let’s dive into the juicy details of this delightful dish!
Why is this chicken so special?
Elevated Flavor: The savory combination of soy sauce, garlic, and ginger creates a unique sauce that’s bursting with island-inspired taste.
Crispy Delight: The flour and cornstarch mixture ensures a perfectly crispy exterior, making each bite incredibly satisfying.
Spicy Kick: The fried jalapeños add a delightful heat, giving your taste buds a tropical adventure.
Easy to Make: This dish comes together in under an hour, making it a quick and exciting choice for dinner.
Crowd-Pleaser: Perfect for gatherings, this chicken is guaranteed to impress your guests, much like my Chicken Enchiladas Fun!
Versatile Serving Options: Pair with coconut rice or serve over steamed vegetables to enhance the meal’s tropical flair.
Crispy Hawaiian Garlic Chicken Ingredients
• Get ready to embrace those tropical flavors!
For the Chicken
- Boneless Chicken Thighs – The main protein, tender and juicy; you can substitute with chicken breast for a leaner option.
- Flour – Provides the crispy coating; whole wheat flour can be used for a healthier variation.
- Cornstarch – Enhances the crunchiness of the coating.
- Oil (for frying) – Necessary for achieving that crispy texture; can substitute with vegetable or canola oil.
For the Sauce
- Soy Sauce – Adds umami and saltiness; use low-sodium for a lighter flavor.
- Sugar – Balances the savoriness with sweetness; brown sugar enhances caramelization beautifully.
- Garlic (minced) – Infuses the sauce with depth and aroma.
- Ginger (grated) – Adds warmth and spiciness to the sauce.
For the Spice
- Jalapeños (sliced and fried) – Punches in spicy heat and texture; can replace with bell pepper for a milder option.
Step‑by‑Step Instructions for Crispy Hawaiian Garlic Chicken
Step 1: Prepare Chicken
Start by patting the boneless chicken thighs dry with paper towels, ensuring they’re moisture-free for optimal crispiness. Season them lightly with salt and pepper. In a separate bowl, combine flour and cornstarch, mixing well to create a coating that will help achieve that irresistible crunch on your Crispy Hawaiian Garlic Chicken.
Step 2: Heat Oil
In a deep, heavy-bottomed pan, pour enough oil to cover the base by about two inches and heat it over medium-high heat. Use a thermometer to monitor the oil, aiming for a temperature of 350°F (180°C). Once hot, you should see shimmering on the oil’s surface, indicating it’s ready for frying.
Step 3: Coat Chicken
Take each seasoned chicken thigh and dredge it thoroughly in the flour and cornstarch mixture, shaking off any excess. Ensure each piece is evenly coated to achieve that ultimate crispy finish. The coating will create a delicious barrier that locks in the moisture while you fry, giving you tender, juicy chicken inside.
Step 4: Fry Chicken
Carefully lower the coated chicken thighs into the hot oil, frying in batches to avoid overcrowding, which can lower the oil temperature. Fry each piece for about 6-8 minutes per side, or until they are golden brown and crispy. Keep an eye on the chicken, as you want a beautiful golden exterior—this is the secret to perfect Crispy Hawaiian Garlic Chicken!
Step 5: Prepare Sauce
While the chicken is frying, heat a separate pan over medium heat. Add soy sauce, sugar, minced garlic, and grated ginger, stirring gently. Cook for about 3-5 minutes until the mixture becomes fragrant and starts to thicken, creating a luscious sauce that will coat your chicken beautifully.
Step 6: Combine
Once the chicken is fried to perfection, carefully transfer it to a platter lined with paper towels to drain excess oil. Then, place the hot, crispy chicken into the pan with the garlic sauce. Toss the chicken gently to ensure each piece is fully coated in the savory sauce, letting the flavors meld together.
Step 7: Add Jalapeños
If you desire that added heat, stir in the fried jalapeños at this point. Their spicy crunch will infuse the sauce with extra flavor and texture, enhancing your Crispy Hawaiian Garlic Chicken experience. Mix well, allowing the jalapeños to mingle with the chicken and sauce for a few moments.
Step 8: Serve
Now it’s time to plate your Crispy Hawaiian Garlic Chicken! Serve it hot alongside steamed rice or sautéed vegetables for a complete meal. The crispy, saucy chicken is sure to be a hit at your dinner table, bringing a taste of the islands straight to your home!
Variations & Substitutions for Crispy Hawaiian Garlic Chicken
Feel free to explore these delightful variations and substitutions to make the Crispy Hawaiian Garlic Chicken suit your tastes!
- Tropical Twist: Add grilled pineapple or serve with coconut rice for a complete island-themed meal that elevates tropical flavors.
- Vegetarian Option: Substitute chicken with tofu or cauliflower for a plant-based version that still maintains the dish’s essence.
- Extra Crunch: Toss in crushed macadamia nuts for an unexpected crunch and a taste of Hawaii in every bite.
- Sweet Heat: Drizzle honey or agave syrup over the finished chicken for an extra layer of sweetness to complement the heat from jalapeños.
- Spicy Garlic Sauce: For a bolder flavor, add more minced garlic and chili flakes to the sauce, ensuring that every bite has a kick!
- Soy-Free Alternative: Use tamari or coconut aminos instead of soy sauce for a gluten-free version that doesn’t skimp on umami flavor.
- Alternative Proteins: Try this recipe with pork chops or fish fillets to see how the crispy coating pairs with different proteins.
- Flavorful Marinade: Marinate the chicken in a mixture of soy sauce, garlic, and ginger for a few hours before coating for a flavor that permeates the meat.
If you love this dish, you might also enjoy some of my other favorites, like Bang Bang Chicken, which brings delightful spicy goodness, or the cozy comfort of Chicken Dumplings Cozy for a heartwarming meal!
Storage Tips for Crispy Hawaiian Garlic Chicken
- Fridge: Store any leftover Crispy Hawaiian Garlic Chicken in an airtight container for up to 3 days. This keeps the chicken flavorful and safe to eat.
- Freezer: For longer storage, freeze the coated but uncooked chicken in a single layer on a baking sheet. Once frozen, transfer to a zip-top bag and store for up to 2 months.
- Reheating: To keep the chicken crispy, reheat in the oven at 375°F (190°C) for about 10-15 minutes. This method preserves the crunch and enhances flavors.
- Pairing: When ready to eat, serve with a fresh side of rice or steamed vegetables to complete the meal and enjoy those delicious Hawaiian flavors!
What to Serve with Crispy Hawaiian Garlic Chicken
Indulging in a feast that captures the spirit of Hawaii begins with the perfect side dishes that complement your sensational chicken.
- Steamed Jasmine Rice: The fluffy texture absorbs the savory soy garlic sauce beautifully, making each bite a delightful experience.
- Garlic Butter Green Beans: These tender beans add a fresh, crunchy contrast, enhancing the meal’s vibrancy while keeping it light.
- Coconut Rice: A sweet twist, coconut rice introduces a subtle richness that highlights the tropical flavors in the chicken. Pairing with fried shallots adds an enticing crunch.
- Pineapple Fried Rice: This fruity twist ups the island vibe, blending sweet and savory flavors that harmonize beautifully with the spicy chicken.
- Crispy Coleslaw: A refreshing, crunchy slaw with a tangy dressing balances the richness of the chicken, making it a perfect contrast.
- Mango Salsa: This bright, zesty salsa introduces a sweet and spicy profile that cuts through the richness while adding a burst of flavor.
- Pineapple Upside Down Cake: Finish your meal with this classic dessert, where sweetness and nostalgia combine to echo the island ambiance.
- Mai Tai Cocktail: Celebrate the meal with this fruity cocktail, combining rum, lime, and almond flavors that transport you right to a Hawaiian beach.
Make Ahead Options
These Crispy Hawaiian Garlic Chicken are perfect for busy weeknights when you need to save time without sacrificing flavor! You can marinate the chicken thighs in soy sauce, garlic, and ginger up to 24 hours ahead of time, which allows the flavors to deeply infuse the meat. Additionally, you can coat the chicken in the flour and cornstarch mixture, then store it in an airtight container in the refrigerator for up to 3 days. To ensure the chicken remains crispy, fry it just before serving. When it’s time to eat, simply heat the oil, fry the chicken until golden brown, toss it in the sauce, and enjoy restaurant-quality Crispy Hawaiian Garlic Chicken at home!
Expert Tips for Crispy Hawaiian Garlic Chicken
- Oil Temperature: Ensure your oil is hot enough (around 350°F) before frying to achieve that crispy exterior. Too cool oil can make the chicken soggy.
- Batch Frying: Fry chicken in small batches to maintain the oil temperature. This allows for an even, golden browning without losing that crunchy texture.
- Proper Coating: Make sure each piece of chicken is thoroughly coated in the flour-cornstarch mix. This creates a protective layer that keeps moisture in while adding crispiness.
- Adjust the Spice: If you love heat, feel free to add more jalapeños or even a dash of hot sauce to the sauce. For a milder version, simply replace jalapeños with bell peppers.
- Serve Immediately: For the best experience, serve your Crispy Hawaiian Garlic Chicken right after tossing in the sauce. This way, you’ll enjoy the crunch before it softens!
Crispy Hawaiian Garlic Chicken Recipe FAQs
What kind of chicken should I use for Crispy Hawaiian Garlic Chicken?
Absolutely, boneless chicken thighs are perfect for this recipe due to their tenderness and juiciness. If you’re looking for a leaner option, you can certainly substitute them with boneless chicken breasts. Just keep in mind that they might take a little less time to cook, so keep an eye on them!
How should I store leftovers of Crispy Hawaiian Garlic Chicken?
Store any leftover Crispy Hawaiian Garlic Chicken in an airtight container for up to 3 days in the refrigerator. To maintain its delicious crispiness, I recommend reheating it in the oven at 375°F (190°C) for about 10-15 minutes until warmed through, instead of using the microwave which might make it soggy.
Can I freeze Crispy Hawaiian Garlic Chicken?
Certainly! You can freeze the coated but uncooked chicken thighs on a baking sheet in a single layer. Once frozen solid, transfer them to a zip-top freezer bag and store for up to 2 months. When you’re ready to fry them, simply thaw in the refrigerator overnight before frying as directed.
What can I do if the chicken doesn’t get crispy?
Very! If your chicken isn’t crispy, it could be due to the oil not being hot enough. Make sure it’s at 350°F (180°C) before frying. Also, frying in small batches helps maintain the oil temperature; overcrowding can lead to steaming instead of frying. Finally, ensure each piece is well-coated with the flour-cornstarch mixture for the crunch you’re craving!
Is Crispy Hawaiian Garlic Chicken suitable for people with dietary restrictions?
While the recipe does not specify dietary themes, it’s vital to consider allergies. This dish contains soy sauce, which can be high in sodium and may not be suitable for those with a soy allergy. For a gluten-free version, you can use tamari or a gluten-free soy sauce alternative. Always check ingredient labels to accommodate specific dietary needs!
Crispy Hawaiian Garlic Chicken to Spice Up Your Dinner Plans
Ingredients
Equipment
Method
- Start by patting the boneless chicken thighs dry with paper towels. Season with salt and pepper. Combine flour and cornstarch in a separate bowl.
- Heat oil in a deep, heavy-bottomed pan over medium-high heat to 350°F (180°C).
- Dredge each chicken thigh in the flour and cornstarch mixture, ensuring each piece is evenly coated.
- Lower the coated chicken into the hot oil, frying in batches for about 6-8 minutes per side until golden brown and crispy.
- In another pan, heat soy sauce, sugar, minced garlic, and grated ginger over medium heat for 3-5 minutes until fragrant and thickened.
- Transfer fried chicken to paper towels to drain oil, then toss in the hot garlic sauce until fully coated.
- Stir in fried jalapeños for added heat and flavor. Mix well.
- Serve hot with steamed rice or sautéed vegetables.
Leave a Reply