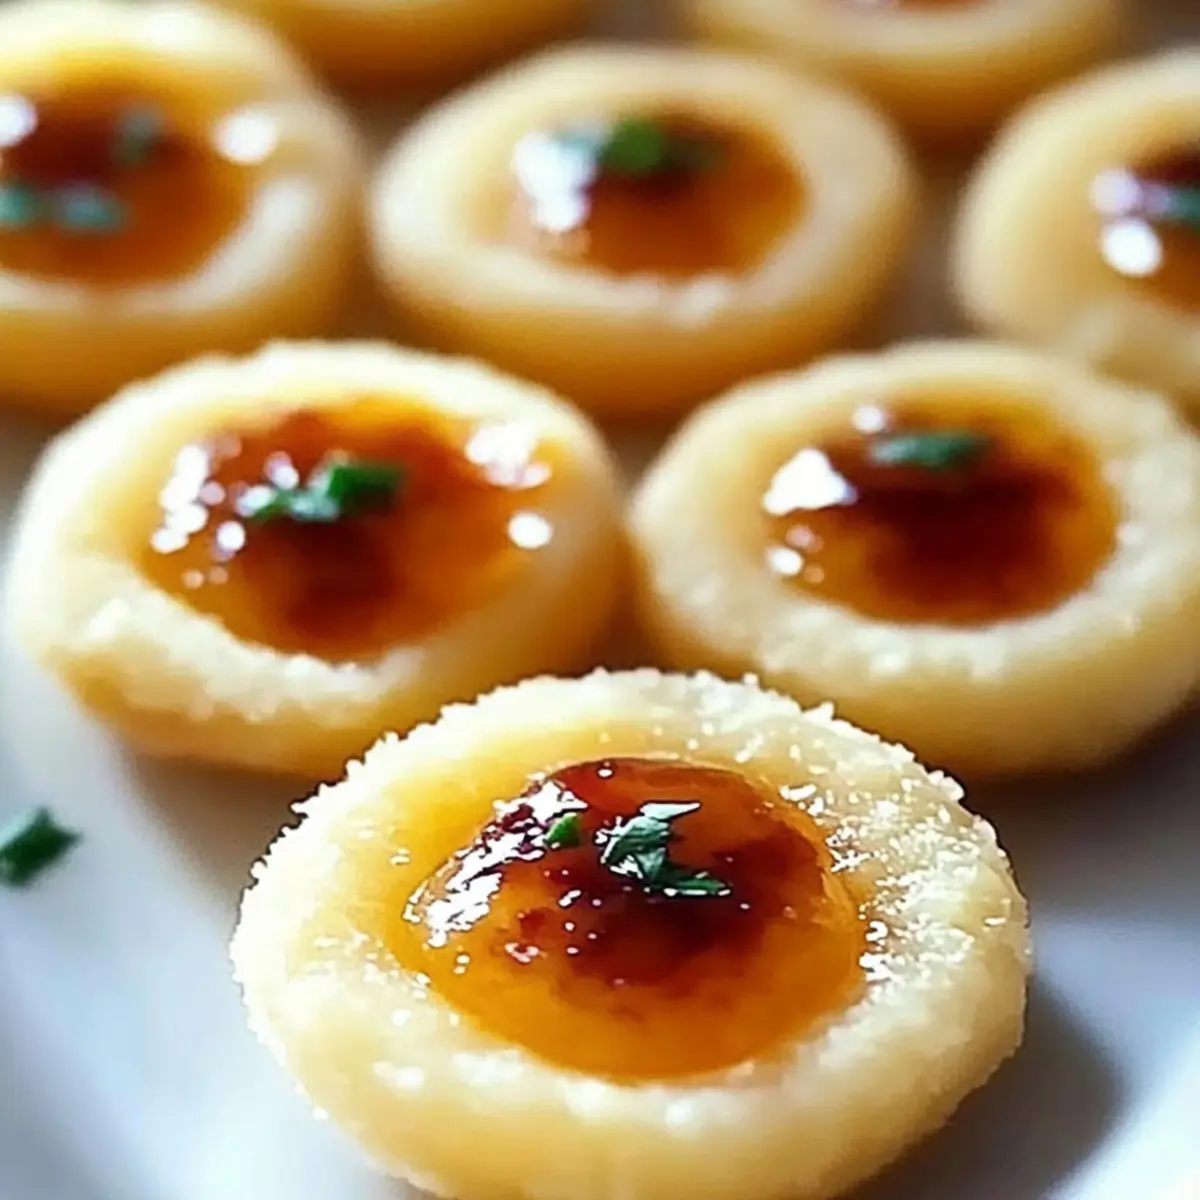
As I was rummaging through my pantry last weekend, I stumbled upon a jar of hot pepper jelly, and a spark of inspiration ignited in my kitchen. That’s how these Cheesy Thumbprint Appetizers were born—a delightful fusion of crispy and creamy that’s perfect for gatherings or cozy nights at home. With a rich cheddar base and a sweet-spicy pop from the jelly, they promise to be a hit with everyone! Best of all, they’re quick to whip up, so you can spend less time in the kitchen and more time sharing laughs with friends. Plus, I’ve got you covered with gluten-free options, ensuring no one misses out on these tasty bites. Ready to impress your guests with an innovative twist on a classic? Let’s dive into this irresistible recipe!
Why Are These Appetizers So Irresistible?
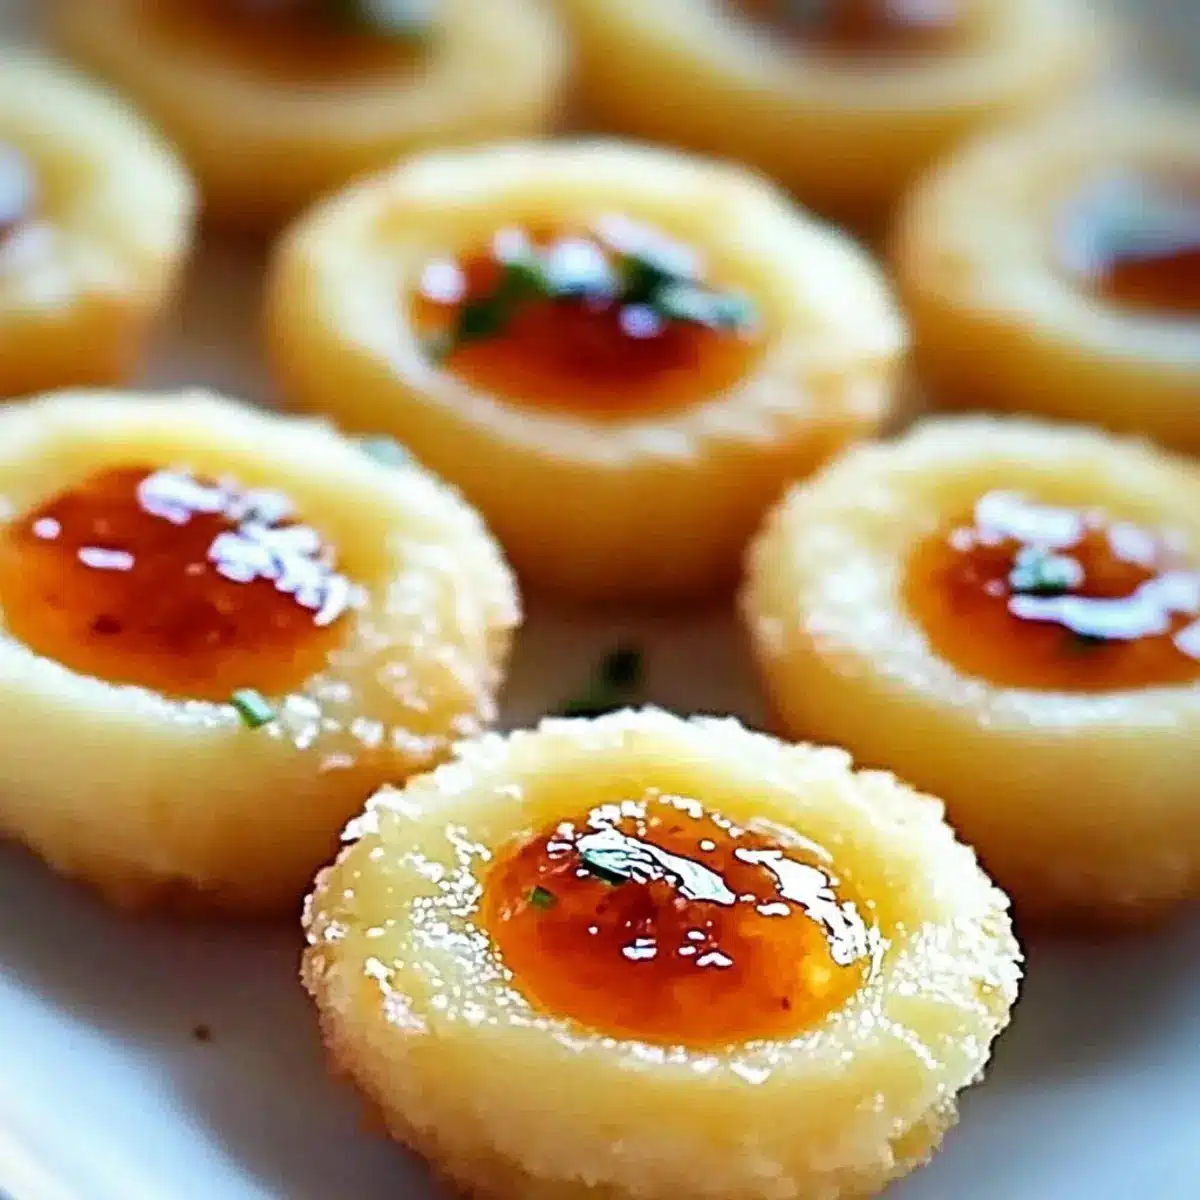
Crispy and Creamy: Each bite features golden, crispy edges enveloping a rich cheddar center, providing a satisfying texture contrast.
Sweet-Spicy Surprise: The hot pepper jelly adds an unexpected zing that elevates the traditional appetizer into something special.
Quick and Easy: These Cheesy Thumbprint Appetizers can be prepared in under an hour, making them a perfect choice for spontaneous gatherings.
Versatile Ingredients: Feel free to swap cheeses or jellies based on your preference—try pepper jack for extra heat or a fruity jelly for a different flavor profile.
Crowd Pleaser: With their bold flavors and unique presentation, these appetizers will wow your guests and spark lively conversations, just like my other favorites, like Oven Baked Cheesy Tacos or Cheesy Ranch Potatoes.
Cheesy Thumbprint Appetizers Ingredients
• Everything you need for a flavorful treat!
For the Dough
- Sharp Cheddar Cheese – Provides the main flavor and a savory base; a great substitute is pepper jack for extra heat.
- Cream Cheese – Adds creaminess; make sure to soften it for easy mixing.
- Unsalted Butter – Contributes richness; can be replaced with vegan butter for a dairy-free option.
- All-purpose Flour – Forms the dough’s structure; for gluten-free needs, swap with a 1:1 baking blend.
- Salt – Enhances the flavor profile of the dough.
- Garlic Powder (optional) – Introduces a delightful flavor layer; feel free to leave it out if you prefer simplicity.
For the Topping
- Hot Pepper Jelly – Provides that sweet-spicy surprise filling that makes these Cheesy Thumbprint Appetizers shine; choose one with balanced heat for broad appeal.
- Fresh Thyme or Parsley (optional) – Use as a fragrant garnish to elevate presentation and flavor.
Step‑by‑Step Instructions for Cheesy Thumbprint Appetizers
Step 1: Prepare the Creamy Base
In a mixing bowl, combine 8 ounces of softened cream cheese and 4 tablespoons of unsalted butter. Beat them together using a handheld mixer on medium speed until the mixture is smooth and creamy—about 1-2 minutes. The goal is to create a luscious blend that will serve as the foundation for your Cheesy Thumbprint Appetizers.
Step 2: Add the Cheddar Cheese
Next, incorporate 1 cup of shredded sharp cheddar cheese into the cream cheese and butter mixture. Stir with a spatula or spoon until it is fully integrated, creating a rich and cheesy base. You’ll know it’s mixed well when the cheese is speckled throughout the mixture, giving it a beautiful golden color and strong aroma.
Step 3: Mix in the Dry Ingredients
Gradually add 1 cup of all-purpose flour, ½ teaspoon of salt, and ½ teaspoon of garlic powder (if using) into the cheese mixture. Stir gently until a soft dough starts to form—this should take about 1-2 minutes. The dough should feel slightly tacky but still hold together without crumbling, ensuring your thumbprint appetizers have the right texture.
Step 4: Chill the Dough
Wrap the dough in plastic wrap and refrigerate it for at least 30 minutes. Chilling helps the dough firm up, making it easier to handle when forming the balls. After chilling, the dough should feel more solid, allowing you to shape it without sticking excessively to your hands.
Step 5: Preheat and Prepare
Preheat your oven to 375°F (190°C). While the oven warms up, line a baking sheet with parchment paper or a silicone baking mat. This will prevent the Cheesy Thumbprint Appetizers from sticking. Prepare your workspace with your chilled dough, a cookie scoop or tablespoon, and the jelly for later.
Step 6: Shape the Appetizers
Using a cookie scoop or tablespoon, scoop out about 1-inch balls of the dough and place them on the prepared baking sheet, leaving about 2 inches of space between each ball. The dough should be firm enough to hold its shape but soft enough to mold readily. You will have around 18-24 balls, depending on the size.
Step 7: Create Indentations
With your thumb or the back of a teaspoon, gently press down the center of each dough ball to create a small indentation. Be careful not to press all the way through; you want to reserve space for the hot pepper jelly filling. This step is crucial for ensuring each Cheesy Thumbprint Appetizer holds its tasty surprise.
Step 8: Fill with Hot Pepper Jelly
Fill each indentation with about ½ teaspoon of hot pepper jelly, being mindful not to overfill—this prevents overflowing while baking. Choose a jelly with a balanced heat level to complement the cheddar cheese. The bright color of the jelly against the dough will present beautifully in the finished dish.
Step 9: Bake to Perfection
Slide the baking sheet into the preheated oven and bake for 13-15 minutes, or until the edges are golden brown. As the Cheesy Thumbprint Appetizers bake, you’ll notice the delightful aroma wafting through your kitchen. They are ready when the tops are set and the bottoms are lightly golden.
Step 10: Cool and Serve
Once baked, remove the baking sheet from the oven and let the appetizers cool on the sheet for 5 minutes. Then, carefully transfer them to a wire rack to cool completely. This cooling time allows the cheesy center to firm up slightly, making them easier to handle while still retaining their decadent, warm filling.

Cheesy Thumbprint Appetizers Variations
Feel free to experiment with these delightful twists on your Cheesy Thumbprint Appetizers for a personalized touch that will excite your taste buds!
-
Cheese Swap: Replace sharp cheddar with gouda or pepper jack for different flavor profiles and heat levels. Gouda adds a buttery richness, while pepper jack delivers a spicy kick!
-
Gluten-Free Option: Swap all-purpose flour for a 1:1 gluten-free baking blend to make these appetizers suitable for gluten-sensitive friends. The texture will remain delightful, ensuring everyone can enjoy them.
-
Vegan Version: Use vegan cream cheese and butter to create a plant-based version of these savory bites. They’ll be every bit as creamy and satisfying!
-
Flavor Boost: Mix in herbs like fresh rosemary or chives with the cheese for an aromatic layer that enhances the overall taste. Just a sprinkle can truly elevate your appetizers!
-
Jelly Variations: Experiment with different jellies such as raspberry or jalapeño for unique flavor combinations. Each jelly adds its own character, creating a new experience with every bite.
-
Mini Muffins: Shape the dough into mini muffin cups instead of balls to create a fun bite-sized version with extra space for the jelly. Think of it as a cheesy, flavor-packed muffin!
-
Spicy Kick: Add a pinch of cayenne pepper to the cheese mixture for an extra kick. A little heat balances beautifully with the sweetness of the pepper jelly.
-
Herb Garnish: Consider finishing the appetizers with a sprinkle of chopped fresh parsley or thyme before serving to add freshness and a pop of color, just like in my Cheesy Christmas Tree recipe!
With these variations, your Cheesy Thumbprint Appetizers will always have something new to offer, keeping your gatherings lively and your family excited!
How to Store and Freeze Cheesy Thumbprint Appetizers
Fridge: Store uneaten appetizers in an airtight container for up to 4 days to maintain freshness and flavor.
Freezer: To freeze, place uncooked dough balls on a baking sheet and freeze until solid. Transfer them to a freezer bag for up to 3 months.
Reheating: When ready to enjoy, bake frozen dough immediately from the freezer, increasing the baking time by an additional 2-3 minutes.
Storage Tip: If baked, allow appetizers to cool completely before storing in a container; this keeps them from getting soggy.
Make Ahead Options
These Cheesy Thumbprint Appetizers are a fantastic choice for meal prep, making your hosting duties seamless! You can prepare the dough up to 24 hours in advance by mixing all the ingredients and storing it wrapped in plastic wrap in the refrigerator to maintain its freshness. Alternatively, form the dough balls and refrigerate them for up to 3 days. When you’re ready to bake, simply create the indentations and fill them with hot pepper jelly before baking as directed. This advanced prep not only saves you time on busy weekdays or party days but also ensures that every bite remains just as delicious and comforting!
What to Serve with Cheesy Thumbprint Appetizers?
Elevate your gathering with complementary dishes that beautifully harmonize with these flavorful bites.
-
Crispy Garden Salad: A fresh medley of greens and crunchy veggies adds a bright contrast and keeps the palate refreshed between bites.
-
Roasted Vegetable Platter: The caramelized sweetness of roasted seasonal veggies works perfectly alongside the strong flavors of the cheesy appetizers.
-
Savory Cheese Board: Pair with a selection of cheeses, crackers, and fruits to create an impressive spread that invites guests to graze and mingle.
-
Zesty Garlic Bread: The warmth of garlic bread brings comforting familiarity and is a delightful way to mop up any extra jelly.
-
Pineapple Salsa: This sweet and tangy blend of pineapple, onions, and cilantro offers a refreshing punch that balances the savory cheese.
-
Sparkling Lemonade: A bubbly lemon drink adds a touch of brightness, enhancing the flavors of the appetizers while keeping the atmosphere festive.
-
Chocolate Dipped Strawberries: Finish the meal with a sweet treat; the chocolate contrasts beautifully with the cheesy and spicy elements, creating a decadent finale.
Expert Tips for Cheesy Thumbprint Appetizers
- Dough Consistency: Ensure your dough is cool but pliable after refrigerating for 30 minutes; this helps maintain shape when baking your Cheesy Thumbprint Appetizers.
- Indentation Matters: Be careful not to press too hard when forming indentations; aim to create space for the jelly without piercing the bottom of the dough ball.
- Jelly Control: Avoid overfilling the jelly in each thumbprint; excessive jelly can spill over during baking, leading to a messy outcome.
- Uniform Sizing: For even baking, use a cookie scoop to create uniformly-sized balls. This will ensure all appetizers bake at the same rate.
- Reheating Tips: When reheating, place cooled appetizers in a 300°F (150°C) oven for 5-7 minutes to regain their delightful texture without drying out.

Cheesy Thumbprint Appetizers Recipe FAQs
What type of cheese can I substitute in Cheesy Thumbprint Appetizers?
Absolutely! While sharp cheddar cheese provides a nice flavor, you can easily substitute it with pepper jack for an extra kick or gouda for a creamier taste. These variations can give your appetizers a delightful twist, and I often experiment with different cheese blends depending on my mood!
How should I store leftovers?
To keep your Cheesy Thumbprint Appetizers fresh, store them in an airtight container in the fridge for up to 4 days. This method preserves their crispy edges and cheesy centers. I recommend separating layers with parchment paper to prevent sticking, ensuring each bite remains perfect!
Can I freeze the dough for later use?
Yes, you can freeze the dough! To do this, scoop each ball onto a baking sheet lined with parchment paper and freeze until solid. Once solid, transfer the dough balls to a freezer-safe bag or container and store for up to 3 months. When ready to bake, you can place the frozen dough directly in the oven, just add 2-3 extra minutes to the baking time.
What if my dough is too sticky to handle?
If your dough becomes too sticky while forming the appetizers, it usually means it needs more chilling time. A little extra refrigeration for about 15 minutes can often resolve this issue. Additionally, you can lightly flour your hands to make shaping easier, but be cautious not to add too much flour as it can affect the texture.
Is there a gluten-free option for these appetizers?
Very! You can easily make Cheesy Thumbprint Appetizers gluten-free by using a 1:1 gluten-free baking blend instead of all-purpose flour. Just ensure your other ingredients, like the hot pepper jelly and cheese, are also gluten-free. This way, everyone can enjoy these delicious bites without worry!
How can I adjust the heat level of the hot pepper jelly?
For a milder or spicier taste, you can explore different varieties of jelly! Try using jalapeño jelly for a gentle heat or go bold with a habanero jelly for a fiery twist. I recommend starting with a jelly that has balanced heat to find your perfect flavor profile that complements the creamy cheese.
Cheesy Thumbprint Appetizers with a Sweet-Spicy Surprise
Ingredients
Equipment
Method
- In a mixing bowl, combine cream cheese and unsalted butter. Beat together until smooth and creamy—about 1-2 minutes.
- Incorporate shredded sharp cheddar cheese into the mixture. Stir until fully integrated.
- Gradually add all-purpose flour, salt, and garlic powder (if using). Stir gently until a soft dough starts to form.
- Wrap the dough in plastic wrap and refrigerate for at least 30 minutes.
- Preheat your oven to 375°F (190°C) and line a baking sheet with parchment paper.
- Scoop about 1-inch balls of dough and place on the prepared baking sheet with space between them.
- Press down in the center of each dough ball with your thumb to create an indentation.
- Fill each indentation with about ½ teaspoon of hot pepper jelly.
- Bake for 13-15 minutes until edges are golden brown.
- Cool on the baking sheet for 5 minutes before transferring to a wire rack.
Leave a Reply