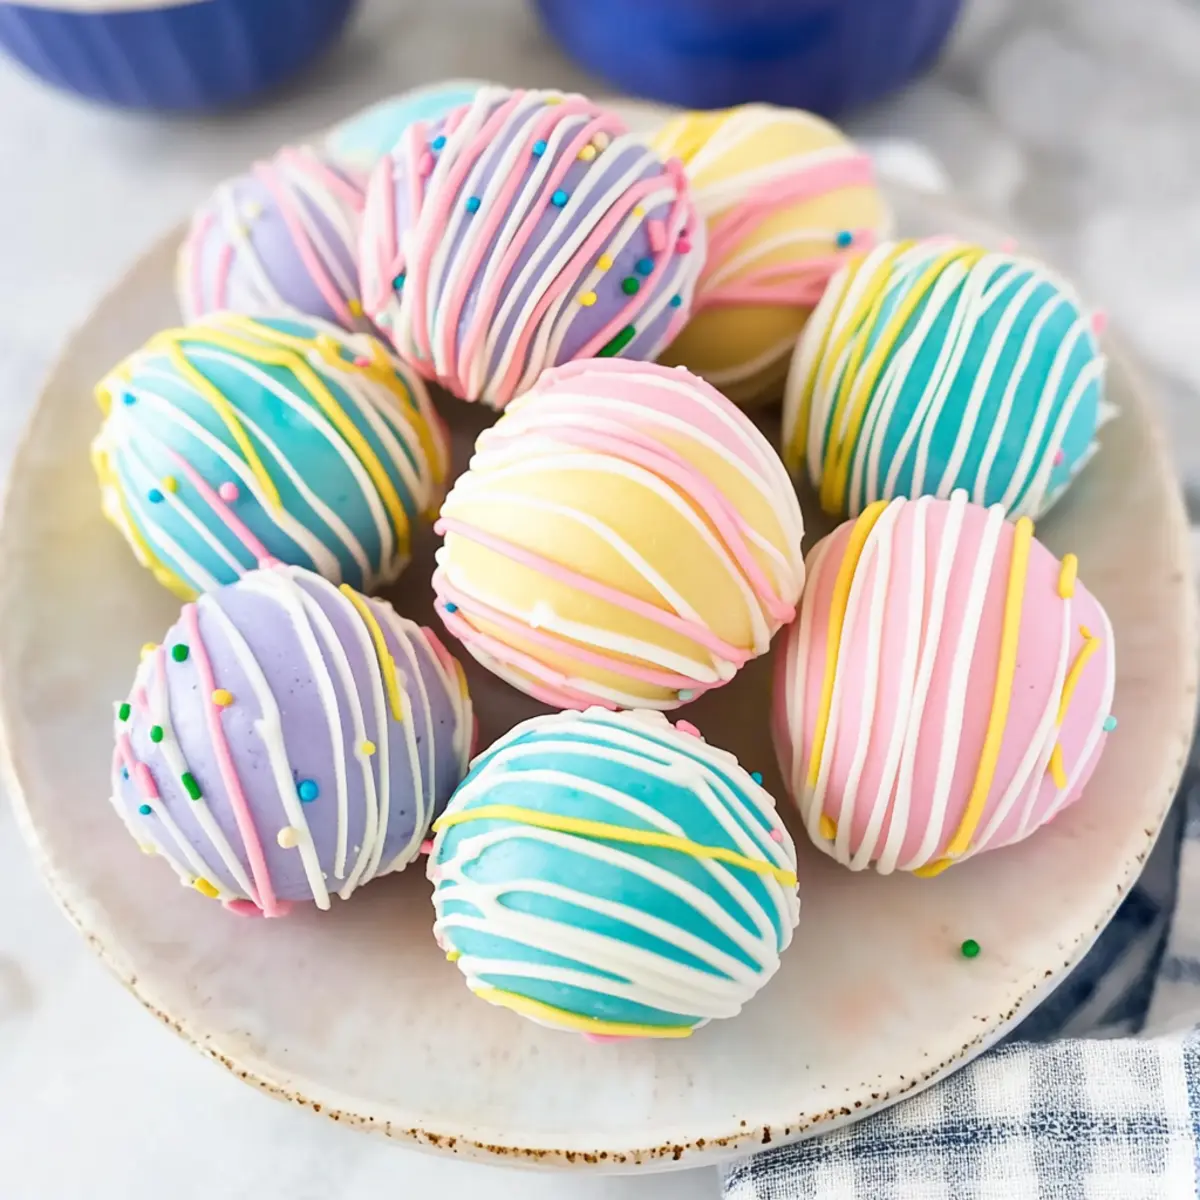
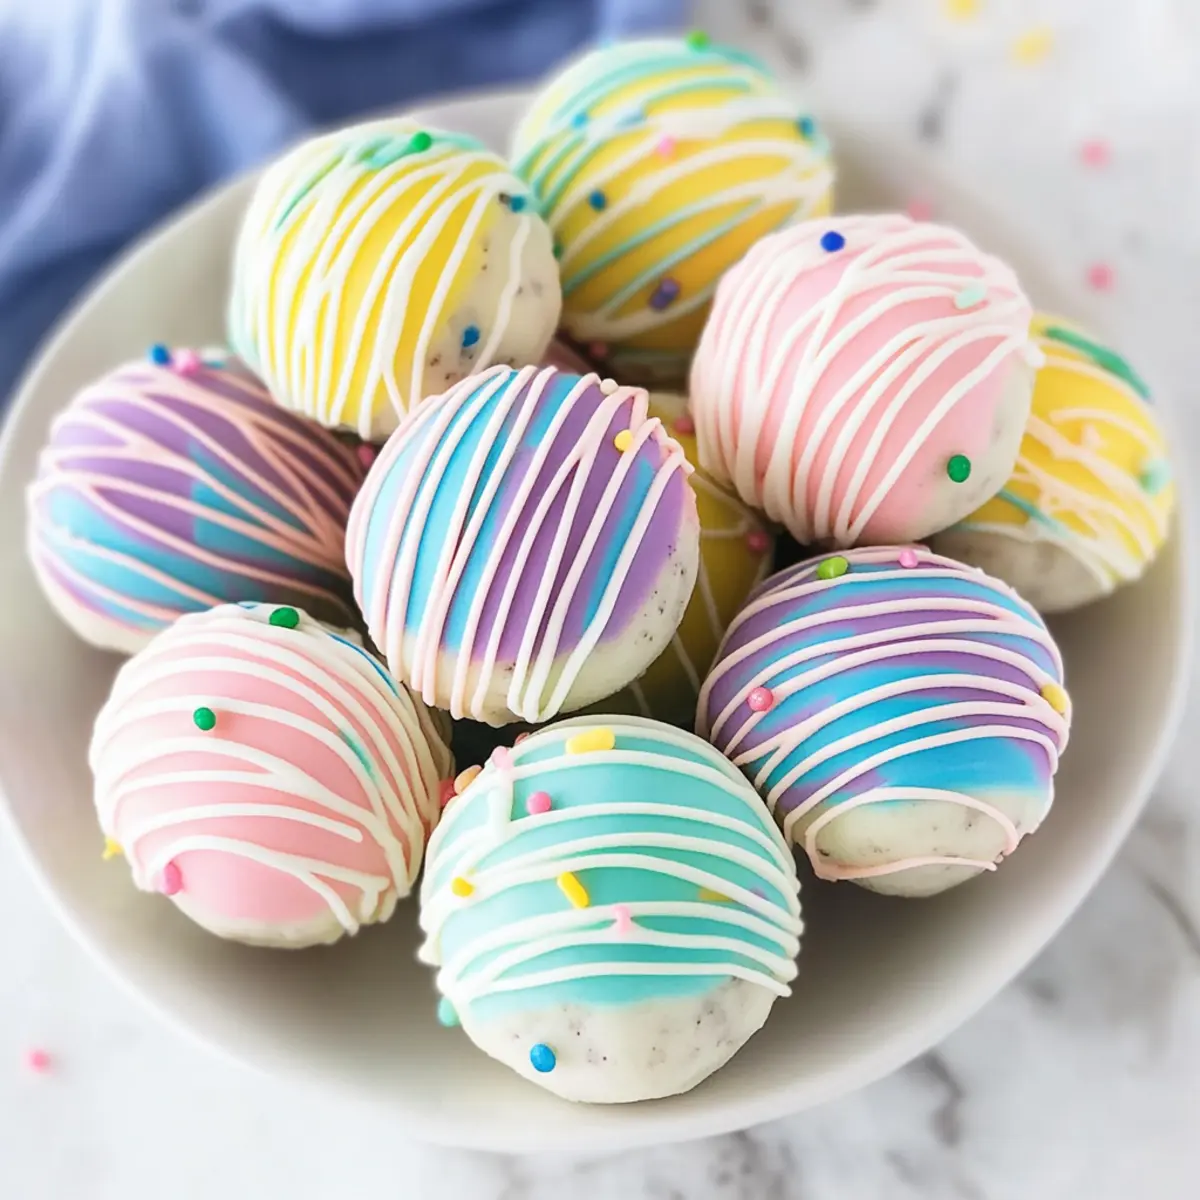
As the vibrant colors of spring begin to peek through, there’s a delightful treat I can’t help but whip up every Easter: Easter Egg Oreo Cookie Balls. These no-bake wonders are perfect for family fun, combining the creamy goodness of cream cheese with the crunch of Golden Oreos—all encased in a sweet candy coating. Not only are they super easy to make, but they also double as a fun activity for kids and adults alike, inviting everyone to get hands-on with rolling, shaping, and decorating these festive delights. They make for the perfect centerpiece on any Easter dessert table, bringing joy and sweetness without the need for any baking stress. Curious about how to create these colorful bites of happiness? Let’s dive into the recipe together!

Why Are Easter Egg Oreo Cookie Balls a Must-Try?
No-Bake Convenience: These treats come together effortlessly without an oven, making them ideal for those busy holiday preparations.
Kid-Friendly Fun: Perfect for family bonding, everyone can join in the rolling and decorating process, making it a delightful activity together.
Creative Customization: Whether you prefer classic Golden Oreos or want to experiment with flavors like mint or birthday cake, the options are endless.
Visually Stunning: Coated in colorful candy, these festive bites are sure to brighten up your Easter dessert table, making them a hit at gatherings.
Delicious and Decadent: The creamy filling combined with a crunchy exterior creates a taste sensation that’s both familiar and exciting.
These Easter Egg Oreo Cookie Balls are a delightful addition to any celebration, so why not pair them with some delicious options like Sausage Egg Breakfast or Salted Caramel Cookie for a full festive experience?
Easter Egg Oreo Cookie Balls Ingredients
For the Cookie Mixture
- Golden Oreos – The base ingredient for flavor and texture; can easily be swapped with Chocolate Oreos for a richer profile.
- Cream Cheese – Provides creaminess and binds the cookie crumbs into a dough; make sure it’s softened for easy mixing.
For the Coating
- White Candy Coating – Envelops the cookie mixture for a sweet shell; you can use colored coatings to jazz up the visual appeal easily.
- Gel Icing Colors – Perfect for tinting the candy coating for decoration; opt for gel to maintain texture and vibrancy.
For Decoration
- Sprinkles or Sanding Sugar (Optional) – Enhances visual appeal and fun before the coating sets; a little sprinkle goes a long way in bringing these Easter Egg Oreo Cookie Balls to life!
Step‑by‑Step Instructions for Easter Egg Oreo Cookie Balls
Step 1: Prepare Oreos
Begin by crushing the Golden Oreos into fine crumbs using a food processor. Pulse until the texture is even, ensuring no large pieces remain—this usually takes about 30 seconds. The fine crumbs serve as the perfect base for your creamy filling, helping to achieve that delightful texture in your Easter Egg Oreo Cookie Balls.
Step 2: Mix Ingredients
In a large mixing bowl, combine the crushed Oreos with softened cream cheese. Use a spatula or wooden spoon to mix until it forms a cohesive dough, approximately 2-3 minutes. The mixture should be sticky enough to hold together when you press it, reminiscent of a rich cookie dough that will become the filling for your cookie balls.
Step 3: Shape Eggs
Scoop about 1½ tablespoons of the delicious Oreo mixture and roll it between your hands to form egg-shaped ovals. Aim for a smooth surface, which should take about 10-15 seconds for each ball. Place the shaped eggs on a parchment-lined baking sheet, ensuring there’s space between them for ease of coating later on.
Step 4: Chill
Refrigerate the shaped eggs for about 1 hour, allowing them to firm up nicely. This step is essential for creating a sturdy base for dipping, ensuring your Easter Egg Oreo Cookie Balls don’t lose their shape when coated. You’ll know they’re ready when they feel firm to the touch for a perfect coating process.
Step 5: Melt Coating
While the eggs chill, slowly melt the white candy coating in a microwave-safe bowl. Heat it in 30-second intervals, stirring between each until the coating is smooth and fully melted. This should take about 1-2 minutes total. Be careful not to overheat, as that can make the coating clumpy and difficult to work with.
Step 6: Dip Eggs
Remove the chilled eggs from the refrigerator and dip each one into the melted coating. Use a fork to lift them out, letting any excess coating drip off. Place the coated eggs back onto the parchment paper, ensuring they are spaced apart to prevent sticking. This process should be quick to maintain the shape of your Easter Egg Oreo Cookie Balls.
Step 7: Decorate
Melt any additional candy coating and add gel icing colors to create vibrant hues for decoration. Drizzle this colorful coating over the set eggs, being creative with your designs. Before the coating hardens, sprinkle on fun toppings like sprinkles or sanding sugar to add a festive touch to your delicious Easter treats.
Step 8: Store
Once decorated, transfer the Easter Egg Oreo Cookie Balls to an airtight container and store them in the refrigerator. They’ll keep fresh for up to a week, allowing the flavors to meld beautifully. Enjoy these delightful no-bake treats at your Easter celebrations, a sweet reminder of the joy of springtime festivities!
Storage Tips for Easter Egg Oreo Cookie Balls
Fridge: Store the Easter Egg Oreo Cookie Balls in an airtight container in the refrigerator for up to 1 week. This keeps them fresh and allows the flavors to meld beautifully.
Freezer: For longer storage, freeze the coated cookie balls in a single layer on a baking sheet, then transfer to a freezer-safe bag. They can last up to 3 months.
Reheating: No reheating is necessary, but if you prefer them soft, allow the frozen cookie balls to thaw in the fridge for a few hours before serving.
Serving Tip: Bring them to room temperature before enjoying; this enhances their creamy filling and brings out the delightful flavors.
Helpful Tricks for Easter Egg Oreo Cookie Balls
-
Crush Thoroughly: Ensure your Golden Oreos are ground into fine crumbs; larger pieces can result in cracks in the candy coating.
-
Room Temperature Cheese: Always use softened cream cheese for a smooth dough; cold cream cheese leads to a lumpy texture in your Easter Egg Oreo Cookie Balls.
-
Smooth Coating: If the candy coating thickens, stir in a teaspoon of coconut oil to keep it glossy and easy to dip.
-
Chill Time: Don’t skip the chilling step! Letting the shaped eggs firm up properly helps them maintain their form during coating.
-
Vibrant Colors: Work with small batches of colored coating to maintain vibrancy and prevent the colors from fading as they sit.
What to Serve with Easter Egg Oreo Cookie Balls?
These delightful no-bake treats bring joy to your table, and pairing them with the right sides enhances the festive spirit.
- Fruit Salad: A vibrant mix of seasonal fruits balances out the sweetness and adds freshness to your dessert table.
- Chocolate Bark: Rich, crunchy chocolate bark complements the creamy cookie balls, enhancing the chocolate experience for your guests.
- Mini Carrot Cakes: These bite-sized treats echo the Easter theme and create a lovely contrast with the rich, creamy cookie balls.
- Vanilla Ice Cream: A scoop of vanilla ice cream offers a creamy companion that beautifully contrasts the texture of the cookie balls.
- Sparkling Lemonade: The zesty, refreshing fizz of lemonade is the perfect drink to cleanse the palate and brighten up your dessert spread.
- Peanut Butter Cup Brownies: Indulge your guests with fudgy brownies topped with peanut butter cups for a rich treat that pairs excellently with the Oreo flavors.
Each option enhances the festive mood, ensuring that your Easter celebration is filled with flavor and fun!
Make Ahead Options
These Easter Egg Oreo Cookie Balls are perfect for meal prep enthusiasts! You can prepare the cookie mixture up to 24 hours in advance; simply crush the Oreos and mix them with softened cream cheese, then roll into egg shapes and refrigerate. Additionally, you can coat them up to 3 days before serving; just ensure they are stored in an airtight container in the fridge to maintain freshness. When you’re ready to enjoy, simply melt the white candy coating and dip the chilled eggs, then decorate before serving. With these make-ahead tips, you’ll save time while delighting your family with these delicious Easter treats!
Easter Egg Oreo Cookie Balls Variations
Get creative with these Easter Egg Oreo Cookie Balls by customizing flavors and textures for your family’s unique taste!
-
Dairy-Free: Substitute cream cheese with dairy-free cream cheese and use dairy-free coatings for lactose-free treats.
-
Chocolate Lovers: Swap out Golden Oreos for Chocolate Oreos to intensify the chocolate flavor, creating a delightful rich profile.
-
Spicy Touch: Add a pinch of cayenne pepper to the cream cheese mixture for an unexpected kick that balances the sweetness.
-
Fruity Flavor: Mix in small amounts of fruit-flavored extracts like raspberry or lemon to the cream cheese for a fruity twist.
-
Nutty Crunch: Fold in crushed nuts, such as almonds or pecans, into the filling for added texture and a nutty flavor boost.
-
Colorful Coating: Use a mix of candy melts in various colors to coat the balls for a vibrant presentation on your dessert table.
-
Edible Glitter: For a magical touch, sprinkle edible glitter on the melted coating before it sets for a shimmering effect.
-
Coconut Delight: Roll the coated balls in shredded coconut after dipping for a tropical flair that adds both flavor and texture.
Let your imagination run wild, and if you’re in the mood for other festive treats, pairing these with Sausage Egg Breakfast or trying out some Salted Caramel Cookies could really enhance your holiday celebrations!

Easter Egg Oreo Cookie Balls Recipe FAQs
How do I select the best Oreos for this recipe?
Absolutely! For the richest flavor, I recommend using Golden Oreos, but if you’re after a deeper chocolate taste, Chocolate Oreos work wonderfully as well. Just make sure they are fresh—look for any dark spots or signs of aging on the packaging.
What is the best way to store Easter Egg Oreo Cookie Balls?
You can keep your Easter Egg Oreo Cookie Balls in an airtight container in the refrigerator for up to a week. This not only maintains their freshness but allows the taste to mature beautifully. Just place a piece of parchment paper between layers if stacking them to keep the coating intact!
Can I freeze these cookie balls for later use?
Yes, indeed! To freeze your Easter Egg Oreo Cookie Balls, place them in a single layer on a baking sheet and freeze until solid, about 1-2 hours. Once frozen, transfer them to a freezer-safe bag. They can last up to 3 months in the freezer. For serving, simply let them thaw in the refrigerator for a few hours.
What should I do if my candy coating is too thick?
If your coating thickens while melting, no worries! Simply stir in about a teaspoon of coconut oil or vegetable shortening to thin it back out. This tip helps keep your coating smooth and ensures an easy dipping process, so your Easter Egg Oreo Cookie Balls come out picture-perfect!
Are these cookie balls safe for kids and those with allergies?
Very! Easter Egg Oreo Cookie Balls are generally kid-friendly and vegetarian. However, be mindful of allergies—especially to dairy and gluten, as they contain cream cheese and cookies. If you’re serving to kids, it’s always good to double-check with parents about any past allergic reactions.
Can my pet have any of these treats?
It’s best to keep these cookie balls away from pets. The cream cheese and chocolate in the cookie balls may not be safe for animals, especially dogs. Always opt for pet-safe treats when sharing the love with your furry friends!
Eager to try the recipe? Enjoy these delightful treats, and let the festive spirit run wild!
Easter Egg Oreo Cookie Balls That Everyone Will Love
Ingredients
Equipment
Method
- Begin by crushing the Golden Oreos into fine crumbs using a food processor.
- In a large mixing bowl, combine the crushed Oreos with softened cream cheese and mix until a cohesive dough forms.
- Scoop about 1½ tablespoons of the mixture and roll it into egg-shaped ovals.
- Refrigerate the shaped eggs for about 1 hour to firm them up.
- Melt the white candy coating in a microwave-safe bowl, heating in 30-second intervals.
- Dip each egg into the melted coating and place them back on parchment paper.
- Melt any additional coating and add gel icing colors, drizzle over the set eggs and sprinkle toppings.
- Store in an airtight container in the refrigerator.
Leave a Reply