As I set foot into the vibrant scene of spring, the excitement in the air feels electric, especially with Easter just around the corner. This season calls for a dessert that mirrors the bright blooms and joyous celebrations, and that’s where my No Bake Easter JELLO Cheesecake comes in. With its dazzling pastel layers and airy, creamy texture, this delightful dessert is a showstopper for gatherings, making it a breeze to prepare and a hit with all ages. Not only is it a visual delight, but its no-bake nature means you can whip it up without turning on the oven! Imagine making memories with loved ones while enjoying a slice of this refreshing treat. Are you ready to transform your holiday table with this colorful culinary masterpiece?
Why is this Easter dessert a must-try?
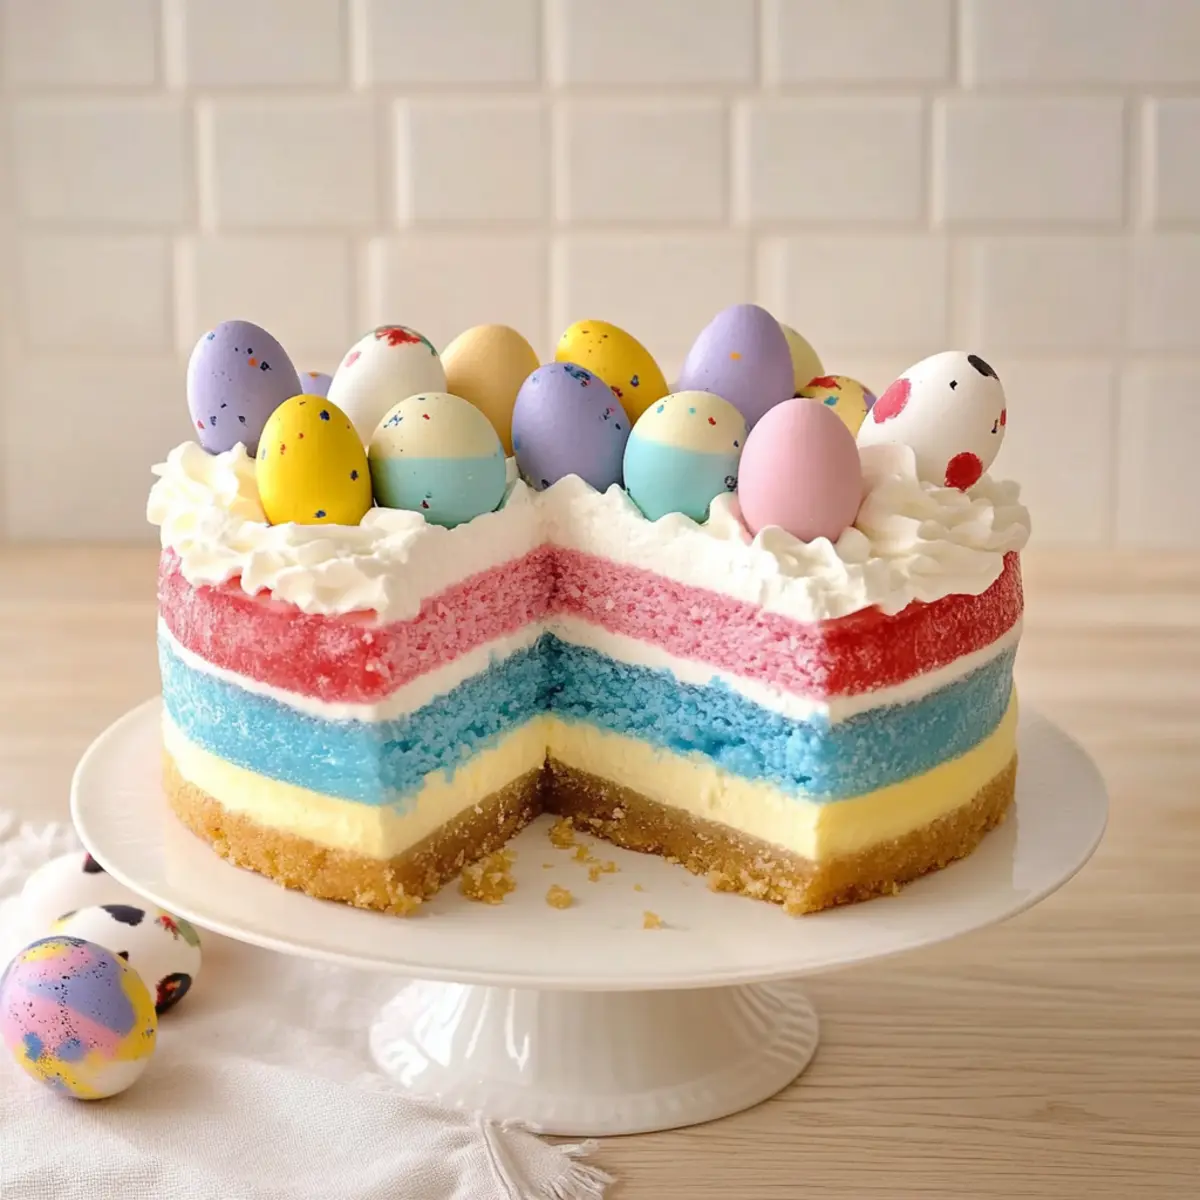
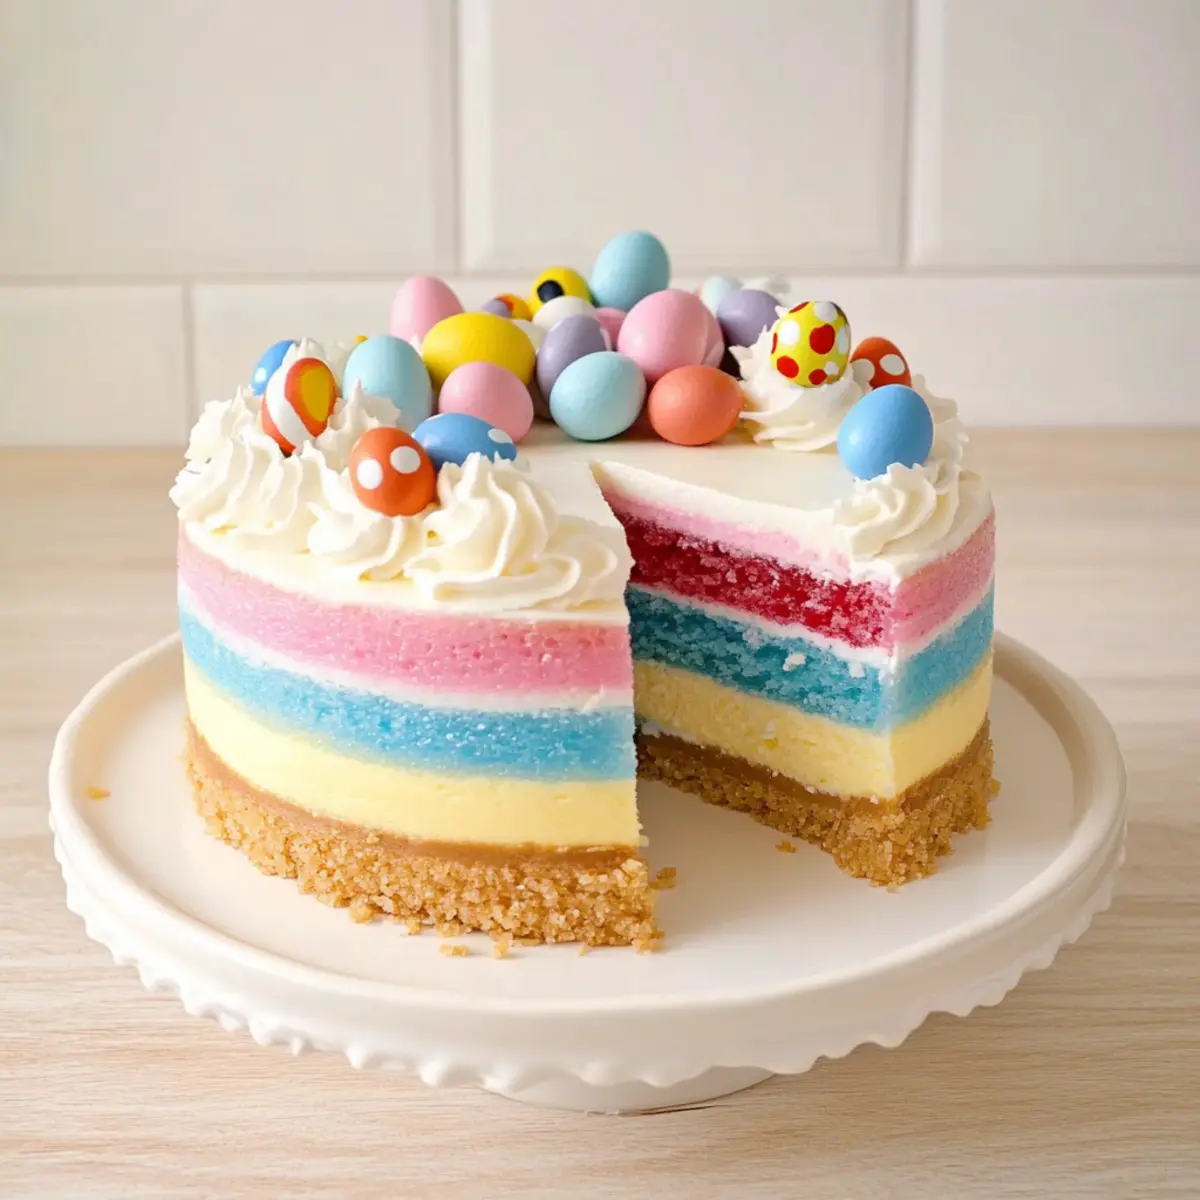
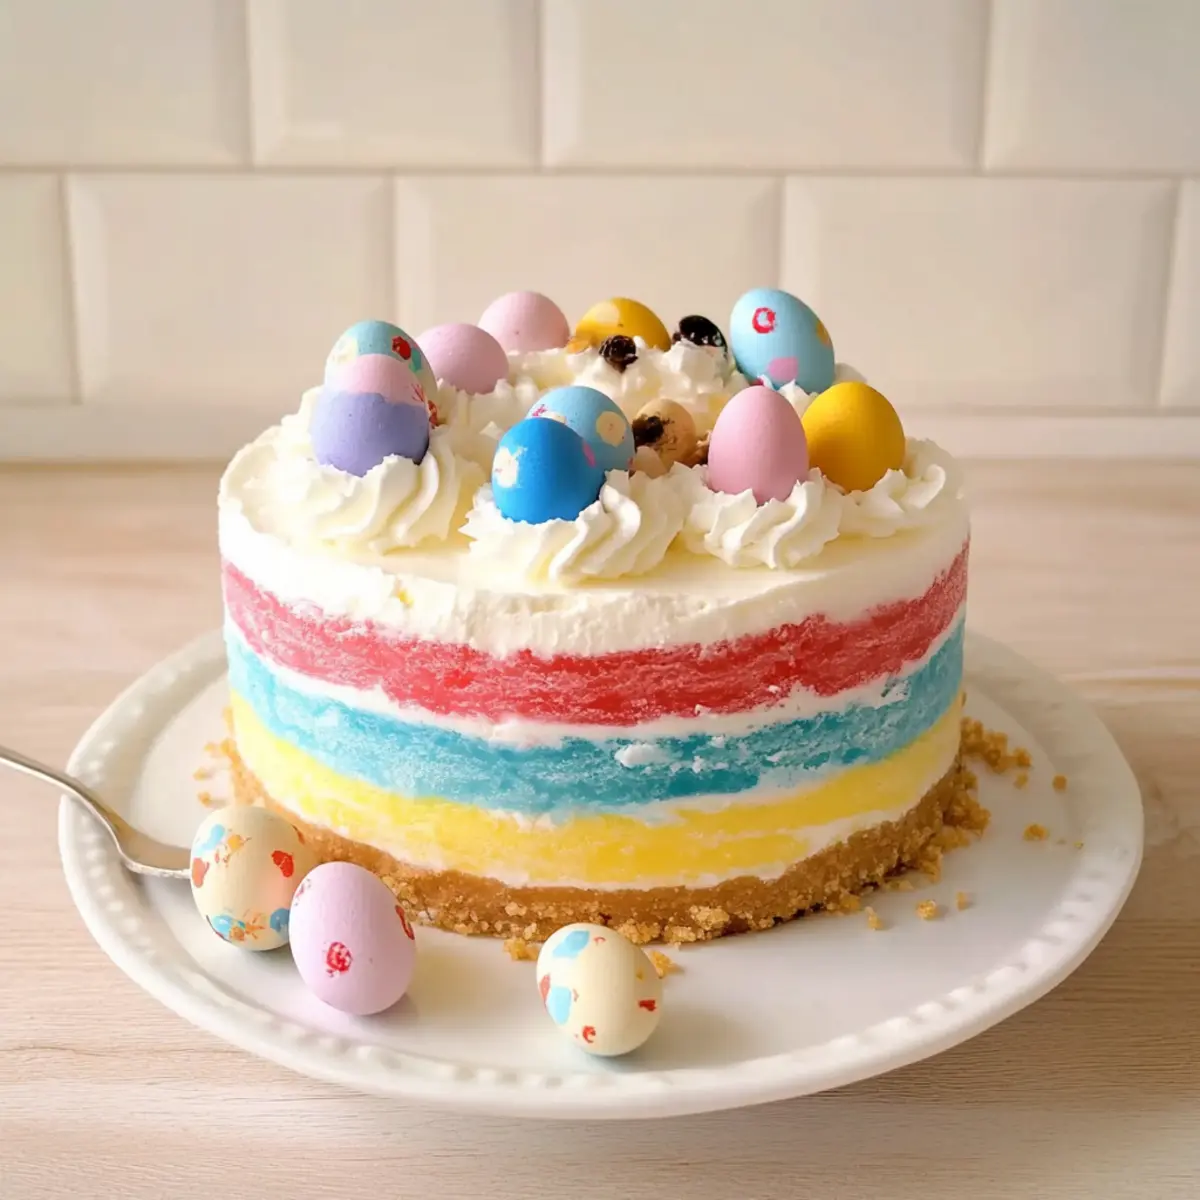
Vibrant Layers: Each slice of this Easter JELLO Cheesecake showcases stunning pastel layers that not only look beautiful but also delight the taste buds.
No-Bake Convenience: Enjoy a hassle-free dessert experience as this recipe requires no oven time, making it perfect for busy holiday preparations.
Crowd-Pleasing Flavor: The light, fluffy texture paired with sweet fruity flavors guarantees that family and friends of all ages will be coming back for seconds!
Easy to Customize: Change up the colors and flavors by using different Jell-O varieties or toppings like fresh berries or sprinkles for a personal touch.
Perfect for Spring Gatherings: With its bright appearance, this cheesecake is sure to be the star of any Easter celebration—just like our Caramel Crunch Cheesecake or Strawberry Crunch Cheesecake can be!
Easter JELLO Cheesecake Ingredients
• Get ready to make this delightful dessert come to life!
For the Cheesecake Base
- Jell-O Classic No-Bake Cheesecake Mix – Creates a smooth cheesecake base; feel free to swap for any no-bake cheesecake mix.
- Cooking Spray – Ensures easy release from the springform pan; parchment paper lining also works well.
For the Blue Layer
- Blue Jell-O Powder (3 tablespoons) – Adds a vibrant blue layer; substitute with any other flavor for a unique twist.
- Boiling Water (⅓ cup) – Dissolves the Jell-O powder; must be boiling for proper activation.
- Ice Cold Water (½ cup) – Cool down the Jell-O mixtures, ensuring a perfect texture.
For the Red Layer
- Strawberry or Cherry Jell-O Powder (3 tablespoons) – Provides a contrasting red layer; use other fruit-flavored Jell-O for different tastes.
- Boiling Water (½ cup) – Necessary for dissolving the red Jell-O powder; maintain boiling.
- Ice Cold Water (½ cup) – Essential for cooling the red Jell-O mixture before mixing.
For the Topping
- Cool Whip (3 tubs, 8 oz each) – Offers a fluffy texture for the layers and topping; homemade whipped cream can be a delightful alternative.
- Cadbury Pastel Mini Eggs (optional) – A decorative topping that adds a festive touch; consider sprinkles, shredded coconut, or fresh berries as alternatives.
Step‑by‑Step Instructions for Easter JELLO Cheesecake
Step 1: Prepare the Springform Pan
Begin by greasing a 9-inch springform pan with cooking spray to prevent sticking. Ensure the entire interior surface is coated evenly. This crucial step guarantees that your stunning Easter JELLO Cheesecake releases smoothly, so you’ll have a perfect presentation.
Step 2: Make the Crust
Following the package instructions for the Jell-O Classic No-Bake Cheesecake mix, prepare the crust and press it firmly into the bottom of the springform pan. Once you have an even layer, chill the pan in the refrigerator for about 30 minutes to help it set properly and create a stable foundation for the colorful layers.
Step 3: Prepare Blue Layer
In a mixing bowl, dissolve 3 tablespoons of blue Jell-O powder in ⅓ cup of boiling water. Stir until the powder is fully dissolved. Next, add ½ cup of ice cold water to cool the mixture down. Once cooled, gently fold in one tub of Cool Whip until well combined, creating a fluffy blue layer for your Easter JELLO Cheesecake.
Step 4: Set Blue Layer
Spread the blue mixture evenly over the chilled cheesecake crust in the springform pan. Place the pan back into the refrigerator and allow the blue layer to set for at least 2 hours. This time allows the layer to solidify, giving your cheesecake the beautiful structure it needs for the next layer.
Step 5: Prepare Red Layer
While the blue layer is setting, repeat the process for the red layer. Dissolve 3 tablespoons of strawberry or cherry Jell-O powder in ½ cup of boiling water, stirring until dissolved. Then, mix in ½ cup of ice cold water, cool slightly, and fold in another tub of Cool Whip, creating a vibrant and delicious topping for your Easter JELLO Cheesecake.
Step 6: Add Red Layer
Once the blue layer has set, carefully spread the red mixture over the top. Be gentle to maintain the layers’ distinction. Once evenly spread, return the cheesecake to the refrigerator and let it chill for an additional 4 hours, or preferably overnight, to ensure all layers are firm and well-integrated.
Step 7: Topping
After the cheesecake has fully chilled, spread the last tub of Cool Whip on top, creating a delightful cloud-like finish. For an additional festive touch, sprinkle Cadbury pastel mini eggs or any other decorative toppings you prefer. This final layer adds not just visual appeal but enhances the fun spirit of your Easter JELLO Cheesecake.
What to Serve with No Bake Easter JELLO Cheesecake
Elevate your Easter gathering with delightful pairings that complement the sweet, creamy goodness of this vibrant dessert.
- Fresh Fruit Salad: A refreshing mix of seasonal fruits balances the cheesecake’s sweetness and adds a burst of color to your table.
- Chocolate-Covered Strawberries: These treats provide a rich chocolate contrast to the light cheesecake, making each bite a harmonious delight.
- Mini Carrot Cakes: Adding a classic Easter favorite offers a cozy flavor profile that beautifully accompanies the cheerful JELLO layers.
- Lemonade or Iced Tea: Serve chilled beverages that balance the sweetness of the cheesecake and provide a refreshing sip on warm spring days.
- Coconut Macaroons: These chewy cookies provide a delightful texture contrast, pairing well with the fluffy layers of the cheesecake.
- Vanilla Bean Ice Cream: A scoop of creamy ice cream turns your dessert into an indulgent experience, enhancing the overall flavor and enjoyment.
- Mimosa Bar: Sparkling beverages with a splash of citrus will bring a festive flair, perfect for toasting during your holiday celebration.
- Pistachio Pudding: This creamy, nutty dessert offers a unique twist that complements the Easter JELLO Cheesecake beautifully, adding to the vibrant color theme.
- Sugar Cookies: Light and sweet, these cookies echo the festivities and make a playful addition to your dessert spread.
Expert Tips for Easter JELLO Cheesecake
-
Cool Before Mixing: Always allow each Jell-O mixture to cool before folding in the Cool Whip; this ensures the layers hold their texture perfectly.
-
Knife Technique: For clean slices, rinse your knife in hot water before each cut through the cheesecake; this avoids messy edges and keeps layers intact.
-
Layering Patience: Resist the urge to rush the chilling time; letting each layer set fully creates that beautiful, distinct layering effect in your Easter JELLO Cheesecake.
-
Chill Until Serving: Keep your cheesecake in the refrigerator until serving to maintain its light, fluffy texture—nobody enjoys a warm cheesecake!
-
Custom Flavors: Don’t hesitate to experiment with different Jell-O flavors or colors; your creativity can lead to a unique Easter JELLO Cheesecake every time!
Make Ahead Options
These delightful Easter JELLO Cheesecake layers are perfect for meal prep, allowing you to save valuable time on your festive celebration day! You can prepare the crust and both the blue and red layers up to 24 hours in advance. Just make sure to follow the instructions for resting in the fridge to keep their fluffy textures. Once assembled, refrigerate the cheesecake (covered) for up to 3 days before serving. To finish, simply add the final layer of Cool Whip and your decorative toppings right before it’s time to gather around the table. This way, you can enjoy the celebration while knowing you’ve created a stunning dessert that’s just as delicious as if made on the day!
Easter JELLO Cheesecake Variations & Substitutions
Feel free to indulge your creativity with delightful twists and variations in this joyful cheesecake recipe!
-
Colorful Layers: Substitute blue Jell-O with lemon Jell-O for a bright yellow layer! The sunny color not only looks beautiful but adds a refreshing flavor to your cheesecake.
-
Flavor Fusion: Try using grape Jell-O for a purple layer! The unique flavor can add a fun twist that intrigues the taste buds at your spring gathering.
-
Homemade Whipped Cream: Instead of using Cool Whip, make your own whipped cream with heavy cream and a touch of powdered sugar. It adds a rich, homemade touch while allowing you to control the sweetness.
-
Berry Toppings: Get creative with toppings! Instead of Cadbury mini eggs, consider fresh strawberries, blueberries, or raspberries. These fruits provide a burst of flavor and vibrant color that complements the cheesecake beautifully.
-
Coconut Whipped Cream: For a tropical flair, top your cheesecake with coconut whipped cream. Simply mix the heavy cream with coconut milk for a delightful twist that embodies the spirit of spring.
-
Nutty Crunch: Add a layer of crushed nuts (such as macadamia or almonds) between the cheesecake layers for a delightful crunch. It creates a fun texture that makes each bite even more enjoyable.
-
Lemon Zest Kick: Incorporate some lemon zest into the Cool Whip for a zesty burst of flavor. This little addition can elevate the creaminess of the dessert for an extra refreshing bite!
-
Sugar-Free Twist: For those looking for a healthier option, try using sugar-free Jell-O and a sugar-free whipped topping. It’s a great way to enjoy this festive dessert without the added sugar.
As you venture into these variations, let your imagination run wild! You’ll find the perfect balance that resonates with your family’s tastes. If you’re interested in exploring more cheesecake ideas, don’t forget to check out our Cheesecake Pumpkin Swirl or our delightful Caramel Crunch Cheesecake recipes!
Storage Tips for Easter JELLO Cheesecake
Fridge: Store leftovers in the refrigerator for up to 3 days, covered to maintain moisture and freshness. This ensures your Easter JELLO Cheesecake stays creamy and delicious!
Freezer: For longer storage, you can freeze individual slices wrapped tightly in plastic wrap and then aluminum foil. This will keep them fresh for up to 2 months.
Reheating: If desired, thaw frozen slices in the refrigerator overnight before serving. Enjoy chilled for the best texture and flavor experience!
Presentation: For neat slices, briefly freeze the cheesecake before cutting; this allows for clean, beautiful pieces that showcase those vibrant layers.

Easter JELLO Cheesecake Recipe FAQs
What’s the best way to select Jell-O powders?
Absolutely! When choosing Jell-O powders, look for those with vibrant colors and a fresh scent. Avoid any packets with visible dark spots or damage. Make sure to check the expiration date to guarantee the best flavor for your Easter JELLO Cheesecake!
How should I store my Easter JELLO Cheesecake leftovers?
Very good question! Store any leftovers in the refrigerator for up to 3 days, covering the cake to retain moisture. If you notice that the surface starts to dry, consider applying a light layer of Cool Whip before covering for added moisture and preservation.
Can I freeze leftover slices, and how should I do it?
Yes, you can freeze this delightful dessert for extended enjoyment! Wrap individual slices tightly in plastic wrap, followed by aluminum foil to prevent freezer burn. You can store them for up to 2 months. When you’re ready to enjoy a slice, simply thaw in the refrigerator overnight for the best texture.
What should I do if my layers don’t set properly?
No worries! If your layers haven’t set, it may be due to insufficient chilling time or the mixtures being too warm before layering. Ensure each mixture cools down before adding it to the previous layer, and allow ample time for each layer to set in the refrigerator—at least 2 hours for blue and 4 hours (or overnight) for the whole cheesecake.
Are there any dietary considerations for this Easter JELLO Cheesecake?
Definitely! This recipe contains dairy and is not suitable for those with lactose intolerance. To make a dairy-free version, substitute the Cool Whip with a dairy-free whipped cream alternative and ensure all Jell-O powders are dairy-free too. Always check labels for allergens like gluten if that’s a concern for you!
What can I substitute for Cool Whip in this recipe?
If you’re looking for alternatives, I often make my own whipped cream by whipping heavy cream with a touch of powdered sugar and vanilla extract until soft peaks form. This will give you a fresh and creamy topping for your Easter JELLO Cheesecake that tastes amazing while also being a more natural option!
Delightful Easter JELLO Cheesecake for a Spring Celebration
Ingredients
Equipment
Method
- Prepare the Springform Pan: Grease a 9-inch springform pan with cooking spray to prevent sticking.
- Make the Crust: Prepare the Jell-O Classic No-Bake Cheesecake mix as per instructions and press into the bottom of the pan. Chill for about 30 minutes.
- Prepare Blue Layer: Dissolve blue Jell-O powder in boiling water. Add ice cold water and fold in Cool Whip.
- Set Blue Layer: Spread the blue mixture over the crust and chill for at least 2 hours.
- Prepare Red Layer: Dissolve red Jell-O powder in boiling water. Mix in ice cold water and fold in Cool Whip.
- Add Red Layer: Spread the red mixture on top of the blue layer and chill for an additional 4 hours or overnight.
- Topping: Spread the last tub of Cool Whip on top and decorate with Cadbury pastel mini eggs or other toppings.
Leave a Reply