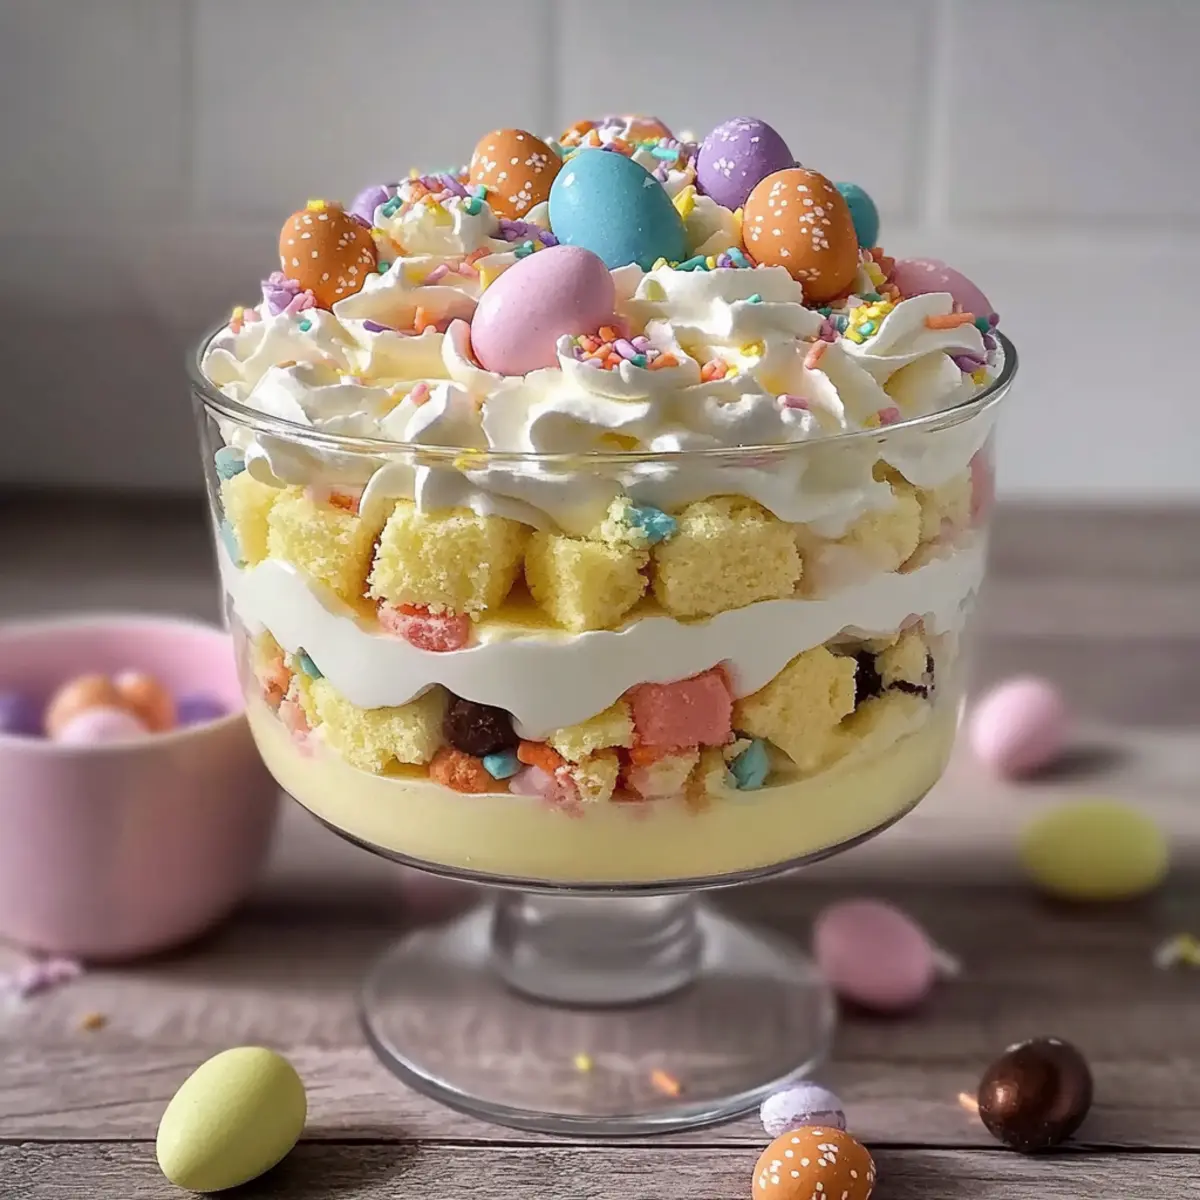
As I stood in my kitchen, the sun streaming through the window, I felt a spark of joy thinking about the vibrant colors of spring and what they could bring to our Easter gathering. This is where my Colorful Easter Trifle Dessert comes in—a showstopper with its delightful layers of pastel cake, creamy pudding, and fluffy whipped topping! Not only is this trifle a fantastic centerpiece to impress your guests, but it also requires minimal effort—allowing you to spend quality time with your loved ones instead of being tethered to the oven. The best part? It’s a no-bake dessert that highlights the season’s freshness, making it an easy crowd-pleaser. Ready to add a splash of cheer to your holiday table? Let’s dive into this fun and festive recipe that will surely bring smiles all around!

Why is This Easter Trifle Special?
Colorful, Festive Layers: Each spoonful of this trifle reveals vibrant cake cubes and silky pudding, reflecting the spirit of spring in every bite.
Effortlessly Delicious: No-bake and easy to whip up, this recipe is perfect for those who want to impress without spending hours in the kitchen.
Versatile Flavor Options: Feel free to experiment with different pudding flavors or add a delicious twist with crushed cookies between layers.
Make-Ahead Marvel: You can prepare it up to 24 hours in advance, allowing you to enjoy the festivities stress-free.
Crowd-Pleasing Appeal: Ideal for any gathering, this dessert is sure to become a staple at your spring celebrations, just like my Caramel Apple Pie and Strawberry Crunch Cheesecake.
Easter Trifle Dessert Ingredients
• Here’s everything you need to create a delightful Easter Trifle Dessert!
For the Cake Layers
- White or Yellow Cake Mix – Provides the base structure and sweetness; a box mix simplifies the process.
- Pink, Yellow, Green, Blue Food Coloring – Adds a festive, pastel hue to each layer; gel coloring ensures even consistency.
For the Pudding Filling
- Instant Vanilla or White Chocolate Pudding Mix – Creates a creamy, rich flavor; two boxes ensure you have enough layers.
- Cold Milk – Activates the pudding mix to form a thick filling; whole milk yields the best texture.
For the Whipped Topping
- Whipped Topping – Offers a light, fluffy texture; feel free to substitute with stabilized homemade whipped cream for a more gourmet touch.
For Decoration
- Mini Chocolate Eggs – Fun and decorative; optional, but they add a playful touch to your trifle.
- Pastel Sprinkles – Perfect for enhancing the festive look; use sparingly for the best aesthetic appeal.
- Edible Flowers – An optional natural decorative element that elevates the trifle’s presentation.
Bring the joy of spring to your table with this colorful Easter Trifle Dessert, a no-bake creation that’s as delightful to make as it is to eat!
Step‑by‑Step Instructions for Easter Trifle Dessert
Step 1: Prepare Cake Batter
Start by following the instructions on the box for your white or yellow cake mix. In a large mixing bowl, combine the cake mix with eggs, oil, and water, beating until fully blended. The batter should be smooth and lump-free, taking about 2-3 minutes. Preheat your oven to 350°F (175°C) while mixing.
Step 2: Color Cake Layers
Once the batter is well-mixed, divide it into separate bowls—one for each color you want to use. Add your chosen food coloring to each bowl, aiming for soft pastel hues. Stir gently until the color is evenly incorporated, then pour the individual batters into greased round cake pans. Aim for even layers for a beautiful trifle.
Step 3: Bake Layers
Place the cake pans in the preheated oven and bake for 25-30 minutes, or until a toothpick inserted into the center comes out clean. As the layers bake, they will rise beautifully and turn a lovely golden color. Once done, remove them from the oven and allow to cool in the pans for about 10 minutes before transferring to wire racks.
Step 4: Make Pudding
In a medium bowl, whisk together the instant vanilla or white chocolate pudding mix with cold milk. Whisk vigorously for about 2 minutes until the mixture thickens and becomes smooth. Cover the bowl and place it in the refrigerator for at least 10 minutes to chill and firm up, ensuring a perfect layer in your Easter trifle.
Step 5: Assemble Trifle
Once your cake layers are cooled and the pudding is set, it’s time to layer your Easter Trifle Dessert. Begin by cutting the cake into cubes, then place a layer of cake cubes at the bottom of a large trifle dish. Follow this with a generous layer of pudding, then your whipped topping. Repeat this process until all components are used, finishing with whipped topping on top.
Step 6: Decorate
Now for the fun part! Spread the remaining whipped topping evenly over the top of your assembled trifle. Decorate with mini chocolate eggs, pastel sprinkles, and edible flowers if desired. Each decorative layer adds color and cheer, making your Easter Trifle Dessert a stunning centerpiece for your spring celebrations.
Step 7: Chill Before Serving
Once decorated, cover the trifle and place it in the refrigerator for at least 2-4 hours, allowing the flavors to meld together and the layers to firm up. This chilling time ensures that the dessert holds its shape when served. When ready to enjoy, simply scoop and serve – delighting your guests with this beautiful Easter Trifle Dessert!
How to Store and Freeze Easter Trifle Dessert
Fridge: Store any leftovers tightly covered in the fridge for up to 3 days. The layers may soften over time, but the flavor will remain delightful!
Make-Ahead: You can assemble the Easter Trifle Dessert up to 24 hours in advance. Just be sure to add any decorative toppings, like mini chocolate eggs or sprinkles, right before serving for optimal freshness.
Freezer: Although not ideal for freezing due to the creamy texture, if you must, freeze individual portions in airtight containers for up to 2 months. Thaw in the fridge before serving.
Reheating: There’s no need to reheat this dessert, as it’s best served chilled and fresh. Simply scoop out and enjoy the layers of joy!
What to Serve with Easter Trifle Dessert
Elevate your gathering with these delicious pairings that complement the light and festive nature of this delightful dessert.
-
Fresh Berries: Bright and juicy berries like strawberries, blueberries, or raspberries enhance the trifle’s fruitiness while adding a refreshing burst of flavor.
-
Lemon Sorbet: The tartness of lemon sorbet cuts through the sweetness of the trifle, providing a refreshing palate cleanser between bites.
-
Lightly Toasted Almonds: Crunchy, toasted almonds add a delightful contrast in texture, balancing the smoothness of the trifle with a nutty crunch.
-
Mint-Infused Iced Tea: This herbal drink brings a refreshing element to the table, perfect for a spring celebration. The mint adds a subtle invigorating touch.
-
Mini Cheesecakes: Individual cheesecake bites offer a rich counterpart to the airy trifle, pleasing those who enjoy a creamy, decadent dessert.
-
Vanilla Ice Cream: A scoop of classic vanilla ice cream beside your trifle creates a luscious, creamy experience, enhancing the dessert’s lightness.
-
Chocolate Dipped Strawberries: These elegant treats add a touch of sophistication and decadence, wonderfully contrasting with the vibrant trifle.
-
Carrot Cake: Celebrate the season with a slice of moist carrot cake, which echoes the flavors of spring and complements the trifle’s lively presentation.
-
Sparkling Lemonade: A bubbly beverage that adds a festive touch to your meal, sparkling lemonade offers a zesty sweetness to brighten up your gathering.
Make Ahead Options
These Easter Trifle Dessert layers are perfect for busy home cooks looking to save time! You can prepare the cake layers up to 24 hours in advance by baking and cooling them completely, then storing them in an airtight container at room temperature. The pudding can also be made ahead—just whisk it together and refrigerate for up to 3 days. When you’re ready to assemble, cut the cake into cubes and layer it with the chilled pudding and whipped topping. To keep this delightful dessert just as delicious, wait until right before serving to add any decorative toppings, ensuring vibrant colors stay fresh and appealing!
Expert Tips for Easter Trifle Dessert
-
Cool Cake Layers: Ensure cake layers are completely cool before cutting them into cubes. This prevents them from crumbling and maintains the trifle’s beautiful layers.
-
Chill the Pudding: Whisk the pudding until thick, then chill for at least 10 minutes. This keeps the trifle from becoming runny during assembly and helps maintain layer definition.
-
Go Easy on Color: When adding food coloring, use a small amount to achieve soft pastels. Too much can lead to overly bright, vibrant colors that detract from the festive look of your Easter Trifle Dessert.
-
Layer with Care: Alternate cake cubes, pudding, and whipped topping with each layer for a visually appealing trifle. This creates a stunning presentation when served.
-
Store Properly: Keep any leftovers tightly covered in the fridge for up to 3 days. However, be aware that layers may soften over time, so enjoy them fresh for the best texture!
Easter Trifle Dessert Variations
Feel free to put your personal touch on this festive dessert and make it your own!
- Flavorful Pudding Swap: Substitute the vanilla pudding with lemon or cheesecake for a refreshing twist. This adds a tangy brightness to your trifle!
- Crunchy Texture Boost: Incorporate crushed cookies or crumbled graham crackers between layers for added texture—everyone loves a little crunch!
- Mini Trifle Delight: Create individual mini trifles by serving in clear cups for easy handling at picnics or gatherings. They’re perfect little portions!
- Fruit Layers: Add layers of fresh berries like raspberries or strawberries between the cake and pudding. This adds a juicy burst of flavor!
- Nutty Addition: Sprinkle chopped nuts such as almonds or walnuts for a delightful crunch and flavor contrast. The nutty richness rounds out the layers beautifully!
- Chocolate Fans: Drizzle chocolate sauce over pudding layers for an indulgent twist that chocolate lovers will adore. It’s decadently delicious!
- Spiced Up Layers: Mix a bit of cinnamon or nutmeg into the cake batter for a warm, cozy flavor. The spices will warm up the vibrant feeling of spring!
For a sweet ending, consider pairing this trifle with my delightful Caramel Apple Pie or the playful Strawberry Crunch Cheesecake. Each variation allows you to create a new twist while celebrating the spirit of the season!

Easter Trifle Dessert Recipe FAQs
What type of cake mix should I use for the Easter Trifle Dessert?
You can use either white or yellow cake mix for this recipe, providing a sweet base structure. I often go for a box mix as it simplifies the process, but feel free to use a homemade recipe if you prefer!
How should I store my Easter Trifle Dessert?
Store any leftovers tightly covered in the fridge for up to 3 days. Be mindful that the layers may soften over time; the flavors remain delightful, but for the best presentation, enjoy within the first couple of days.
Can I make the Easter Trifle Dessert ahead of time?
Absolutely! You can assemble the trifle up to 24 hours in advance. Just remember to add decorative toppings, such as mini chocolate eggs or sprinkles, right before serving for optimal freshness and a festive look.
Is it possible to freeze the Easter Trifle Dessert?
While it’s not ideal for freezing, you can portion out individual servings into airtight containers and freeze them for up to 2 months. To enjoy, simply thaw the portions in the fridge overnight. It should still taste great, but the texture may be a bit different than when enjoyed fresh.
Are there any dietary considerations for the Easter Trifle Dessert?
Yes! This dessert is vegetarian-friendly due to its ingredient composition. However, if you have food allergies, be sure to check the labels on your cake mix and pudding for potential allergens like gluten or dairy. If needed, you can adapt the ingredients to cater to specific dietary preferences easily.
What should I do if my pudding isn’t thickening properly?
If your pudding isn’t thickening, ensure you’re using cold milk and whisk it vigorously for the full 2 minutes as directed. If it still seems runny, refrigerate it for an additional 10-15 minutes to allow it to set further. A thick pudding layer is essential for maintaining layer integrity in your beautiful Easter Trifle Dessert!

Easter Trifle Dessert: A Colorful Delight for Spring Celebrations
Ingredients
Equipment
Method
- Step 1: Prepare Cake Batter - Follow the instructions on the box for your cake mix. In a mixing bowl, combine the cake mix with eggs, oil, and water, mixing until smooth.
- Step 2: Color Cake Layers - Divide the batter into separate bowls for each color, adding food coloring. Stir until evenly colored.
- Step 3: Bake Layers - Preheat oven to 350°F (175°C). Pour colored batter into greased pans and bake for 25-30 minutes, or until a toothpick comes out clean.
- Step 4: Make Pudding - Whisk together pudding mix and milk for about 2 minutes until thick. Chill for at least 10 minutes.
- Step 5: Assemble Trifle - Cut cake into cubes and layer in a trifle dish with pudding and whipped topping, repeating until all components are used.
- Step 6: Decorate - Spread remaining whipped topping and add decorations like chocolate eggs and sprinkles.
- Step 7: Chill Before Serving - Cover and refrigerate for 2-4 hours before serving to allow flavors to meld.
Leave a Reply