As the golden leaves of autumn begin to blanket the ground, the cozy allure of hearty meals beckons. That’s when I can’t resist diving into a dish like Potatoes Au Gratin, a true symphony of creamy goodness that feels like a hug on a chilly day. This vegetarian-friendly recipe transforms simple potatoes into a show-stopping side, featuring a rich garlic-infused cheese sauce and a crunchy topping that has everyone reaching for seconds. With its quick prep and universal appeal, this dish is perfect for gatherings that call for something comforting yet elegant. Are you ready to elevate your culinary game with these ultimate cheesy potatoes? Let’s get cooking!
Why Are You Going to Love This Dish?
Comforting, indulgent flavors: Each bite of these creamy Potatoes Au Gratin delivers a warm embrace, thanks to rich, garlic-infused cheese that you’ll crave all season long.
Crowd-pleasing appeal: This recipe is perfect for gatherings, making it an instant hit that disappears quickly—just like my Savory Rosemary Cookies!
Quick prep time: With simple steps and easy-to-find ingredients, you’ll spend less time in the kitchen and more time enjoying delicious food with friends and family.
Versatile variations: Customize it by swapping garlic for caramelized onions or adding fresh herbs like thyme; the possibilities are endless, making these potatoes adaptable to your tastes.
Impressive presentation: The golden-brown crust on top doesn’t just look appealing; it provides a satisfying crunch that’s reminiscent of gourmet dining—perfect for making any meal special!
Gear up to impress everyone at your next dinner with this Ultimate Creamy and Cheesy Potatoes Au Gratin recipe!
Potatoes Au Gratin Ingredients
For the Gratin
• Unsalted Butter – 4 tablespoons, adds richness and flavor. Substitution: Use salted butter but reduce added salt.
• Russet Potatoes – 3 pounds, provides the structure and texture for the gratin. Note: Avoid waxy potatoes like red-skinned varieties for optimal creaminess and absorption of flavors.
• Heavy Cream – 1 cup, creates a rich and luscious sauce. Substitution: Half-and-half can be used for a lighter version, but flavor will differ.
• Shredded White Cheddar Cheese – ½ cup, enhances creaminess and adds depth of flavor. Substitution: Use sharp cheddar for a sharper flavor.
• Grated Parmesan Cheese – 6 tablespoons total, adds a salty bite and contributes to the crispy top. Tip: Reserve some for topping before baking.
• Garlic Cloves – 3, minced, delivers aromatic flavor to the dish. Substitution: Garlic powder if fresh is unavailable.
• Salt and Pepper – essential for seasoning. Tip: Adjust to taste based on preference.
Optional Topping
• Additional Parmesan Cheese – for sprinkling on top, ensures a beautiful, crispy finish. Tip: Broil briefly at the end for extra goldenness.
Elevate your dining experience with these cheesy potatoes that are bound to become a favorite!
Step‑by‑Step Instructions for Ultimate Creamy and Cheesy Potatoes Au Gratin
Step 1: Preheat and Prepare
Preheat your oven to 375˚F (190˚C). While it’s heating up, grab a baking dish and grease it generously with 2 tablespoons of unsalted butter to ensure the gratin doesn’t stick. This step is crucial for achieving that delightful crust in your Ultimate Creamy and Cheesy Potatoes Au Gratin.
Step 2: Slice the Potatoes
Using a mandolin or a sharp knife, thinly slice the 3 pounds of russet potatoes to about 1/8 inch thick. Uniform slices will ensure that the potatoes cook evenly and absorb that luscious cheese sauce beautifully. Aim for a consistent texture, which is key for a creamy gratin that everyone will love.
Step 3: Mix the Cheese Sauce
In a large mixing bowl, combine 1 cup of heavy cream, ½ cup of shredded white cheddar cheese, and 4 tablespoons of grated Parmesan cheese along with the minced garlic. Stir until well blended, creating a rich cheese sauce that will coat your potatoes. This mixture is what makes the potatoes au gratin so irresistibly creamy and flavorful.
Step 4: Coat the Potatoes
Add the sliced potatoes to the cheese mixture, ensuring each slice is evenly coated. This step allows the potatoes to soak up the creamy goodness, enhancing the flavor throughout. It’s a critical part of the process that guarantees the Ultimate Creamy and Cheesy Potatoes Au Gratin is loaded with rich taste.
Step 5: Layer the Potatoes
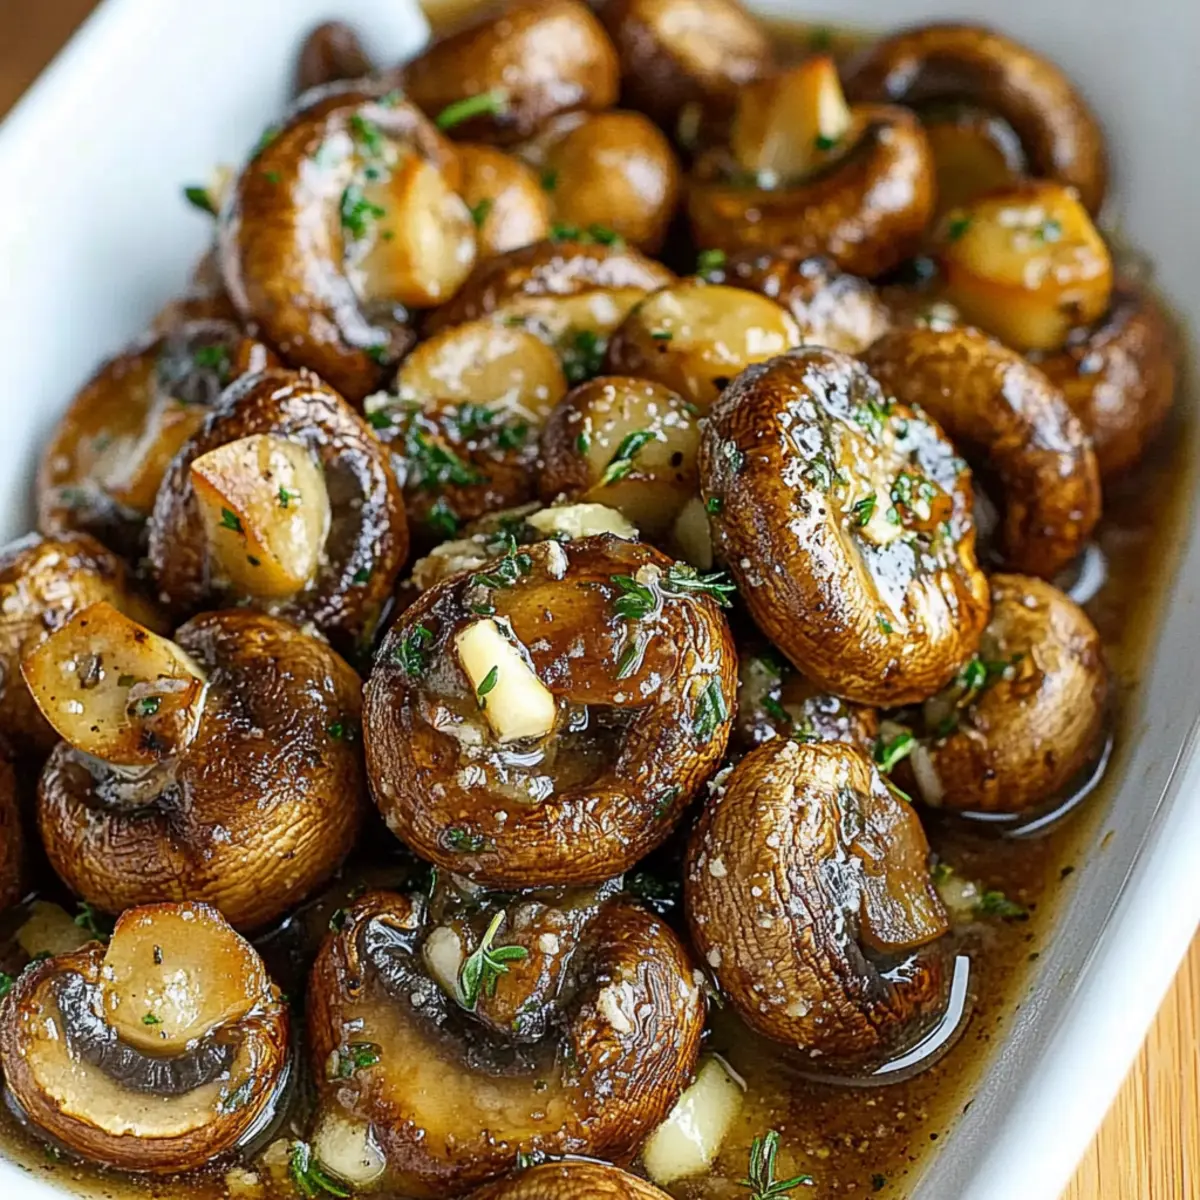
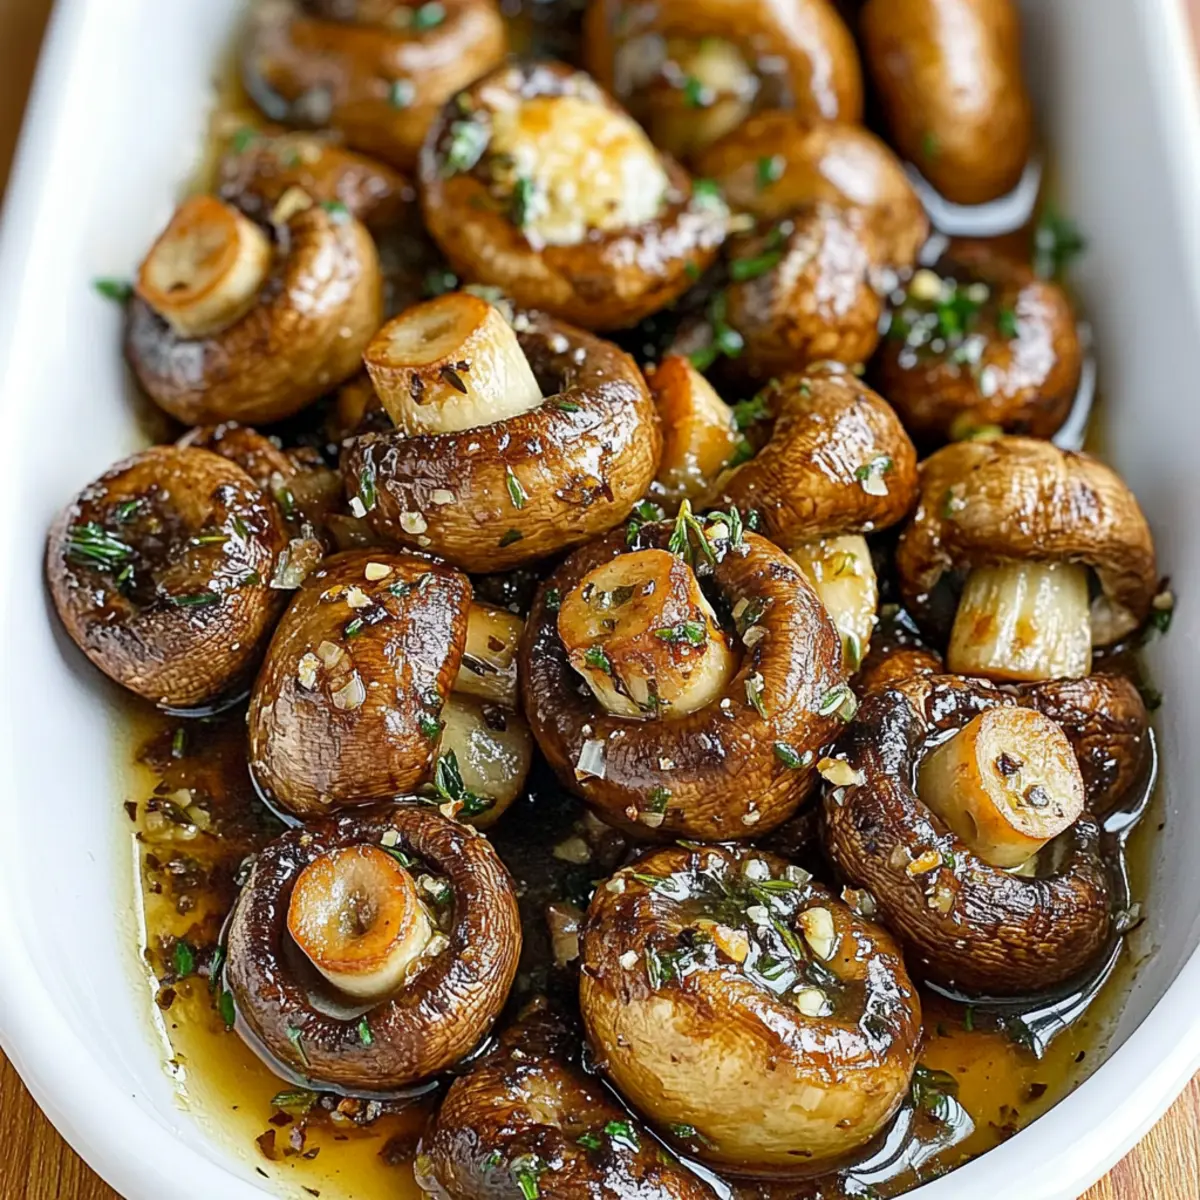
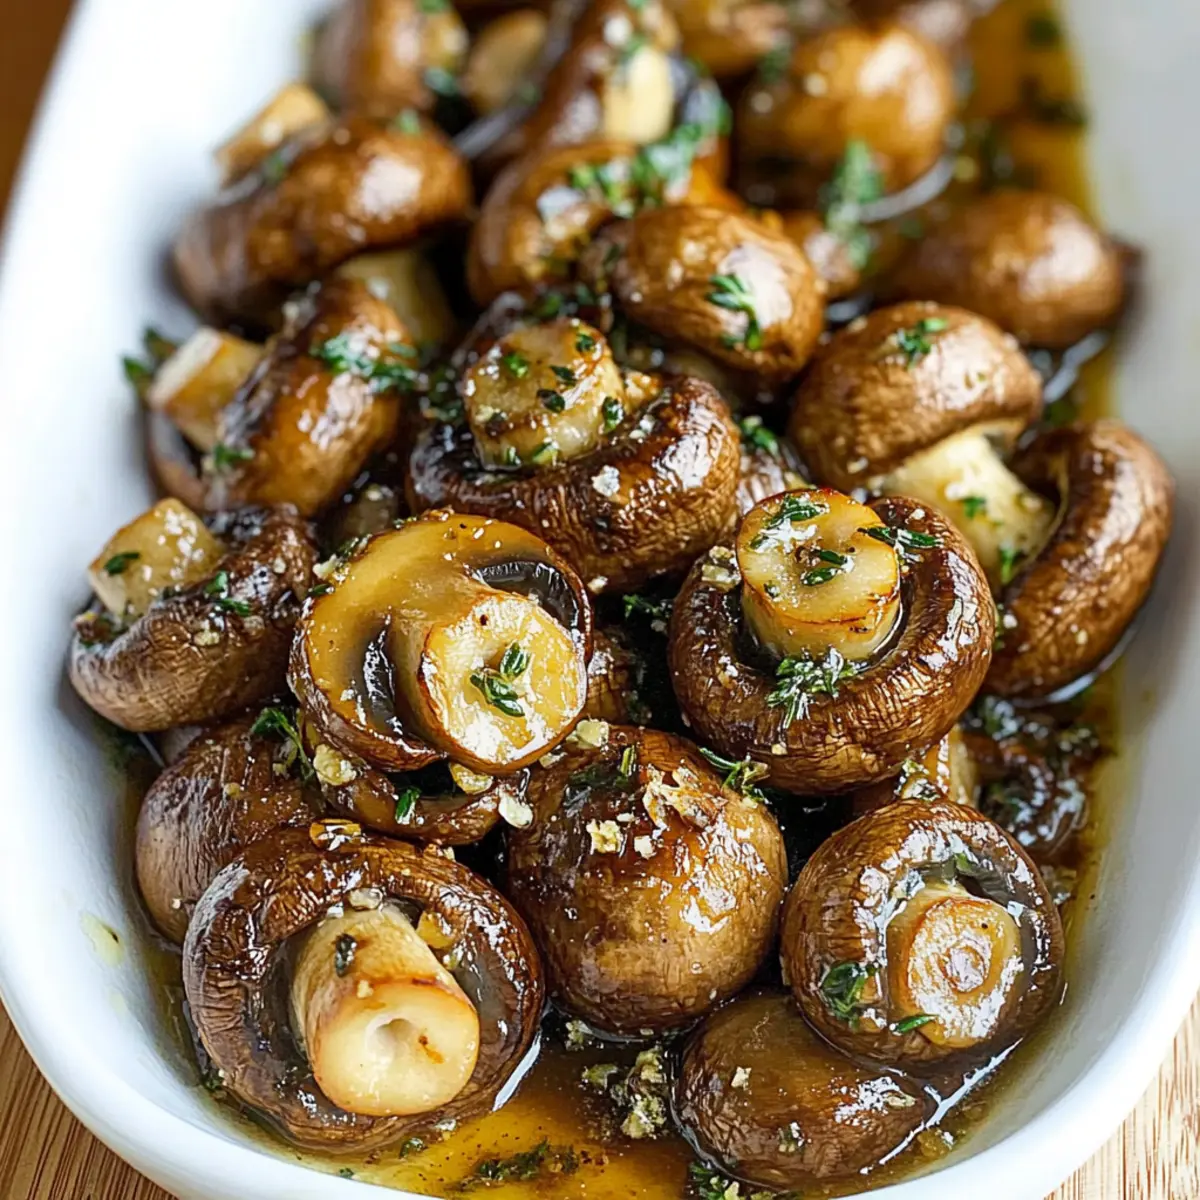
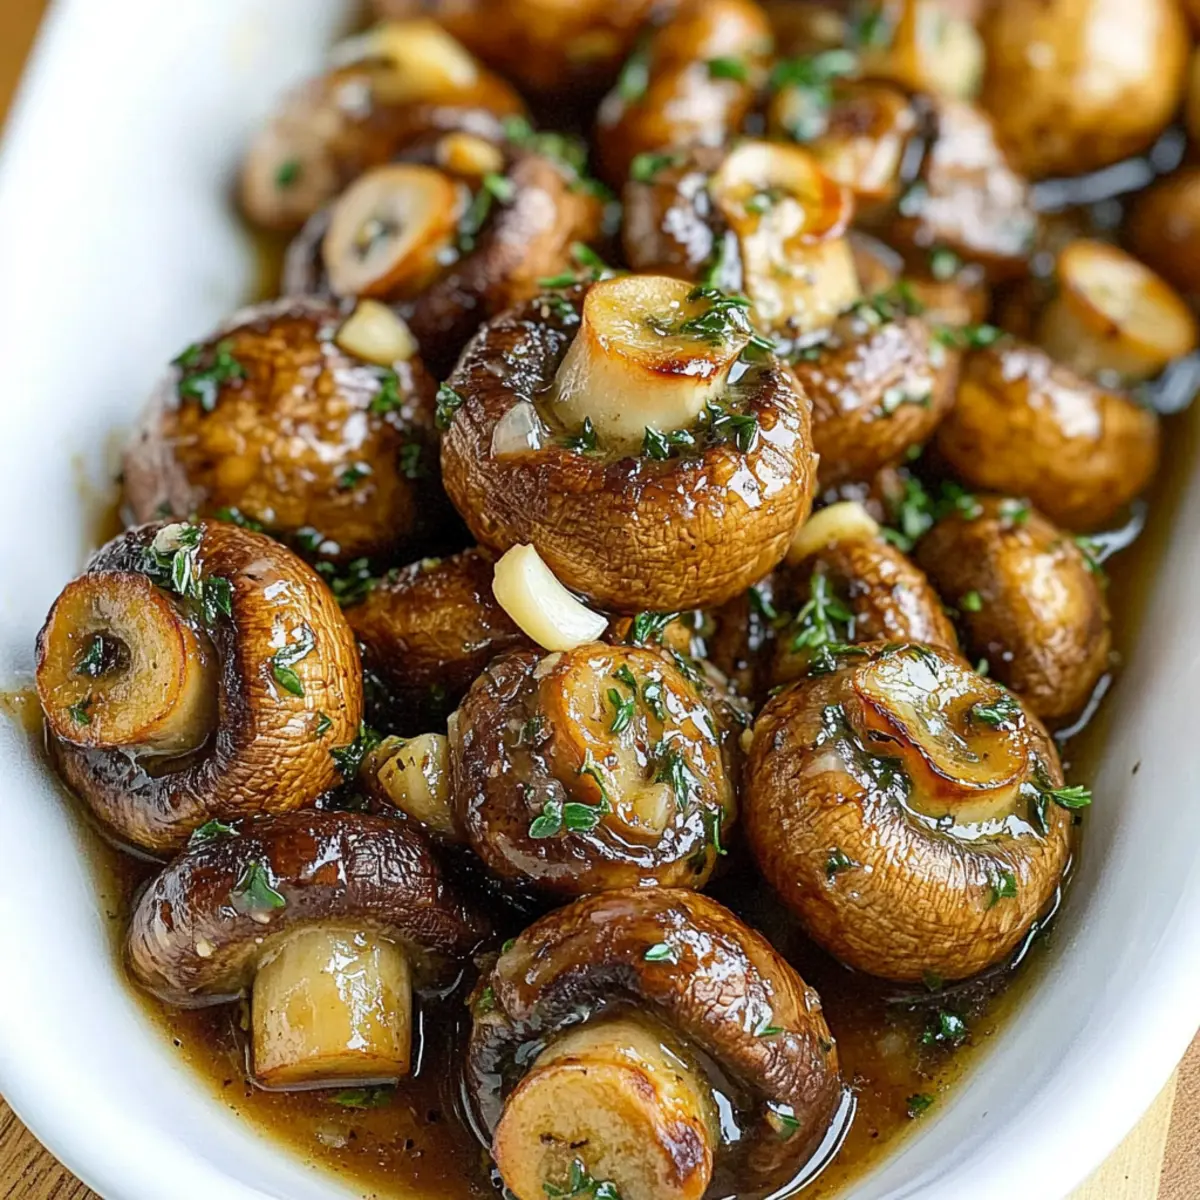
Carefully layer the coated potatoes upright in the prepared baking dish, creating a visually appealing arrangement. Pour any leftover cheese mixture over the potatoes, then lightly season with salt and pepper to taste. This layering technique showcases the creamy sauce and ensures every bite is satisfying.
Step 6: Bake Covered
Dot the top of the layered potatoes with the remaining 2 tablespoons of butter and cover the dish tightly with aluminum foil. Bake in the preheated oven for 35-40 minutes. This step allows the potatoes to steam, becoming tender and infused with the cheesy flavor that makes this dish a comfort food classic.
Step 7: Uncover and Add Topping
After 35-40 minutes, remove the foil and sprinkle the remaining Parmesan cheese on top for that perfect crispy crust. Continue baking for an additional 25-30 minutes or until the potatoes are fork-tender and the top is golden brown. The bubbling cheese will be a delightful visual cue that your Ultimate Creamy and Cheesy Potatoes Au Gratin is nearly ready to serve.
Step 8: Broil for a Golden Finish
For an extra touch of perfection, turn the broiler on high and broil the gratin for 1 minute, watching closely to prevent burning. This step will give the top a beautifully golden and bubbly finish, enhancing the presentation and texture of your cheesy potatoes.
Step 9: Cool and Serve
Once broiling is complete, allow the gratin to cool for about 10 minutes before slicing. This cooling period lets the layers set, making it easier to serve. Enjoy the Ultimate Creamy and Cheesy Potatoes Au Gratin as a side dish that will steal the show at your next gathering!
Storage Tips for Maple Cookies
Room Temperature: Store your Maple Cookies in an airtight container at room temperature for up to 1 week. This keeps them soft and fresh, ready for munching!
Fridge: If you want to prolong their freshness, iced cookies can be kept in the refrigerator for up to 2 weeks. Just be sure to separate layers with parchment paper to avoid sticking.
Freezer: For longer storage, freeze your Maple Cookies for up to 3 months. Layer them in an airtight container with parchment paper in between to preserve their texture and flavor.
Reheating: To enjoy cookies warm, preheat the oven to 350°F (175°C) and place them on a baking sheet for about 5 minutes. This refreshes their delightful, tender quality!
What to Serve with Maple Cookies with Velvety Maple Icing
Elevate your treat experience with delightful accompaniments that resonate with the warm, sweet notes of maple.
- Rich Coffee: A cup of freshly brewed coffee enhances the sweetness of the cookies, making for a cozy duo that warms your heart.
- Creamy Hot Chocolate: The smooth chocolaty richness pairs beautifully with the maple icing, creating a dreamy dessert scenario that’s hard to resist.
- Vanilla Ice Cream: Serve a scoop alongside your cookies for a luscious contrast, where the maple and vanilla flavors unite in a delicious dance.
- Chai Tea: The spices in chai complement the sweetness of the maple, offering a fragrant and soothing combination perfect for any occasion.
- Fruit Compote: A side of warm fruit compote, like apple or pear, adds a fresh tartness that brightens up the sweetness, balancing your dessert plate perfectly.
- Pecan Pie: This classic dessert echoes the maple flavor while introducing a crunchy texture that visitors will love, rounding out a sweet buffet beautifully.
These pairings will create a harmonious experience that transforms your delightful Maple Cookies from a simple treat into a celebration!
Helpful Tricks for Maple Cookies
-
Room Temperature Butter: Ensure your butter is softened to room temperature. This step is key for achieving that fluffy texture in your Maple Cookies.
-
Don’t Overmix: Mix until just combined to prevent tough cookies; overmixing can lead to a denser texture instead of the ideal lightness.
-
Icing Consistency: Allow the icing to cool slightly before spreading. If it’s too thick, add a splash of milk to reach your desired consistency for the best Maple Cookies.
-
Cool Cookies Properly: Let your cookies cool on the baking sheet for a few minutes to maintain their soft centers. Moving them too soon may cause breakage.
-
Watch Baking Time: Keep an eye on your cookies as they bake. They should be lightly golden on the edges and soft in the center—avoid overbaking to ensure they remain tender.
Make Ahead Options
These Maple Cookies with Maple Icing are a fantastic choice for busy home cooks looking to save time without sacrificing flavor! You can prepare the cookie dough up to 3 days in advance by chilling it in the refrigerator, tightly wrapped in plastic wrap. When ready to bake, simply scoop and bake as directed. The icing can also be made up to 24 hours ahead; just store it in an airtight container in the fridge to maintain its quality. Lastly, once the cookies are baked and cooled, they can be stored in an airtight container for up to a week at room temperature, ensuring they remain just as delicious for your holiday gatherings or cozy snacks!
Maple Cookies Variations & Substitutions
Get ready to jazz up your Maple Cookies with delightful twists that will surprise and please any palate!
-
Nutty Crunch: Stir in chopped walnuts or pecans for a delicious crunch that complements the soft texture beautifully. The added depth of flavor creates a wonderful balance with the sweet icing.
-
Chocolate Chips: Add semi-sweet or dark chocolate chips to the dough for a rich, decadent touch. The chocolate melts perfectly, creating gooey bursts of sweetness amidst the soft cookie.
-
Spiced Up: Mix in a teaspoon of cinnamon or a pinch of nutmeg to elevate the warm, cozy flavors. This subtle spice twist enhances the maple without overpowering it.
-
Orange Zest: Brighten the flavor profile by adding a teaspoon of orange zest to the dough. The citrus adds a refreshing zing that beautifully contrasts with the maple’s sweetness.
-
Gluten-Free: Swap the all-purpose flour for a gluten-free blend to cater to dietary needs. There are excellent options available that maintain the cookie’s fluffy texture and delightful taste.
-
Vegan-Friendly: Replace the butter with coconut oil and use flax eggs for a dairy-free and egg-free version. The result is just as delicious, with that lovely maple flavor singing through.
-
Layered Icing: For a visual treat, consider drizzling chocolate icing on top of the maple icing for a pretty and delicious two-tone finish. It’s a showstopper that adds a playful touch!
-
Pumpkin Spice: Replace some of the dry ingredients with pumpkin puree and spice mix for fall flair. The warm spices and pumpkin meld perfectly with maple, creating a seasonal delight.
Each of these variations adds a unique flair to your Maple Cookies, making them a memorable treat, whether for the holidays or just a cozy afternoon snack. Don’t hesitate to experiment and find your favorite combo! And if you’re curious about more delicious baked goods, check out my rich Savory Rosemary Cookies for a different flavor experience!
Maple Cookies with Velvety Maple Icing Recipe FAQs
What type of maple extract should I use for my cookies?
Absolutely! Always opt for pure maple extract rather than artificial varieties to ensure the best flavor. Pure maple extract adds a rich, authentic maple taste that elevates your cookies, making them truly special.
How should I store my Maple Cookies?
Very! Store your Maple Cookies in an airtight container at room temperature for up to 1 week to keep them soft and delicious. If you’re icing them, consider refrigerating the cookies for longer freshness, which can extend their life to about 2 weeks. Just remember to separate layers with parchment paper to prevent sticking!
Can I freeze Maple Cookies?
Absolutely! To freeze your Maple Cookies, layer them in an airtight container with parchment paper between each cookie to maintain their texture. They can be frozen for up to 3 months. When you’re ready to enjoy them, simply let them thaw at room temperature or pop them in a preheated oven at 350°F (175°C) for about 5 minutes to refresh their lovely softness.
What should I do if my cookie dough is too sticky?
Very good question! If you find your dough is too sticky to work with, consider chilling it in the refrigerator for about 30 minutes. This will firm it up and make it easier to scoop and shape into cookies. Make sure to keep your hands floured, and you’re good to go!
Are there any allergies I should be aware of for this recipe?
Yes, definitely! Be cautious with ingredients like eggs and dairy, particularly if you or your loved ones have allergies. You can substitute the eggs with flax eggs or applesauce, and for a dairy-free option, use vegan butter and plant-based milk. Always read labels on store-bought ingredients to ensure they meet your dietary needs.
How can I adjust the icing consistency for my Maple Cookies?
Great question! If your icing is too thick, allow it to cool slightly, then whisk in a small splash of milk until you reach your desired consistency. If it’s too runny, gradually add more sifted powdered sugar until it thickens to your liking. Timing and consistency are key to successfully icing your cookies!
Delicious Maple Cookies That Melt in Your Mouth
Ingredients
Equipment
Method
- Preheat your oven to 350°F (175°C).

- In a large mixing bowl, cream together the softened butter and sugar until light and fluffy.
- Add the maple syrup and eggs, mixing until smooth.
- In another bowl, combine flour, baking powder, and salt. Gradually add to the wet ingredients.
- Drop spoonfuls of dough onto a baking sheet lined with parchment paper.
- Bake for 10-12 minutes, until edges are lightly golden.
- Let cool for a few minutes on the baking sheet before transferring to a wire rack.
- In a bowl, combine powdered sugar and milk, mixing until you reach the desired consistency.
- Spread icing on cooled cookies and allow it to set.
Leave a Reply