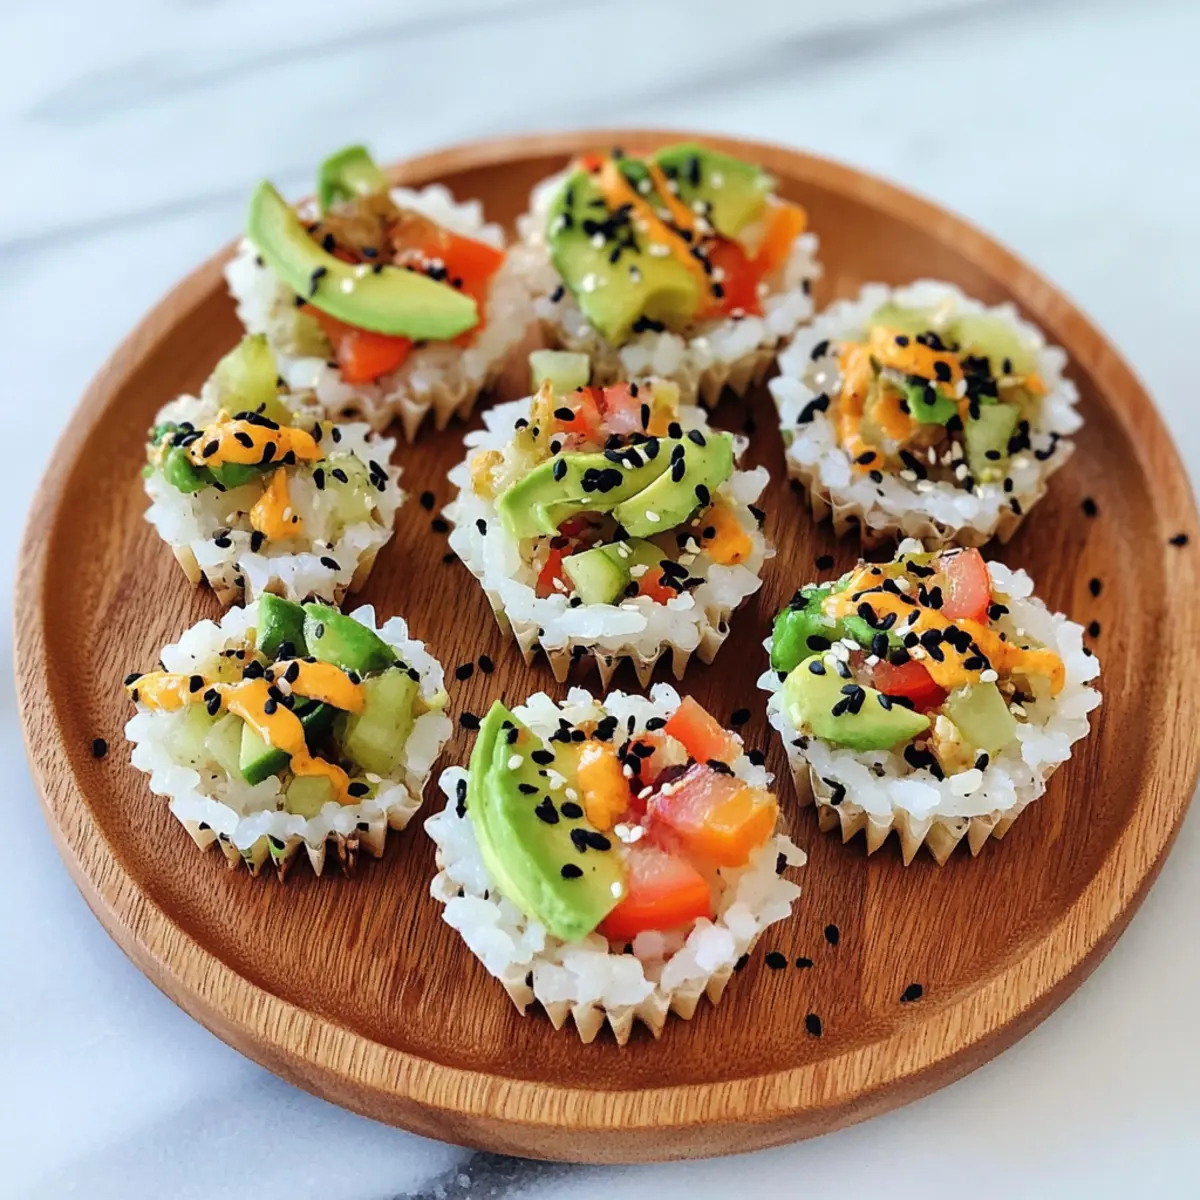
The first time I served these sushi cups at a gathering, I was amazed at how quickly they vanished. These customizable no-bake sushi cups bring the vibrant flavors of sushi right into bite-sized form, making them not only a crowd-pleaser but also a delightful option for any meal or snack. They pair the comforting sushi rice with the freshness of colorful veggies and creamy avocado, all drizzled with a zesty spicy mayo. With the convenience of no rolling required, they’re the perfect solution for anyone yearning for a healthy yet satisfying dish. Plus, you can easily adapt them to your taste or dietary needs—whether you’re sticking to gluten-free or going veg-friendly. Curious how to create these little flavor bombs? Let’s dive into the recipe!
What Makes Sushi Cups So Special?
Customizable Perfection: These sushi cups offer endless customization, allowing you to choose your favorite veggies and sauces for a personalized touch.
No-Bake Delight: Skip the cooking hassle—prep time is minimal, making it a fantastic option for quick weeknight dinners or elegant snacks.
Flavor Explosion: The combination of creamy avocado, crunchy veggies, and spicy mayo creates a flavor profile that’s sure to impress.
Ideal for Gatherings: Perfect for parties and casual get-togethers, these eye-catching bites will vanish in no time!
Health-Conscious Choice: Gluten-free and vegetarian options mean everyone can enjoy these delicious treats without compromise. Try including diverse ingredients for a colorful presentation, making your sushi cups as lively as your gatherings!
Sushi Cups Ingredients
These delectable Sushi Cups come together with fresh, vibrant ingredients that you may already have in your kitchen!
For the Rice Base
- Sushi Rice – This forms the sturdy base of your cups; rinse it well before cooking to remove excess starch for the best texture.
- Water – Essential for cooking the sushi rice until it’s perfectly tender.
For the Filling
- Chopped Veggies – Use a colorful mix like carrots, cucumber, and bell peppers for crunch and freshness—feel free to get creative with your favorites!
- Mukimame (Shelled Edamame) – A protein-packed addition; you can swap these with regular edamame pods if they’re what you have on hand.
- Diced Avocado – Adds a creamy texture and healthy fats; about half a small avocado will do.
For the Sauce
- Sauce of Choice (Soy Sauce, Tamari, or Coconut Aminos) – This enhances the flavors of your sushi cups; opt for gluten-free options as needed.
- Mayonnaise – The creamy base of the spicy mayo; use vegan mayo for a plant-based alternative.
- Sriracha Sauce – Adds a spicy kick; adjust the amount to match your taste preference.
- Honey – Provides a touch of sweetness to balance the flavors; you can leave it out for a sugar-free version.
- Sesame Oil – For a rich, nutty flavor; use according to your personal taste.
For Garnish
- Black Sesame Seeds – Perfect for adding a touch of elegance and visual appeal to your sushi cups; sprinkle generously!
With these simple yet flavorful ingredients, your homemade Sushi Cups are just a few steps away. Let’s bring those flavors to life!
Step‑by‑Step Instructions for Sushi Cups
Step 1: Cook the Sushi Rice
Begin by rinsing 1 cup of sushi rice under cold water until the water runs clear, removing excess starch. In a medium pot, combine the rinsed rice with 1 ¼ cups of water; bring to a boil. Once boiling, reduce the heat to low, cover, and simmer for 20 minutes until the water is absorbed and rice is tender. Remove from heat and let it cool slightly.
Step 2: Form the Rice Base
Once the sushi rice is cool enough to handle, lightly grease a 12-cup muffin tin to prevent sticking. Using about 2 heaping tablespoons of rice, press the mixture firmly into the bottom of each muffin cup to create a base. Make sure each cup is packed tightly. Place the tin in the refrigerator for 20 minutes to set the rice base.
Step 3: Prepare the Filling
While the rice is chilling, chop 1 cup of assorted vegetables such as carrots, cucumber, and bell peppers. In a mixing bowl, combine the chopped veggies with 1 cup of steamed mukimame and half a diced avocado. Drizzle your sauce of choice, like soy sauce or tamari, over the mixture, and toss gently until well combined, ensuring all ingredients are coated.
Step 4: Create the Spicy Mayo
In a separate bowl, whisk together ¼ cup of mayonnaise, 1 tablespoon of Sriracha sauce, 1 tablespoon of coconut aminos, and a drizzle of honey. Adjust the spiciness to your preference by adding more or less Sriracha. This creamy spicy mayo will add an exciting kick to your sushi cups, so mix until smooth and creamy.
Step 5: Assemble the Sushi Cups
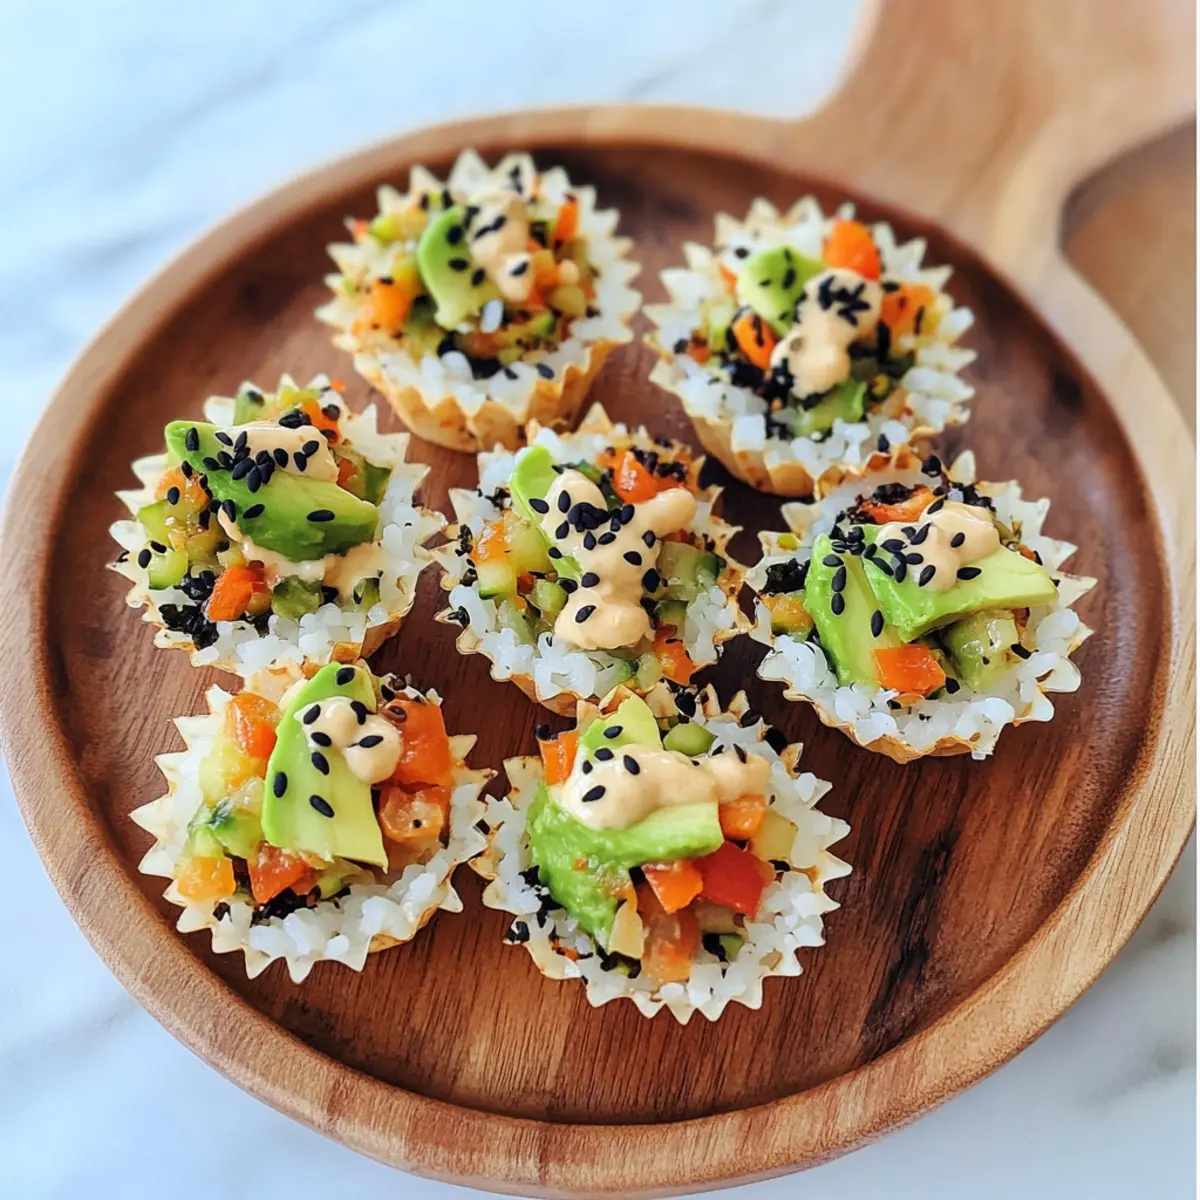
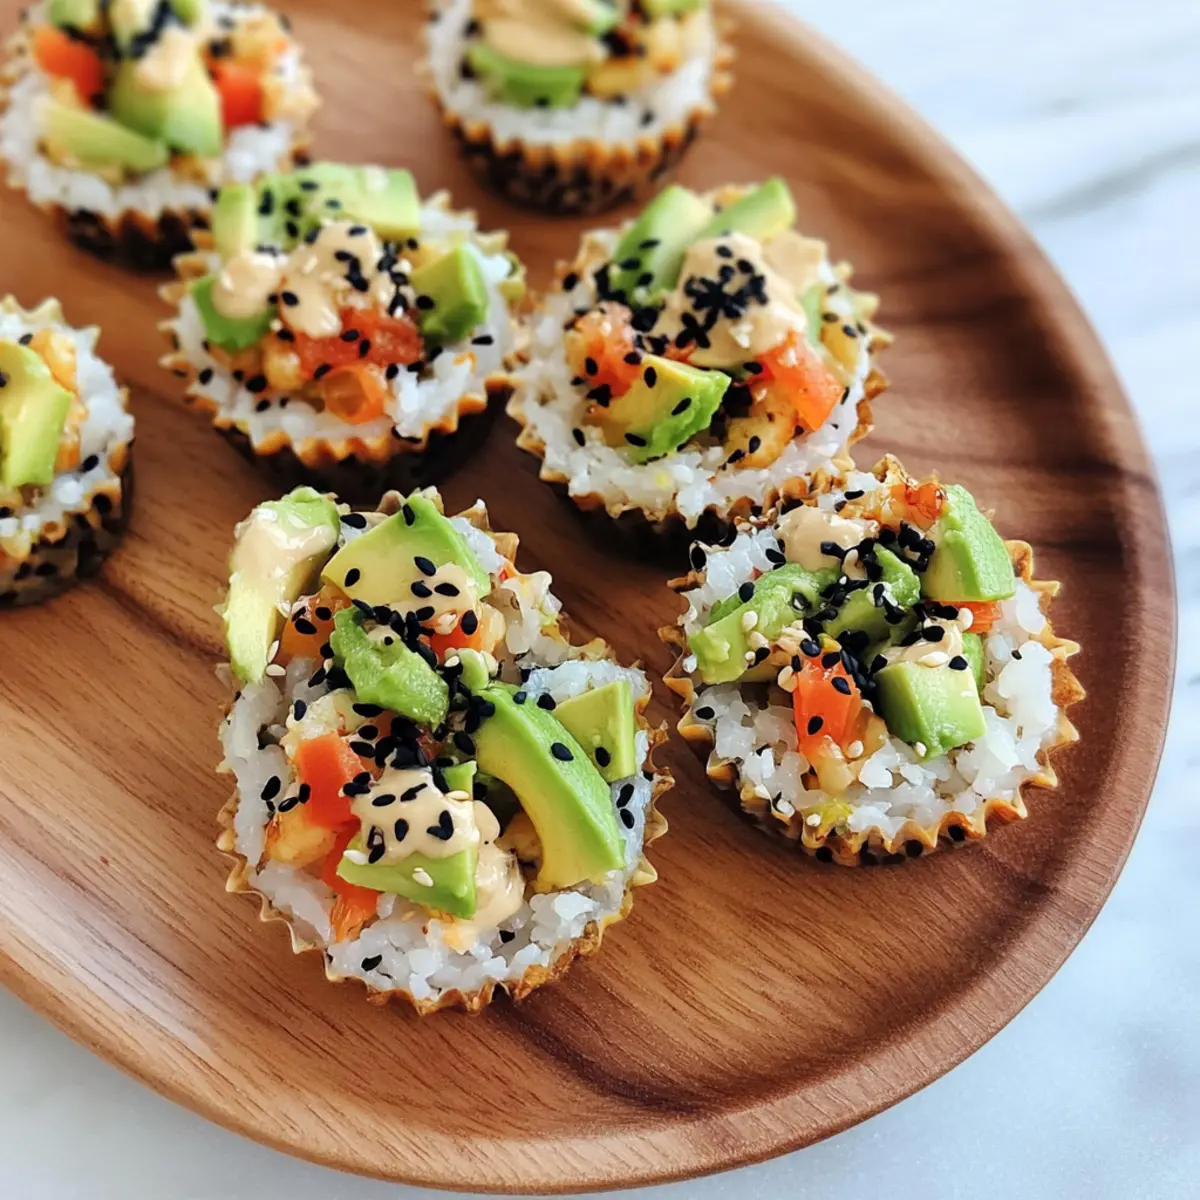
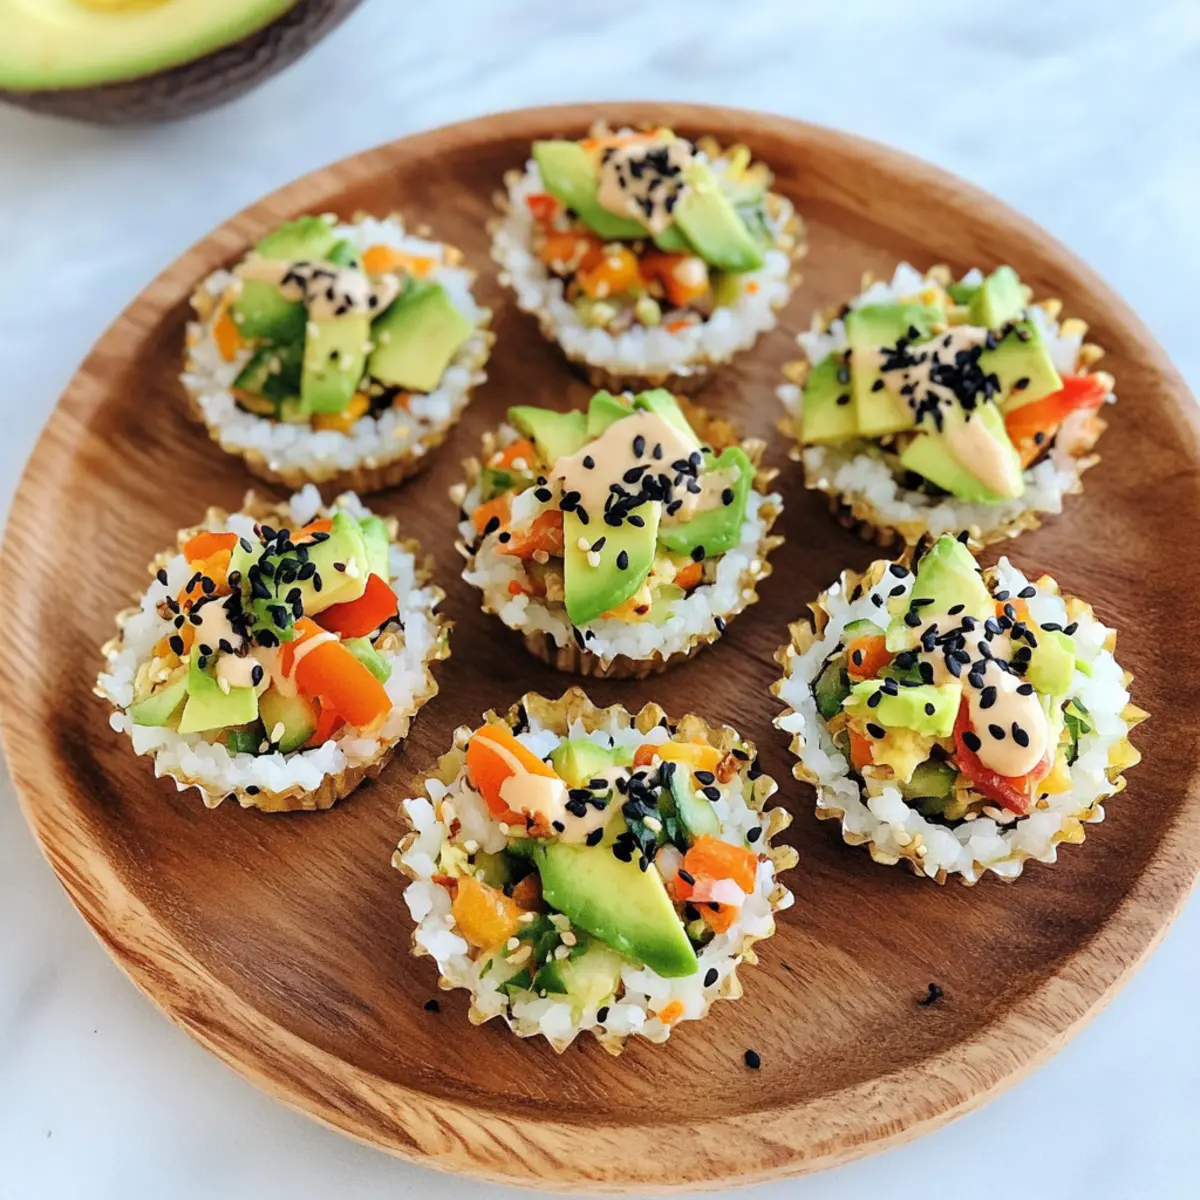
Remove the rice cups from the refrigerator. Carefully fill each rice base with the vegetable mixture, pressing down slightly to ensure they are packed. Drizzle the prepared spicy mayo generously on top of each filled cup, allowing it to seep into the vegetables and rice.
Step 6: Garnish and Serve
Finish off your sushi cups by sprinkling black sesame seeds over each cup for a beautiful contrast and nutty flavor. These customizable sushi cups are now ready to be served as appetizers or a light meal. Enjoy the combination of flavors and textures!
Make Ahead Options
These Sushi Cups are perfect for meal prep enthusiasts! You can prepare the rice base and fill the cups with your vegetable mixture up to 24 hours in advance. Simply press the cooled sushi rice firmly into a muffin tin and keep it covered in the refrigerator to maintain freshness. You can also mix the chopped veggies and steamed mukimame ahead of time, storing them in an airtight container until you’re ready to assemble. To finish, just fill each rice cup with the veggie mixture, drizzle with spicy mayo, and garnish with black sesame seeds just before serving to ensure they taste just as delicious as when freshly made!
How to Store and Freeze Sushi Cups
Fridge: Store sushi cups in an airtight container in the fridge for up to 2 days to maintain freshness and prevent sogginess from the spicy mayo.
Freezer: For longer storage, you can freeze the rice cups without toppings for up to 1 month. Just thaw in the fridge before serving.
Reheating: Warm the rice cups in a microwave for 30-60 seconds if desired, but keep the spicy mayo separate until ready to eat to maintain texture.
Assembly Tip: Ensure to add the fresh toppings just before serving, particularly if you’ve stored the cups for a longer period.
Sushi Cups: Endless Variations Await
Feel free to let your creativity shine with these delightful sushi cups, enhancing flavors and textures to suit your taste buds!
-
Seafood Surprise: Incorporate imitation crab, shrimp, or spicy tuna for a delightful seafood twist that adds a burst of flavor. The combination of seafood with creamy avocado elevates the experience to a whole new level!
-
Vegan Delight: Swap mayonnaise for vegan mayo and eliminate honey for a fully plant-based edition that maintains rich creaminess without any animal products.
-
Spicy Kick: Amp up the Sriracha or add sliced jalapeños to infuse heat that dances on your palate. Just be cautious, as you won’t want to overpower the freshness of the veggies!
-
Nutty Flavor Burst: Drizzle sesame dressing in addition to your sauce for a heightened nutty flavor dimension that will make your taste buds sing! This subtle addition brings the sushi cups to a delightful crescendo.
-
Colorful Medley: Combine a variety of vibrant chopped vegetables, such as bell peppers, purple cabbage, or even radishes, to provide an eye-catching and nutritious presentation. Each bite becomes a feast for the eyes, too!
-
Rice Alternative: Swap sushi rice with quinoa or cauliflower rice for a lower-carb twist, perfect for those watching their intake without sacrificing flavor. These alternatives ensure your sushi cups remain deliciously satisfying!
-
Herbed Infusion: Add fresh herbs like cilantro, mint, or chives into your veggie mix for a fragrant lift that brightens each bite, turning your sushi cups into a refreshing garden-inspired delight!
-
Dipping Sauce Duo: Serve with additional dipping sauces on the side like a creamy wasabi dip or ginger dressing to offer guests a whole range of flavors to explore. The options are limitless!
Explore these variations to create stunning sushi cups that suit any occasion, whether you’re hosting a gathering or enjoying a family dinner.
Expert Tips for Sushi Cups
-
Rinse Rice: Always rinse your sushi rice until the water runs clear; this removes excess starch and prevents the rice from being overly sticky.
-
Chill Time: Don’t rush the chilling process; letting the rice base set for 20 minutes in the fridge enhances its structure for easier handling.
-
Custom Fillings: Experiment with different veggies and proteins. But avoid using overly wet ingredients that might make the cups soggy—balance crunch with moisture!
-
Sauce Control: Adjust the spice level in the spicy mayo according to your taste; start small with Sriracha and add more if desired for those who love a kick!
-
Serving Fresh: Enjoy the sushi cups immediately for the best texture. If prepping ahead, keep the spicy mayo separate until ready to serve—this prevents sogginess.
-
Creative Garnishes: Don’t hesitate to add colorful garnishes like chopped green onions or radish sprouts on top of your sushi cups for extra flair and flavor!
What to Serve with Customizable No-Bake Sushi Cups
Satisfy your cravings for a complete meal by pairing these colorful bites with delightful accompaniments that elevate every bite.
-
Crispy Tempura Vegetables: The light, crunchy tempura complements the soft texture of sushi cups, adding delicious contrast and an extra veggie serving.
-
Zesty Cucumber Salad: A refreshing salad seasoned with rice vinegar and sesame oil brightens up your sushi cups, enhancing the fresh flavors of your meal.
-
Miso Soup: This warm, savory soup is perfect for dipping, providing a comforting balance to the cool, creamy sushi cups.
-
Sake or Green Tea: Fluid choices like chilled sake or a warm cup of green tea not only pair well but also enhance the overall experience with their delicate flavors.
-
Pickled Ginger: Offering a tangy and refreshing palate cleanser, pickled ginger complements the sushi cups beautifully and keeps each bite exciting.
-
Dumplings: Bite-sized dumplings, whether steamed or fried, bring a delightful savory element to the table, perfect for sharing with friends and family.
Feel free to mix and match these options to create a meal that is both nourishing and full of flavor!
Customizable No-Bake Sushi Cups Recipe FAQs
What ingredients should I look for when buying sushi rice?
Absolutely! When selecting sushi rice, look for a short-grain variety, ideally labeled “sushi rice” or “shinseiki.” It should have a pearlescent appearance, indicating it’s sticky enough to hold together. Ensure the packet is sealed without any dents or rips, and check the expiration date for freshness.
How long can I keep my sushi cups in the refrigerator?
These delightful sushi cups can be kept in the fridge for up to 2 days when stored in an airtight container. To maintain their best quality and freshness, consume them within this timeframe. The rice may harden over time, so for the best experience, try to enjoy them sooner rather than later.
Can I freeze sushi cups, and if so, how should I do it?
Yes, you can freeze the rice base of the sushi cups! To freeze, simply prepare the cups without any toppings. Place the assembled rice cups in a freezer-safe container or wrap them tightly in plastic wrap. They can be frozen for up to a month. When ready to enjoy, thaw them in the refrigerator overnight, and add your fresh veggies and spicy mayo before serving.
What if my spicy mayo turns out too thick or too spicy?
Very! If your spicy mayo is too thick, try whisking in a little water, milk, or more lemon juice for a smoother consistency. To adjust the spice level, simply start with a small amount of Sriracha and taste as you go. You can always add more heat but removing it can be tricky, so keep that in mind!
Are there any dietary considerations when making sushi cups?
Definitely! For gluten-free options, ensure you use gluten-free soy sauce or coconut aminos in your sauces and toppings. If you’re making these sushi cups for guests or family members with allergies, it’s thoughtful to check which vegetables and sauces are safe for everyone. Always offer a variety of ingredient choices to cater to different dietary needs.
How can I prevent my sushi cups from getting soggy?
To prevent sogginess, store the spicy mayo separately until just before serving. Additionally, avoid including overly moist veggies, like tomatoes, which can contribute to sogginess. Instead, focus on crunchy vegetables and let your creativity shine with colorful alternatives to achieve a balanced texture in your sushi cups!
Deliciously Customizable Sushi Cups for Easy Weeknight Dinners
Ingredients
Equipment
Method
- Rinse sushi rice until water runs clear. In a pot, combine rinsed rice and water, bring to a boil, then reduce heat, cover, and simmer for 20 minutes until tender.
- Lightly grease a muffin tin. Press 2 heaping tablespoons of rice into the bottom of each cup to form a base. Chill for 20 minutes.
- Chop assorted vegetables and combine with mukimame and diced avocado. Drizzle with sauce and toss to combine.
- Whisk together mayonnaise, sriracha, coconut aminos, and honey until smooth.
- Fill each rice base with vegetable mixture and drizzle with spicy mayo.
- Sprinkle black sesame seeds over the top before serving.
Leave a Reply