In the heart of my kitchen, a delightful aroma begins to swirl as I whip up a treat that transports me to the vibrant streets of Indonesia. This Easy Gluten-Free Indonesian Sticky Coconut Cake, known as Wingko Babat, is not just a dessert; it’s a chewy and fudgy adventure for coconut lovers. With its unique texture reminiscent of mochi, this recipe offers a delightful twist that’s perfect for sharing at gatherings or savoring during quiet afternoons. Plus, it’s incredibly simple to make, whether you’re a seasoned home chef or just beginning to explore the world of gluten-free baking. Trust me, your taste buds will thank you for this delightful indulgence! Curious to see how it all comes together? Let’s dive into the recipe!
Why Is Sticky Coconut Cake So Irresistible?
Chewy Texture: The distinctive chewy consistency that mirrors mochi offers a unique mouthfeel you’ll love.
Rich Coconut Flavor: Each bite is packed with creamy coconut goodness, bringing a taste of tropical bliss straight to your home.
Easy to Make: With just a few simple steps, even novice bakers can create this delicious treat without any fuss.
Versatile Serving Options: Enjoy it as a refreshing snack or dessert, and impress your friends at gatherings with its exotic flair.
Crowd-Pleasing Delight: Whether you’re serving it at a party or enjoying it with a cup of coffee, this cake is sure to please any palate.
Storage Friendly: It keeps well in the fridge and can even be frozen for later, making it a convenient treat to always have on hand! Don’t forget to check out my other delicious recipes like the Coconut Curry Soup for more coconut-inspired goodness!
Sticky Coconut Cake Ingredients
• Here’s what you need to create this delightful treat!
For the Batter
- Eggs (2 eggs, separated) – Provides structure and moisture; for a vegan version, you can use aquafaba.
- Granulated Sugar (1¼ cups) – Adds sweetness and balances the rich coconut flavor beautifully.
- Canned Coconut Milk (2¼ cups) – Ensures creaminess; make sure to shake well before using to combine the cream and water.
- Shredded Sweetened Coconut (3 cups) – Adds delightful texture and amplifies the coconut experience; use sweetened for best results.
- Glutinous Rice Flour (1½ cups) – Essential for achieving that chewy texture characteristic of the Sticky Coconut Cake; Mochiko is a great substitute if necessary.
- Vanilla Extract (1 teaspoon) – Introduces a lovely depth of flavor to the cake.
For the Topping
- Egg Yolk (1 egg yolk) – Adds a lovely glossy finish when brushed on the top before broiling.
With these ingredients, you’re all set to embark on your sticky, coconut-filled adventure! Enjoy the process, and get ready for a treat that’s sure to impress.
Step‑by‑Step Instructions for Easy Gluten-Free Indonesian Sticky Coconut Cake
Step 1: Preheat Oven
Begin by preheating your oven to 350°F (175°C). This ensures the temperature is just right for baking your Sticky Coconut Cake. While the oven warms up, prepare your 8×8-inch baking pan by lightly greasing it to prevent sticking and ensure easy removal of the cake after baking.
Step 2: Prepare Batter
In a large mixing bowl, whisk the separated egg whites and granulated sugar together until bubbly and frothy, about 2-3 minutes. Gradually stir in the canned coconut milk, followed by the shredded sweetened coconut, glutinous rice flour, and vanilla extract. Mix until the batter is smooth and slightly runny; it’s okay if it’s a little liquidy—this is the perfect consistency for your Sticky Coconut Cake!
Step 3: Pour and Bake
Once your batter is ready, pour it into the prepared baking pan, spreading it evenly with a spatula. Place the pan in the preheated oven and bake for approximately 45 minutes, or until the top appears set and slightly golden. You’ll know it’s done when a toothpick inserted into the center comes out clean or with just a few moist crumbs.
Step 4: Add Egg Yolk Layer
After baking, remove the cake from the oven and allow it to cool for a few minutes. Gently brush the surface with the egg yolk for a glossy finish. Switch your oven setting to broil and return the cake to the oven. Broil for 5-10 minutes, watching closely until the top turns a delightful golden brown; this adds a beautiful color and slight crispness.
Step 5: Cool and Refrigerate
Carefully take the cake out of the oven and let it cool on a wire rack for about 30 minutes. Once cooled, cover the cake and refrigerate it for at least 8 hours, or preferably overnight. Chilling allows the flavors to meld and the texture of your Sticky Coconut Cake to firm up beautifully, making it easier to cut once it’s set.
Step 6: Cut and Serve
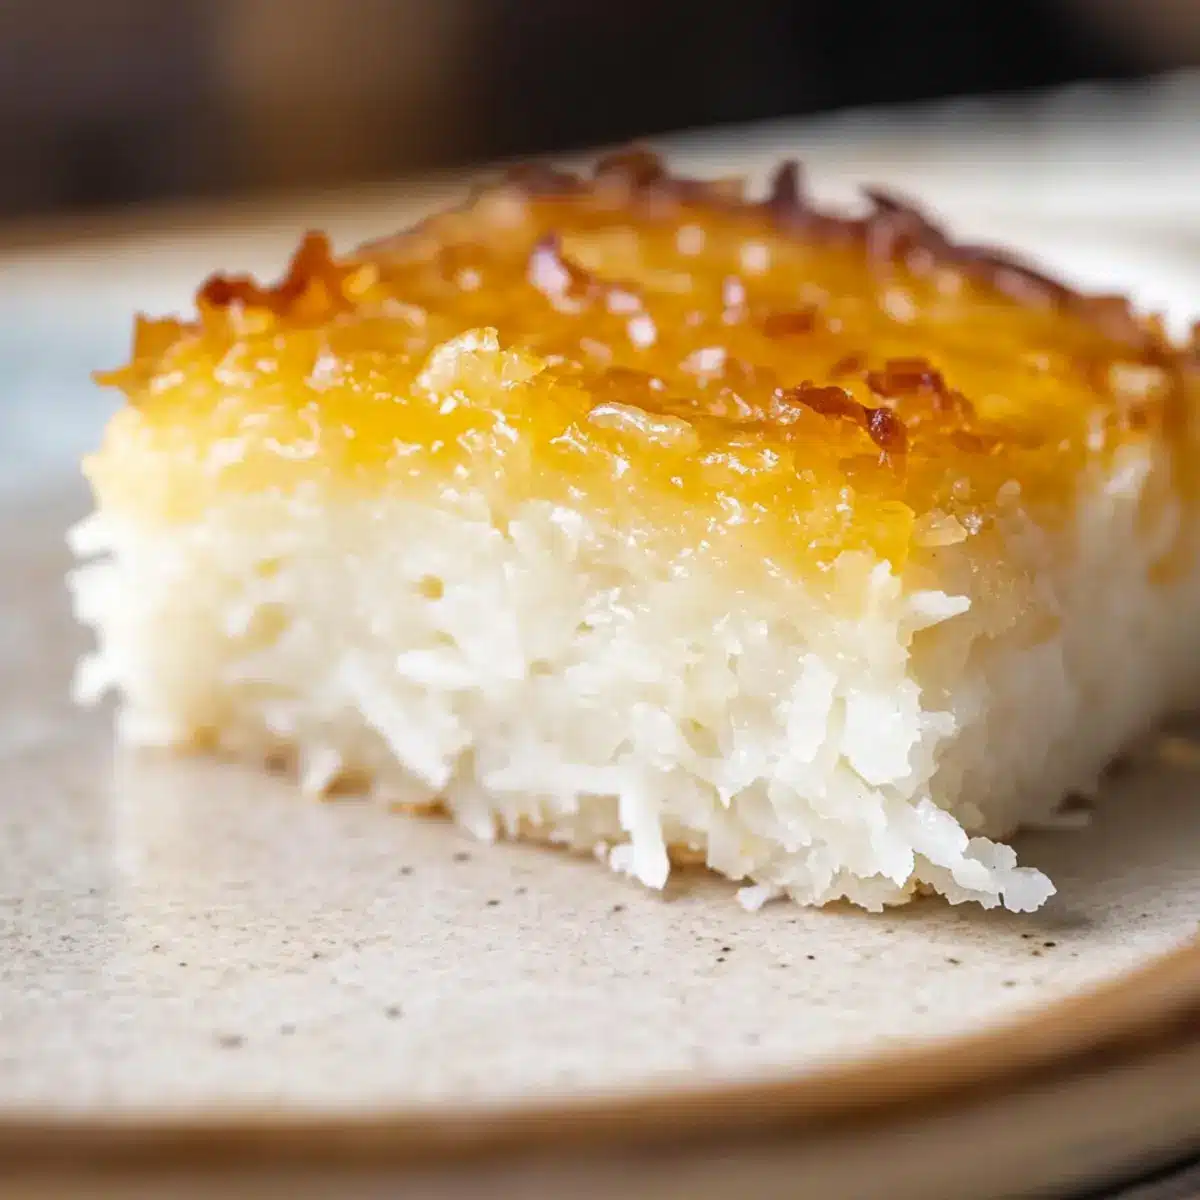
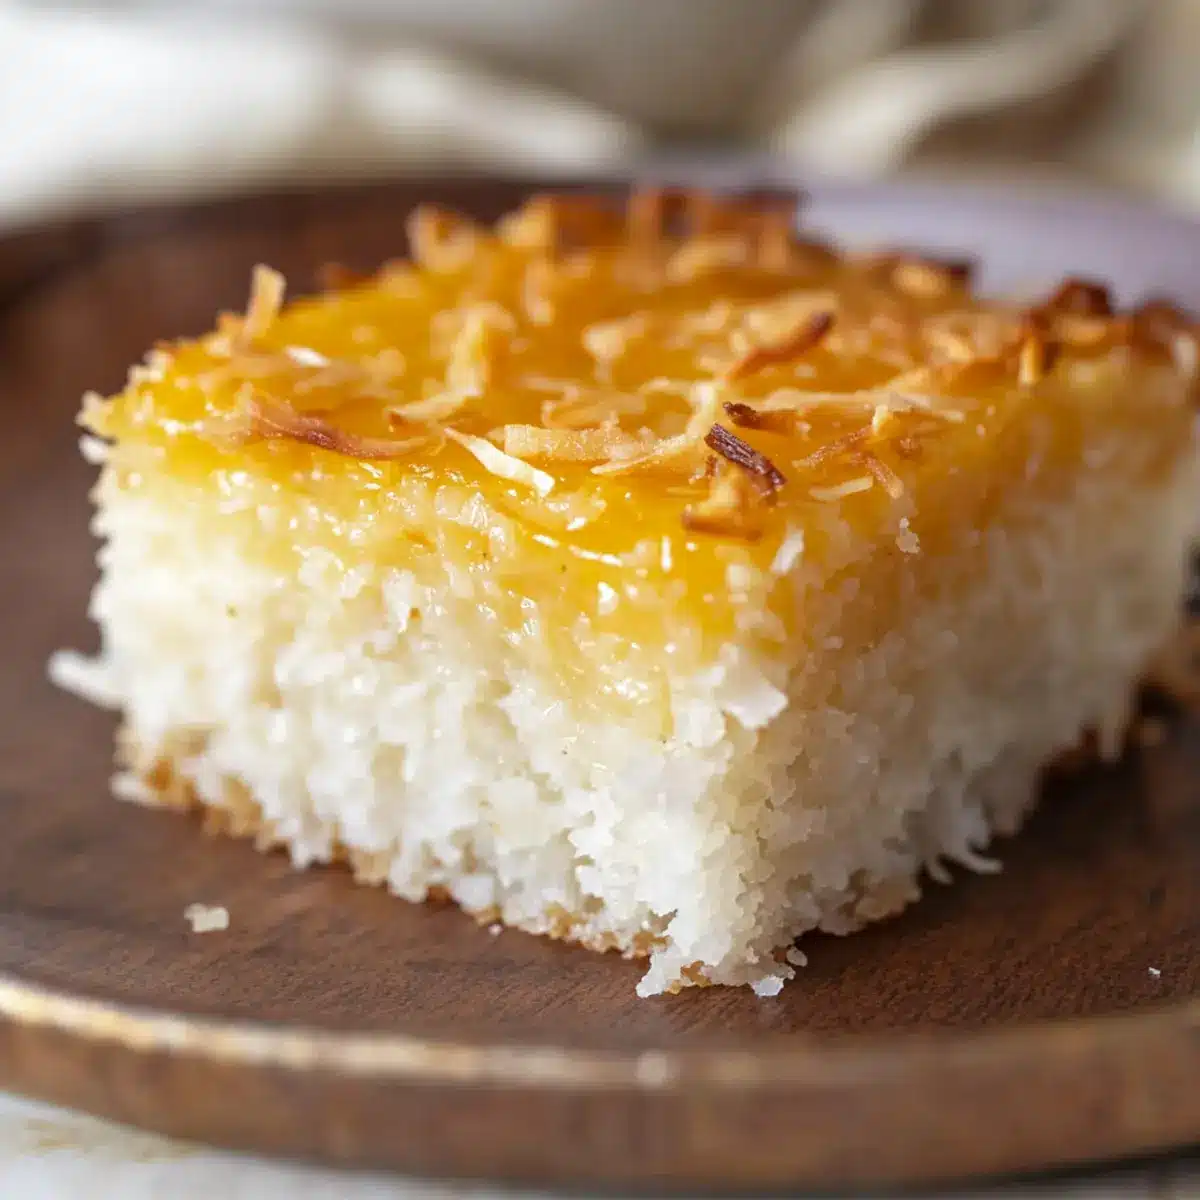
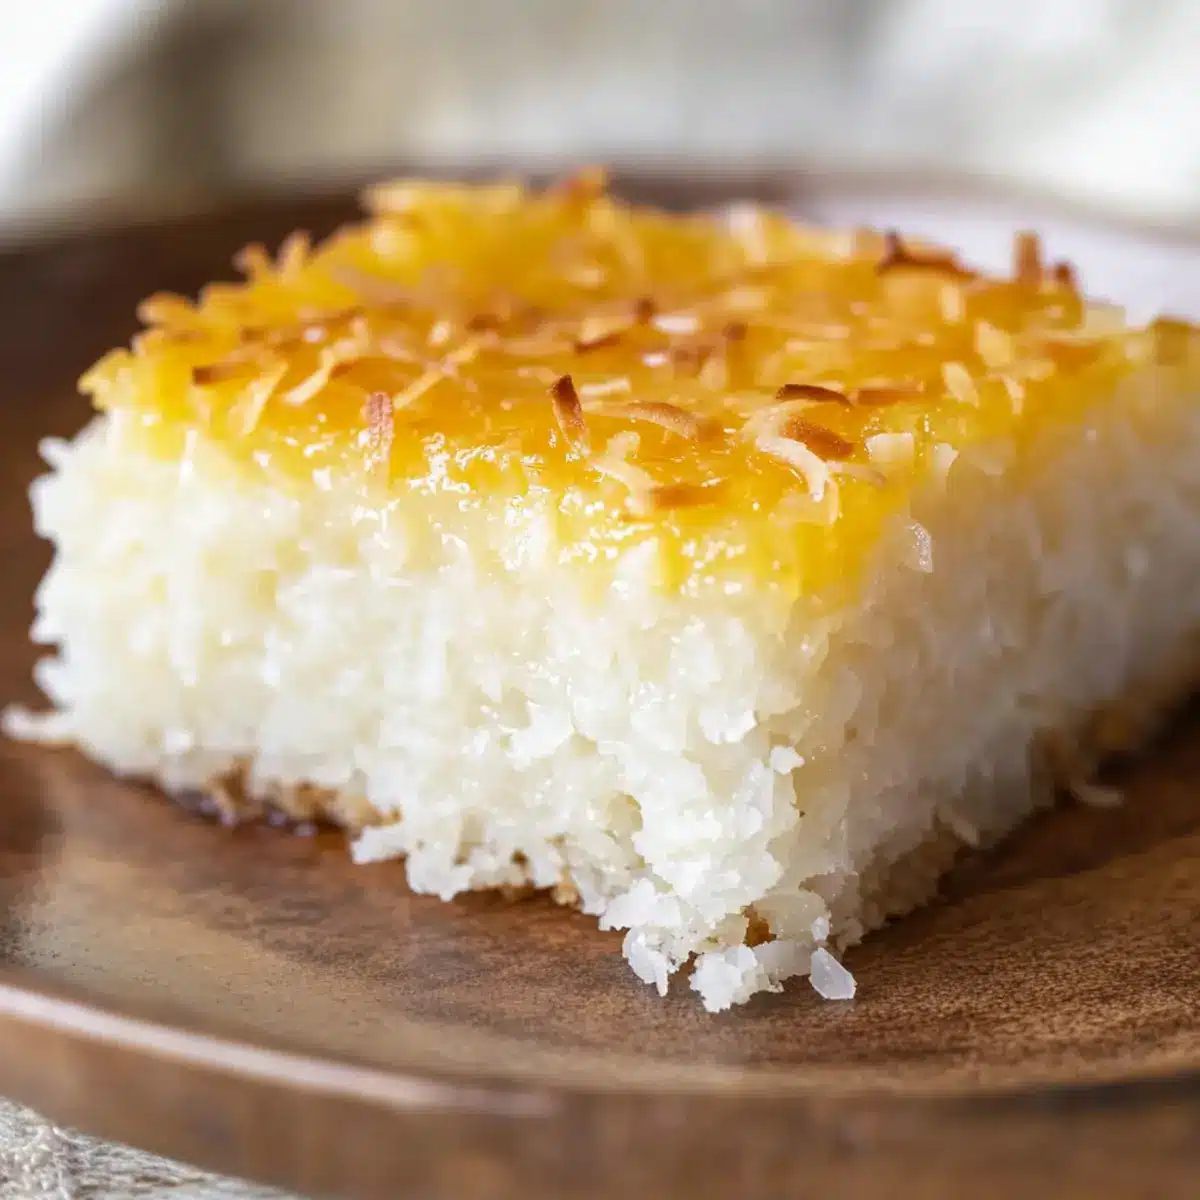
After the cake has chilled, use a sharp knife to slice it into squares or triangles. The cake should be dense and chewy, with a satisfying texture. Serve your deliciously sticky coconut cake chilled, alongside a cup of warm tea or coffee for an exquisite treat that will impress friends and family alike!
What to Serve with Easy Gluten-Free Indonesian Sticky Coconut Cake
Imagine indulging in a velvety slice of sticky coconut delight, perfectly complemented by dishes that enhance its flavor and create a memorable dining experience.
- Tropical Fruit Salad: A refreshing blend of mango, pineapple, and kiwi offers a vibrant, fruity contrast that brightens each bite.
- Coconut Milk Ice Cream: Creamy and rich, this ice cream echoes the cake’s coconut essence while providing a cooling, luscious treat.
- Sweetened Thai Tea: The aromatic spices in this drink provide a perfect balance to the cake’s sweetness, enhancing the overall flavor profile.
- Chai Latte: The warm, spiced notes of chai create a comforting companion to the chewy texture of the cake—perfect for afternoon tea.
- Matcha Green Tea: Light and slightly bitter, matcha brings a lovely contrast, enhancing the cake’s sweetness while promoting a calming experience.
- Spicy Sesame Noodles: The savory, spicy profile of these noodles adds an unexpected kick that pairs intriguingly with the sweetness of the cake.
Imagine serving your sticky coconut cake with a cup of warm chai latte, savoring each flavorful moment. This delightful pairing elevates your dessert experience and leaves a lasting impression on your guests!
Make Ahead Options
These Easy Gluten-Free Indonesian Sticky Coconut Cakes are perfect for meal prep, making your busy weeknights a breeze! You can prepare the batter up to 24 hours in advance—just store it in the refrigerator before baking. Additionally, once the cake is baked, allow it to cool and then refrigerate it for up to 3 days to let the flavors meld beautifully. To maintain that delightful chewy texture, cover it tightly with plastic wrap. When you’re ready to enjoy, simply slice it into squares, and serve chilled or at room temperature. This way, you’ll have a delicious, tropical treat ready to go with minimal effort!
Sticky Coconut Cake Variations & Substitutions
Feel free to play around with this recipe and make it your own, bringing out new flavors and textures that tantalize your taste buds!
- Sugar-Free: Use a sugar substitute like stevia or monk fruit to create a lower-calorie version without sacrificing sweetness.
- Nutty Twist: Incorporate finely chopped nuts, such as almonds or cashews, into the batter for added crunch and rich flavor. The nutty aroma will elevate your cake to a whole new level of deliciousness.
- Spiced Version: Add a pinch of cinnamon or nutmeg for a warm, cozy flavor that perfectly contrasts the sweetness of the coconut. A sprinkle of spices can transform your cake into a delightful treat for chilly days!
- Fruit-Infused: Fold in small pieces of fresh fruit like mango or pineapple for a burst of tropical goodness. The juicy fruit will create a beautiful contrast with the chewy texture of the cake.
- Chocolate Lovers: Mix in cocoa powder for a chocolatey version or consider drizzling chocolate ganache on top for a decadent twist. Imagine the rich combination of chocolate and coconut!
- Eggless Delight: Replace the eggs with flaxseed meal mixed with water for a vegan-friendly version that still has great texture. This simple swap opens your cake to everyone!
- Coconut Cream Layer: Top the cake with a fluffy layer of coconut whipped cream after chilling for an added creamy delight. It’s just like adding a pillow of sweetness that takes your cake to the next level.
- Baking Potpourri: Use different flavored extracts, like almond or coconut extract, to play with the dessert’s aroma and enhance its tropical character. You might be surprised how these small adjustments create a delightful experience!
These variations are just the beginning. Don’t hesitate to check out my delicious Coconut Curry Soup for a flavor-packed meal that complements the festive spirit of your sticky coconut cake. Enjoy experimenting and happy baking!
Expert Tips for Sticky Coconut Cake
-
Mix Thoroughly: Ensure you mix the batter well to prevent lumps. A slightly liquidy consistency is normal and necessary for the chewy texture.
-
Gentle Egg Yolk Application: Brush the egg yolk on the cake carefully to avoid tearing the delicate crust. A light hand is key to maintaining its structure.
-
Chill for Best Texture: Refrigerate the cake overnight for optimal firmness. This allows the flavors to meld beautifully and enhances the chewy experience.
-
Choose Thick Alternative Milk: If using a dairy-free milk, opt for a thicker variety for a similar texture in your Sticky Coconut Cake; this will help maintain the desired consistency.
-
Monitor Broiling Closely: When broiling the top, keep a close eye on it to prevent burning. The goal is a golden, glossy finish—this adds to the cake’s allure and flavor!
How to Store and Freeze Sticky Coconut Cake
Fridge: Store the Sticky Coconut Cake in an airtight container for up to 2 weeks. Make sure it’s completely cool before covering to maintain its moist texture.
Freezer: For longer storage, cut the cake into individual slices and wrap each piece tightly in plastic wrap, then place in an airtight container or freezer bag. It can be frozen for up to 3 months.
Thawing: When ready to enjoy, thaw the slices in the refrigerator overnight. To warm them up, simply microwave for 10-15 seconds for a soft, delightful treat.
Serving Suggestions: Enjoy chilled or slightly warmed. This cake is perfect for snacking or as a satisfying dessert paired with tea or coffee!
Sticky Coconut Cake Recipe FAQs
What kind of coconut is best for this recipe?
For the best results, I recommend using sweetened shredded coconut, as it amplifies the coconut flavor and adds delightful texture. Unsweetened coconut can be used if you prefer a less sweet cake, but it may alter the overall taste.
How should I store leftover Sticky Coconut Cake?
After it’s completely cooled, store the Sticky Coconut Cake in an airtight container in the refrigerator for up to 2 weeks. Make sure to cover it tightly to preserve its moisture and rich texture.
Can I freeze Sticky Coconut Cake?
Absolutely! For freezing, cut the cake into individual slices and wrap each piece tightly in plastic wrap. Then place the wrapped slices in an airtight container or freezer bag. This way, your cake can be frozen for up to 3 months! When ready to enjoy, thaw in the refrigerator overnight and gently reheat in the microwave for about 10-15 seconds to restore its delightful chewy texture.
What if my cake comes out too dry?
If your Sticky Coconut Cake is too dry, it might be because it was baked a bit too long. Ensure you check for doneness around the 45-minute mark, and remember that it should be slightly moist in the center when pulling it out of the oven. Also, chilling the cake overnight can enhance its texture, making it more moist and chewy.
Are there any allergy considerations for this recipe?
Yes! This recipe contains eggs and coconut, so those with allergies to either should be cautious. For a vegan alternative, substitute the eggs with aquafaba (the liquid from canned chickpeas), and ensure the coconut products used are free from allergens. Always check your ingredient labels for any potential cross-contamination.
Do I need to chill the cake overnight before serving?
Yes, I highly recommend chilling the Sticky Coconut Cake for at least 8 hours, or preferably overnight. This step allows the flavors to meld beautifully and helps the cake set to the right chewy texture, making it easier to slice and enhancing the overall taste experience.
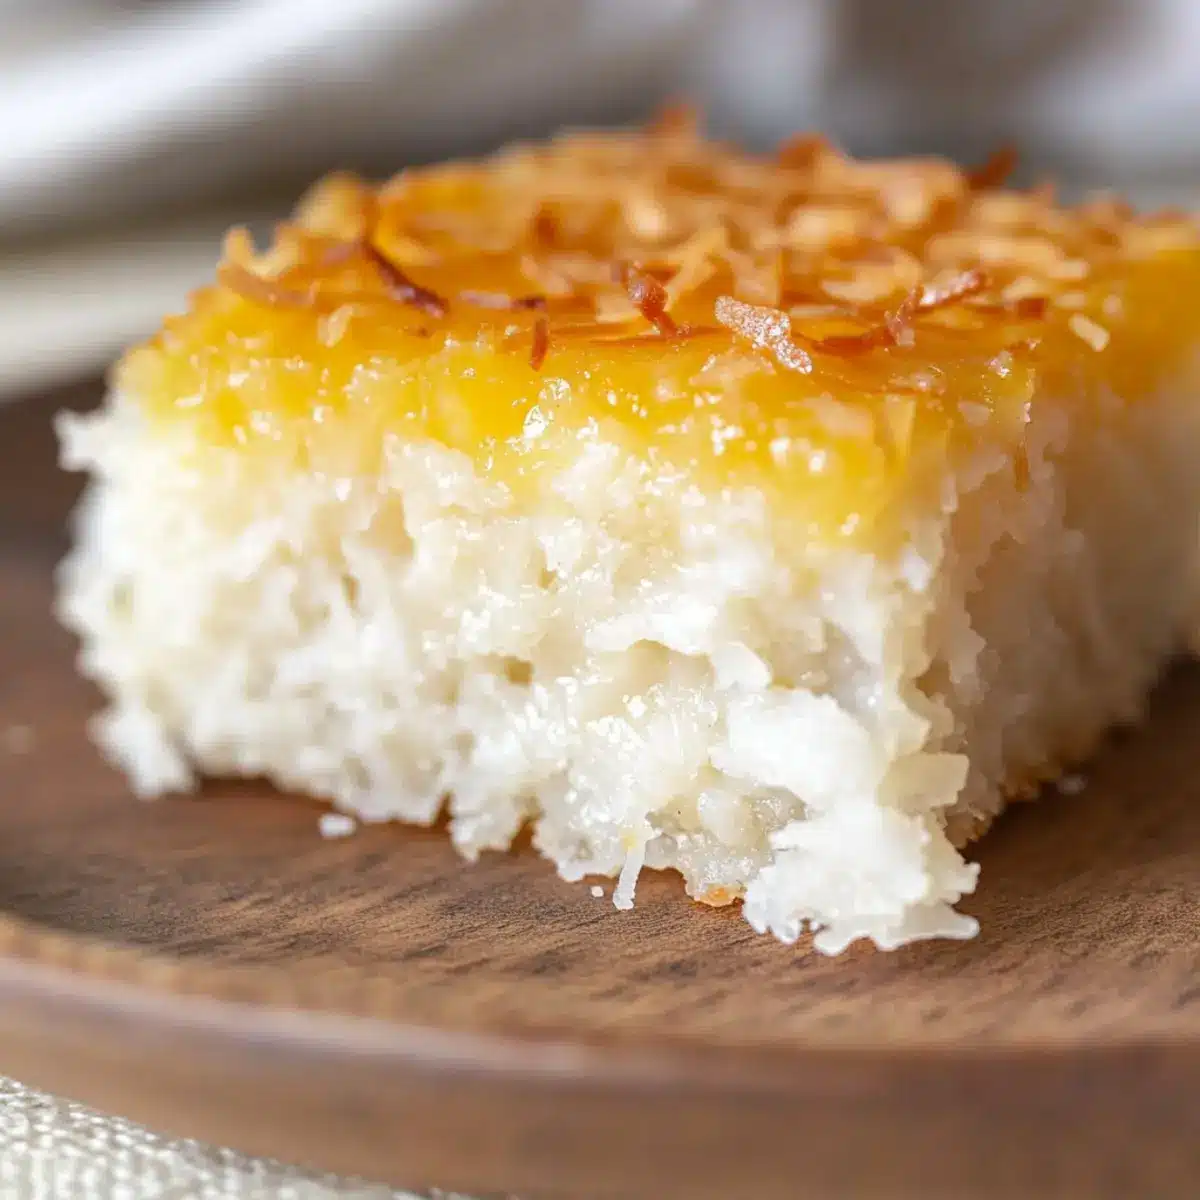
Sticky Coconut Cake: Chewy Delight with a Tropical Twist
Ingredients
Equipment
Method
- Preheat your oven to 350°F (175°C) and grease the 8x8-inch baking pan.
- In a large mixing bowl, whisk the separated egg whites and granulated sugar until bubbly and frothy, about 2-3 minutes. Stir in the coconut milk, followed by the shredded coconut, rice flour, and vanilla extract. Mix until combined.
- Pour the batter into the prepared baking pan and bake for about 45 minutes or until the top is set and slightly golden.
- Remove the cake from the oven, brush the top with egg yolk for a glossy finish, and broil for 5-10 minutes until golden.
- Allow the cake to cool for about 30 minutes, then cover and refrigerate for at least 8 hours or overnight.
- Once chilled, slice the cake into squares or triangles and serve. Enjoy with a cup of warm tea or coffee.
Leave a Reply