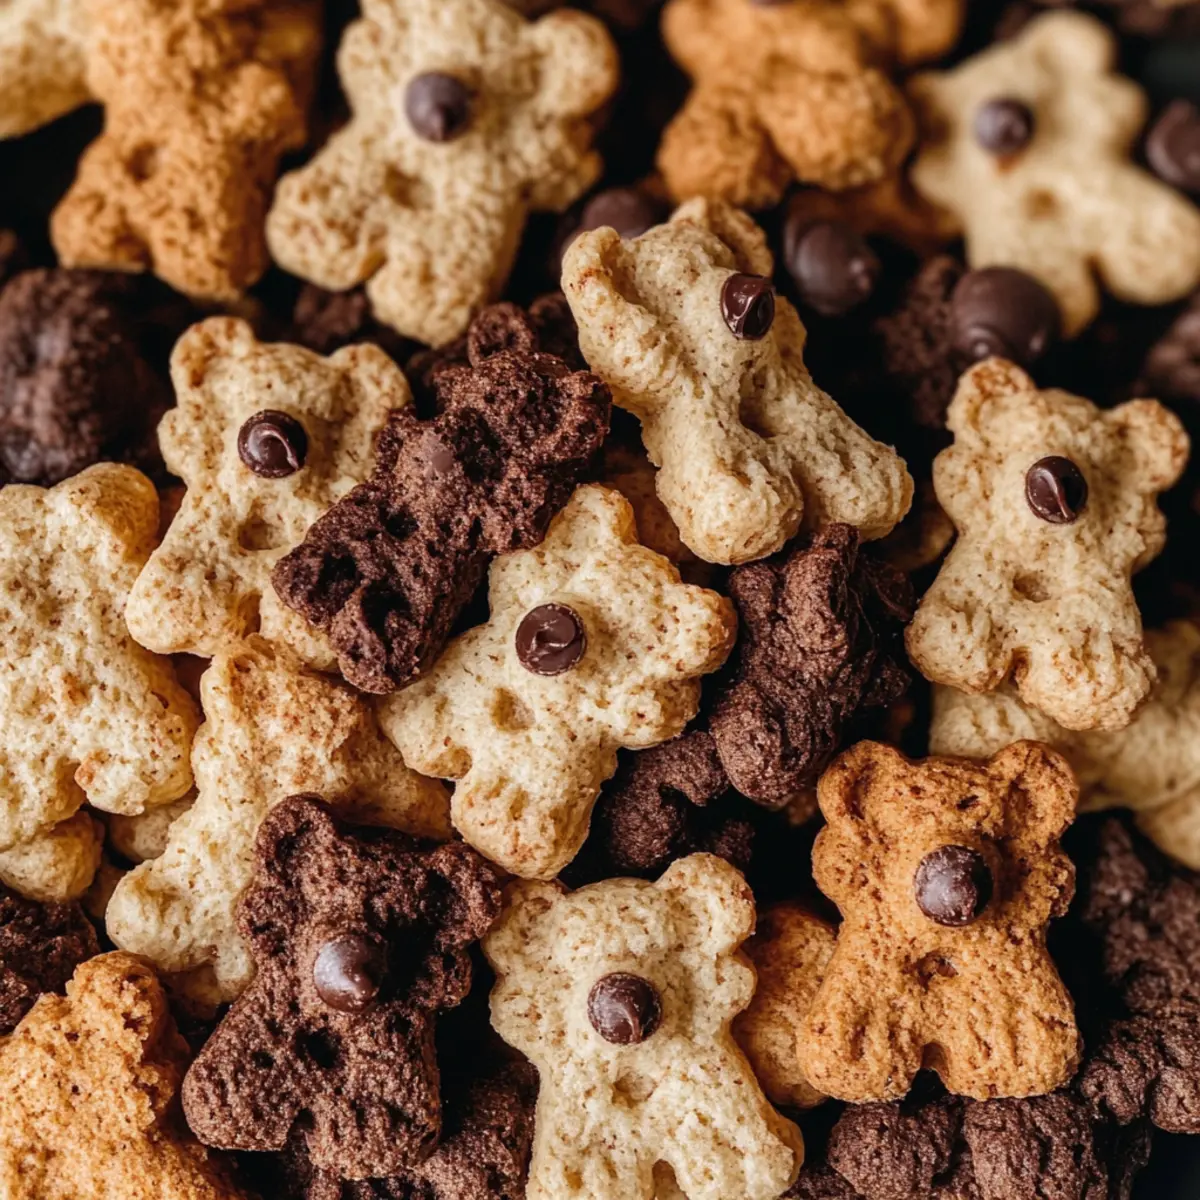
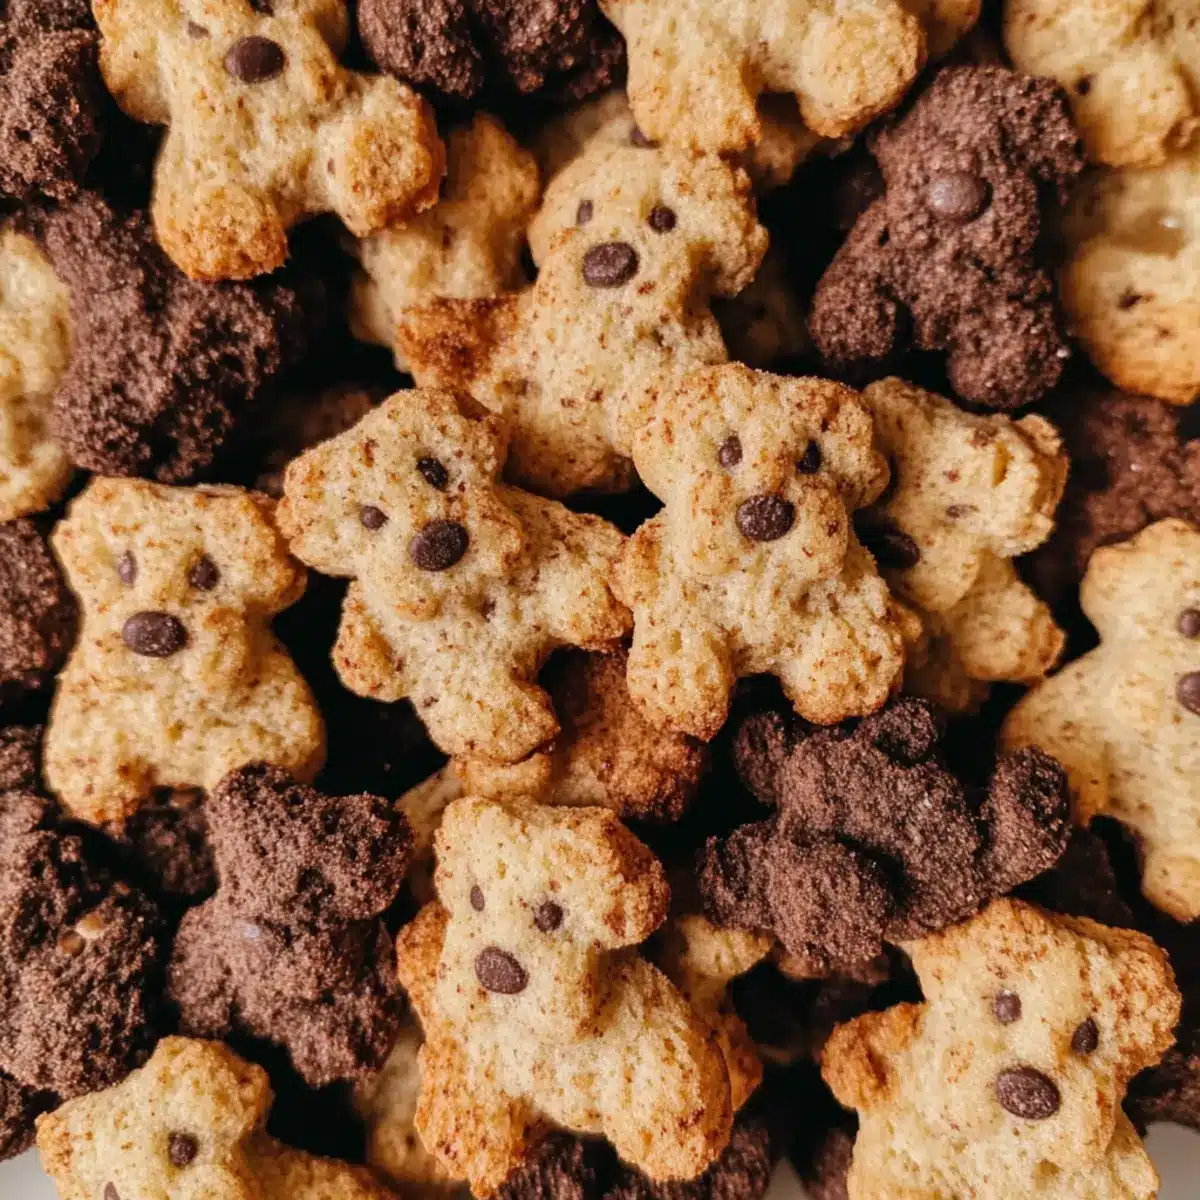
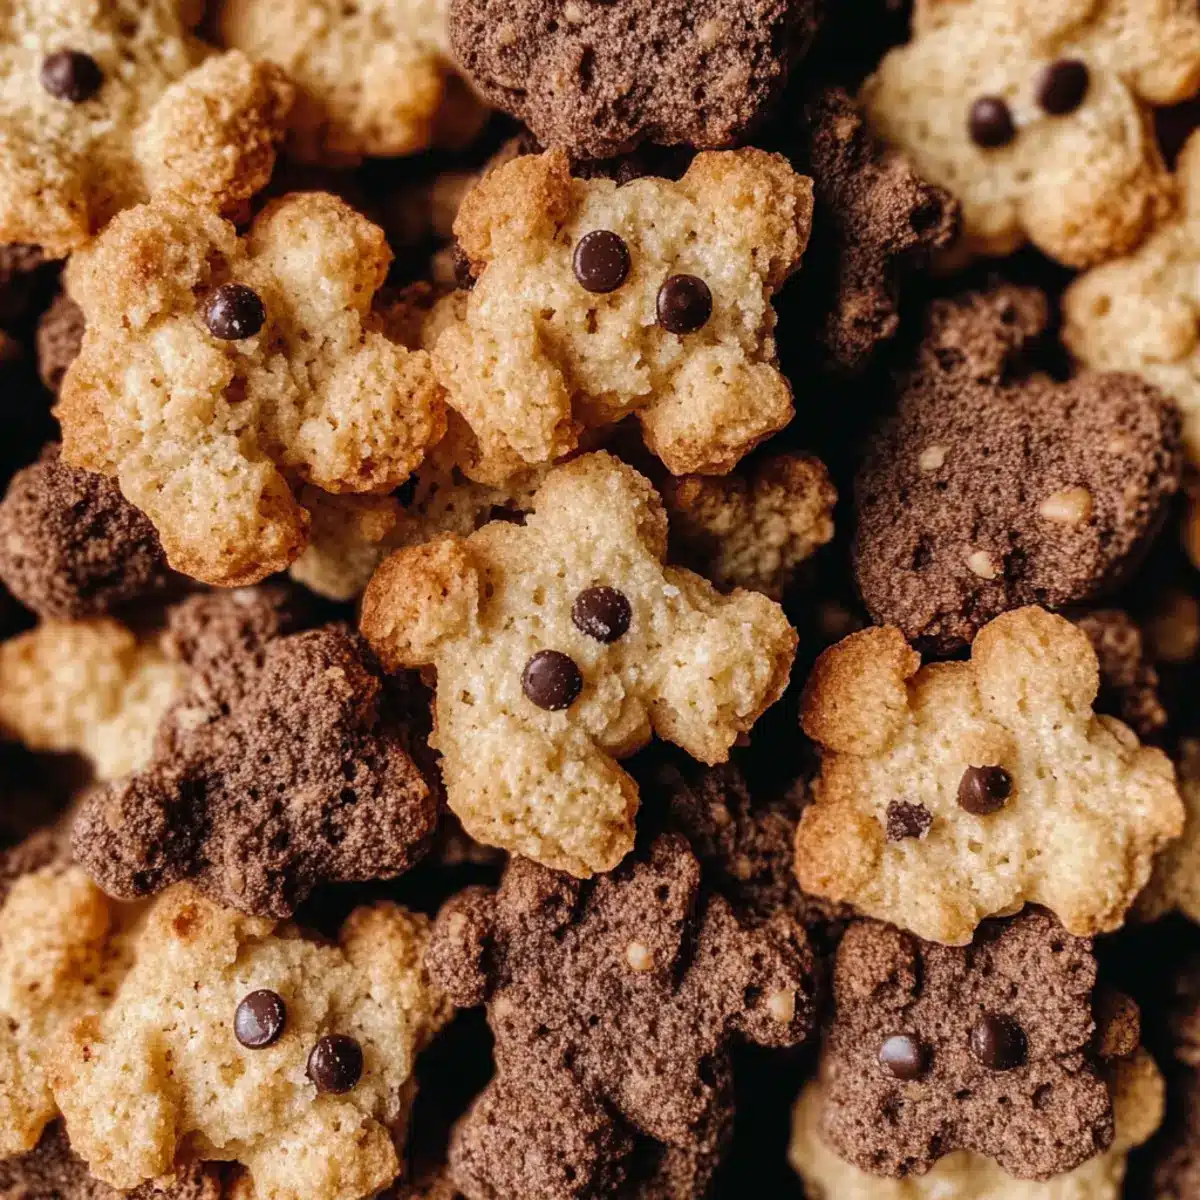
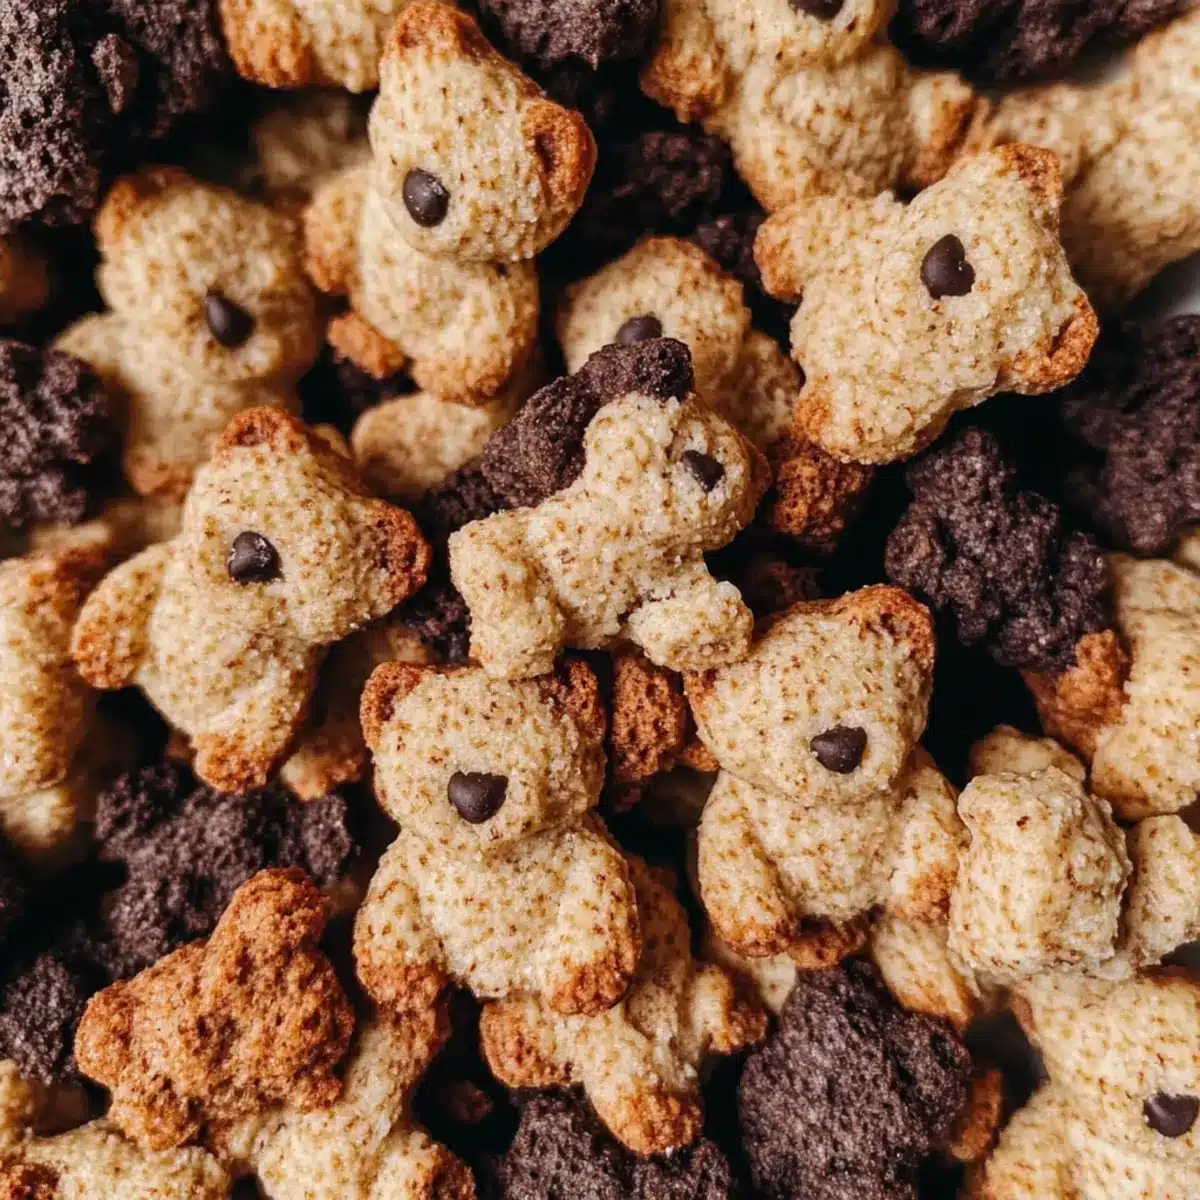
Whisking together a blend of nostalgia and creativity, I discovered the magic of Homemade Teddy Grahams—adorable little cookies bursting with childhood charm. Available in three delightful flavors—honey cinnamon, cocoa, and chocolatey chip—this recipe is a fantastic way to indulge in sweet memories while keeping things vegan and gluten-free. Not only are these treats a breeze to whip up, but they also make for a perfect baking project to enjoy with your kids, turning a simple kitchen moment into a fun family activity. With a satisfying crunch and soft chew, each bite takes you back to simpler times. Are you ready to dive into this bear-y delightful adventure in baking?
Why Make Homemade Teddy Grahams?
Nostalgic Treat: Revisit childhood memories with these adorable Teddy Grahams—a vegan and gluten-free twist on a classic. Easy to Customize: Choose from three flavors, ensuring there’s something for everyone’s taste buds. Perfect for Family Fun: This recipe encourages quality bonding time as you bake together with kids. Healthier Alternative: Made with wholesome ingredients, they offer a guilt-free snacking option. Store and Enjoy: Keep them fresh for a week, making them great for lunchboxes or afternoon cravings. If you love baking with unique flavors, check out these Cranberry Bliss Bars for another delightful treat!
Homemade Teddy Grahams Ingredients
For the Cookie Dough
- All-Purpose Flour – The base structure of the cookies; you can use a gluten-free flour blend for a gluten-free version.
- Plant-Based Butter – Adds richness and moisture to the cookies; regular butter works well if preferred.
- Coconut Milk – Provides creaminess to the dough; feel free to substitute with oat milk if necessary.
- Coconut Sugar – Offers sweetness and texture; cane sugar can be used without affecting the final outcome.
- Agave Syrup – A natural sweetener in the cocoa variation; honey is a great substitute for non-vegan options.
For Flavor Variations
- Cocoa Powder – Essential for the chocolate variation; no common substitutions are recommended.
- Mini Chocolate Chips – Adds delightful chocolate chunks; optional but highly recommended for extra indulgence.
- Honey or Maple Syrup – Sweetener for the honey cinnamon flavor; maple syrup is a suitable alternative.
- Ground Cinnamon – Imparts the iconic honey cinnamon taste; no substitutions are advised for the best flavor.
Each ingredient enhances the magic of your Homemade Teddy Grahams, creating a treat full of joy and nostalgia for friends and family!
Step‑by‑Step Instructions for Homemade Teddy Grahams
Step 1: Preheat and Prepare
Preheat your oven to 350°F (175°C) and line a baking sheet with parchment paper. If you have a teddy graham mold, ensure it’s clean and ready for use. Alternatively, prepare a small cookie cutter for cutting shapes later. This sets the stage for creating beautiful, bear-shaped treats in your Homemade Teddy Grahams adventure.
Step 2: Creaming the Ingredients
In a large mixing bowl, combine the plant-based butter and coconut sugar. Use an electric mixer or a sturdy whisk to cream these ingredients together for about 2-3 minutes until the mixture is smooth and fluffy. You’ll want the butter to be well-incorporated, so it’s light in texture. This step adds richness and sweetness to your Teddy Grahams.
Step 3: Incorporate Wet Ingredients
Next, pour in the coconut milk and continue mixing on low speed until fully combined. This should take around 1 minute. At this stage, the mixture will become more liquid and slightly thinner. The coconut milk enhances the dough’s creaminess, making your Homemade Teddy Grahams soft and delightful.
Step 4: Add Dry Ingredients
Gradually add the all-purpose flour, along with any chosen flavor ingredients such as cocoa powder for chocolate Teddy Grahams or ground cinnamon for honey cinnamon. Mix everything softly until a dough forms, about 2 minutes. Ensure there are no dry flour patches—your dough should be cohesive and slightly sticky, which is perfect for shaping.
Step 5: Chill the Dough
If your dough feels too soft to handle, cover it with plastic wrap and chill in the fridge for about 15-20 minutes. Chilling the dough makes it firmer and easier to work with, allowing you to create perfectly shaped Homemade Teddy Grahams without sticking. This step is crucial for beautiful results!
Step 6: Shape the Teddy Grahams
Once chilled, take portions of the dough and press it into your teddy graham mold or roll it out on a floured surface. Use a rolling pin to achieve an even thickness of about ¼ inch. If using a cookie cutter, ensure to press down firmly to get cute bear shapes. Repeat until all the dough is shaped.
Step 7: Bake the Cookies
Place the shaped Teddy Grahams onto your prepared baking sheet, leaving space between each cookie. Bake in the preheated oven for 12-15 minutes, or until the edges turn golden. Keep an eye on them, as overbaking can lead to darker cookies. Your kitchen will soon be filled with the delightful aroma of freshly baked goodies!
Step 8: Cool and Enjoy
Once baked, allow the Homemade Teddy Grahams to cool on the baking sheet for about 5 minutes, then transfer them to a wire rack. Let them cool completely before serving. This cooling step ensures the cookies firm up beautifully, achieving that satisfying crunch and chewy interior you’ll love!
Make Ahead Options
These Homemade Teddy Grahams are perfect for meal prep enthusiasts! You can prepare the cookie dough up to 24 hours in advance by mixing all the ingredients and then refrigerating it in an airtight container. This ensures the dough maintains its freshness and flavor until you’re ready to bake. Additionally, you can shape the cookies and freeze them for up to three months. When ready to bake, simply take them out of the freezer while preheating your oven, and bake from frozen—just add a couple of extra minutes to the baking time. Enjoy the convenience of having these delightful treats ready at a moment’s notice!
Storage Tips for Homemade Teddy Grahams
Room Temperature: Keep the cookies in an airtight container at room temperature for up to 5 days. This will help preserve their delightful crunch and flavor.
Fridge: For longer freshness, store the Homemade Teddy Grahams in the refrigerator, where they will last up to 1 week. Ensure they’re in a sealed container to avoid moisture.
Freezer: For extended storage, freeze the cookies by placing them in a single layer on a baking sheet, then transferring them to a freezer bag. They can be frozen for up to 3 months.
Reheating: When ready to enjoy, simply thaw at room temperature or pop them in a preheated oven at 350°F (175°C) for a few minutes to restore their texture.
What to Serve with Homemade Teddy Grahams?
Treat your loved ones to a delightful spread that enhances the joy of your homemade treats.
-
Creamy Almond Butter: This smooth and nutty dip perfectly balances the sweetness of the Teddy Grahams, making every bite even more enjoyable. Serve it alongside for a lovely spoonful of indulgence.
-
Fresh Fruit Salad: A refreshing mix of seasonal fruits brightens up the dessert table, complementing the flavors beautifully. The natural sweetness and juicy texture play perfectly against the crunchy cookies.
-
Coconut Yogurt Parfait: Layer your Teddy Grahams with coconut yogurt and fresh berries for a delicious breakfast or snack. The creaminess of the yogurt pairs wonderfully with the crunch of the cookies.
-
Milk Alternative: A tall glass of almond or oat milk is the perfect drink to wash down your Teddy Grahams. Its creamy texture mirrors the softness of the cookies, enhancing your nostalgic snacking experience.
-
Chocolate Dipping Sauce: For an added indulgent twist, serve a warm chocolate sauce for drizzling or dipping. The richness enhances each tender bite, making a truly irresistible treat.
-
Kids’ Snack Boxes: Include these delightful cookies with cheese, nuts, and dried fruits in lunch boxes for a wholesome and fun treat. They’re sure to bring smiles to faces everywhere.
-
Decaf Chai Latte: Sip on a cozy decaf chai latte while enjoying the Teddy Grahams. The warming spices in the latte complement the honey cinnamon flavor perfectly, making for a delightful afternoon break.
-
Whipped Coconut Cream: A dollop of whipped coconut cream served on the side is a light and airy complement for your cookies. The playful texture elevates each bite into a dreamy experience.
Expert Tips for Homemade Teddy Grahams
-
Chill for Shape: Chilling the dough makes it easier to handle and shape, resulting in adorable little bears for your Homemade Teddy Grahams.
-
Accurate Flour Measurement: Be sure to spoon and level your flour to avoid a crumbly texture. Too much flour can lead to dry cookies.
-
Watch Your Bake Time: Keep an eye on your cookies while baking; overbaking can make them too hard. Aim for a golden edge for perfect texture.
-
Flavor Variations: Don’t hesitate to experiment! Add extracts like almond or peanut butter for new flavors that transform your Homemade Teddy Grahams.
-
Use Fresh Ingredients: Ensure your baking ingredients are fresh for the best flavor and texture, especially for baking powder or coconut milk.
Homemade Teddy Grahams Variations
Feel free to embark on a fun journey of customization to make these Teddy Grahams even more delightful!
- Nut-Free: Replace the plant-based butter with sunflower seed butter to avoid nuts while keeping the richness.
- Gluten-Free: Use a 1:1 gluten-free flour blend to ensure everyone can enjoy these bear-shaped delights.
- Naturally Sweetened: Instead of coconut sugar, opt for date sugar for a more natural sweetness without refining processes.
- Cocoa Overload: Add extra cocoa powder to the chocolate variation for a bolder chocolate flavor and deeper color in your Tedddy Grahams. A simple twist that any chocolate lover will appreciate!
- Fruity Surprise: Mix in dried fruits such as cranberries or raisins for a pleasant sweetness that brightens each bite. Try balancing flavors like in these Cranberry Bliss Bars!
- Spiced Sensation: Enhance the honey cinnamon version with a pinch of nutmeg or pumpkin spice for a warming, autumnal twist.
- Salted Caramel Touch: Drizzle some homemade or store-bought salted caramel over the cooled cookies for a luxurious treat that will please your sweet tooth.
- Zesty Lemon: Lemon zest can add a refreshing note to any variation, brightening the flavor profile and offering a unique experience.
These variations will keep things exciting and inclusive, perfect for making memories in the kitchen! If you’re interested in further inventive recipes, consider trying out these Burger Bowls Savor to shake up your meal routine!
Homemade Teddy Grahams Recipe FAQs
How do I choose the right ripeness for my ingredients?
Absolutely! When selecting your ingredients, look for high-quality coconut milk that’s creamy, with no lumps or separation. For the best chocolatey flavor, choose cocoa powder that’s rich in color and aroma. If you opt for any fresh fruit for flavor variations, make sure they are ripe but not overripe—this ensures optimal sweetness and taste!
What’s the best way to store my Homemade Teddy Grahams?
To keep your Homemade Teddy Grahams as crunchy and delicious as possible, store them in an airtight container at room temperature for up to 5 days. If you’d like them to last longer, you can refrigerate them in a sealed container for up to 1 week. This helps maintain their delightful texture and flavor; just remember to let them come to room temperature before enjoying again!
Can I freeze my Homemade Teddy Grahams?
Yes, you can! To freeze your Homemade Teddy Grahams, first arrange them in a single layer on a baking sheet. Once they’re frozen solid, transfer them to a freezer bag, ensuring all air is removed. They can be stored this way for up to 3 months. When you’re ready to enjoy them, simply thaw at room temperature or heat them briefly in a preheated oven at 350°F (175°C) for a few minutes to regain their crunch.
What should I do if my dough is crumbly?
Very! A crumbly dough can happen if you added too much flour. To fix this, you can gradually add a bit more coconut milk, one tablespoon at a time, mixing until the dough comes together. Remember to use the spoon and level method when measuring flour for accuracy! If the dough is still too dry, consider adding a touch more plant-based butter to help bind it.
Are these Homemade Teddy Grahams suitable for pets or people with allergies?
While your Homemade Teddy Grahams are made from wholesome vegan ingredients, they do contain coconut and can have varying levels of gluten depending on the flour used. Always double-check for specific allergies. It’s best to keep these cookies away from pets, especially due to the chocolate chips, which can be harmful to them. If making for someone with allergies, you can adapt the recipe further by using specific allergy-friendly substitutes!
Can I modify the ingredients for different dietary needs?
Absolutely! You can easily make these Homemade Teddy Grahams vegan and gluten-free by using a gluten-free flour blend and plant-based butter. Feel free to swap out coconut milk for oat milk or almond milk as an alternative. These substitutions ensure that everyone—regardless of dietary restrictions—can enjoy these delightful treats. Plus, they won’t compromise flavor or texture!
Delicious Homemade Teddy Grahams: Vegan, Gluten-Free Joy
Ingredients
Equipment
Method
- Preheat your oven to 350°F (175°C) and line a baking sheet with parchment paper.
- In a large mixing bowl, combine the plant-based butter and coconut sugar. Cream together for about 2-3 minutes until smooth and fluffy.
- Pour in the coconut milk and mix on low speed until fully combined.
- Gradually add the all-purpose flour and any flavor ingredients. Mix softly until a cohesive dough forms.
- If the dough is too soft, chill it in the fridge for about 15-20 minutes.
- Once chilled, shape the dough using a teddy graham mold or cookie cutter.
- Place the shaped Teddy Grahams onto the prepared baking sheet and bake for 12-15 minutes until golden.
- Allow to cool on the baking sheet for about 5 minutes, then transfer to a wire rack to cool completely.
Leave a Reply