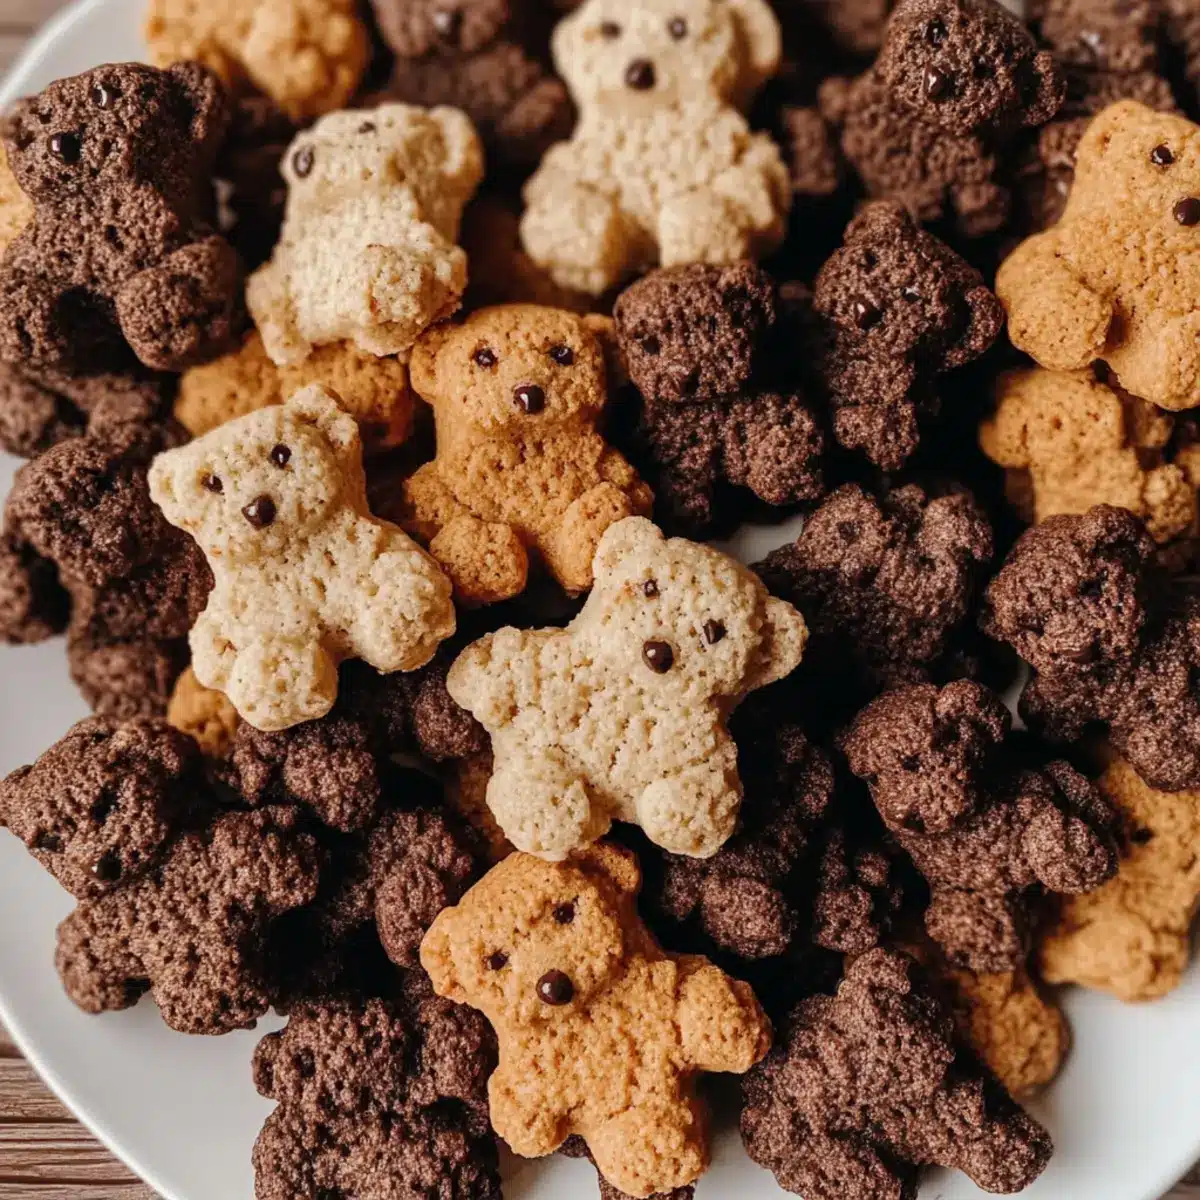
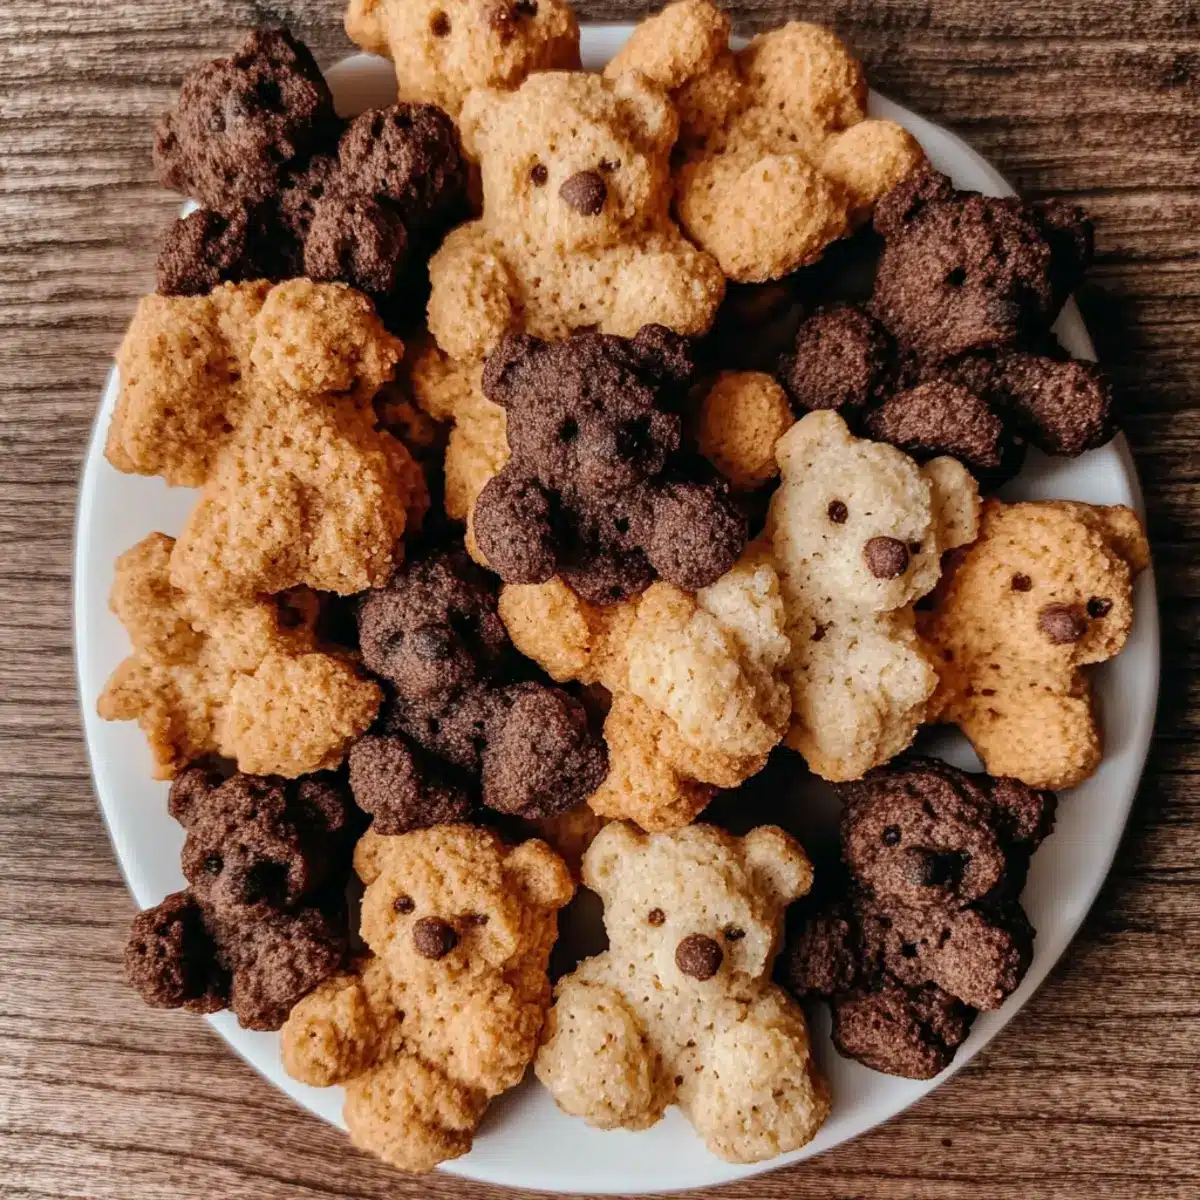
As I was rummaging through my childhood memories, I stumbled upon those charming little bear-shaped cookies that brought so much joy. That’s when I realized it was time to recreate the magic with my Homemade Teddy Grahams! These delightful treats come in three mouthwatering flavors: honey cinnamon, cocoa, and chocolatey chip, each one more adorable than the last. Not only are they vegan and gluten-free, but they also whip up effortlessly, making them a perfect baking adventure for you and your little ones. Whether for snack time or a nostalgic dessert, these cute bear cookies are sure to bring smiles all around. Ready to indulge in some playful baking fun? Let’s get started!
Why Are These Teddy Grahams Special?
Nostalgic Comfort: Bring back your childhood with these adorable bear-shaped cookies that evoke sweet memories.
Easy to Make: A straightforward recipe that even beginner bakers can master quickly—perfect for spontaneous baking days!
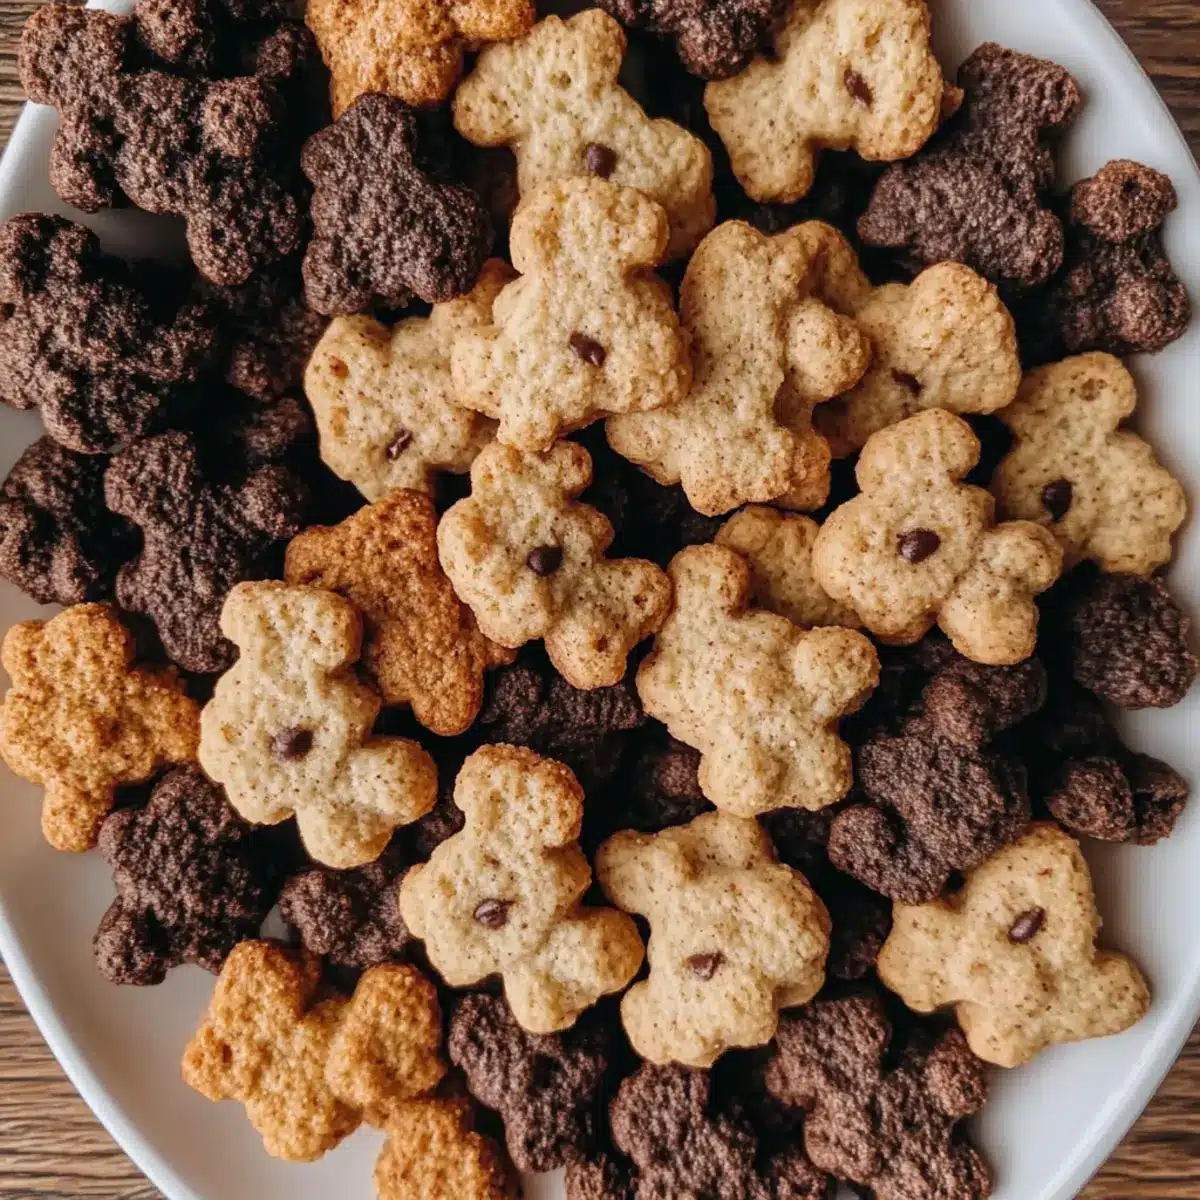
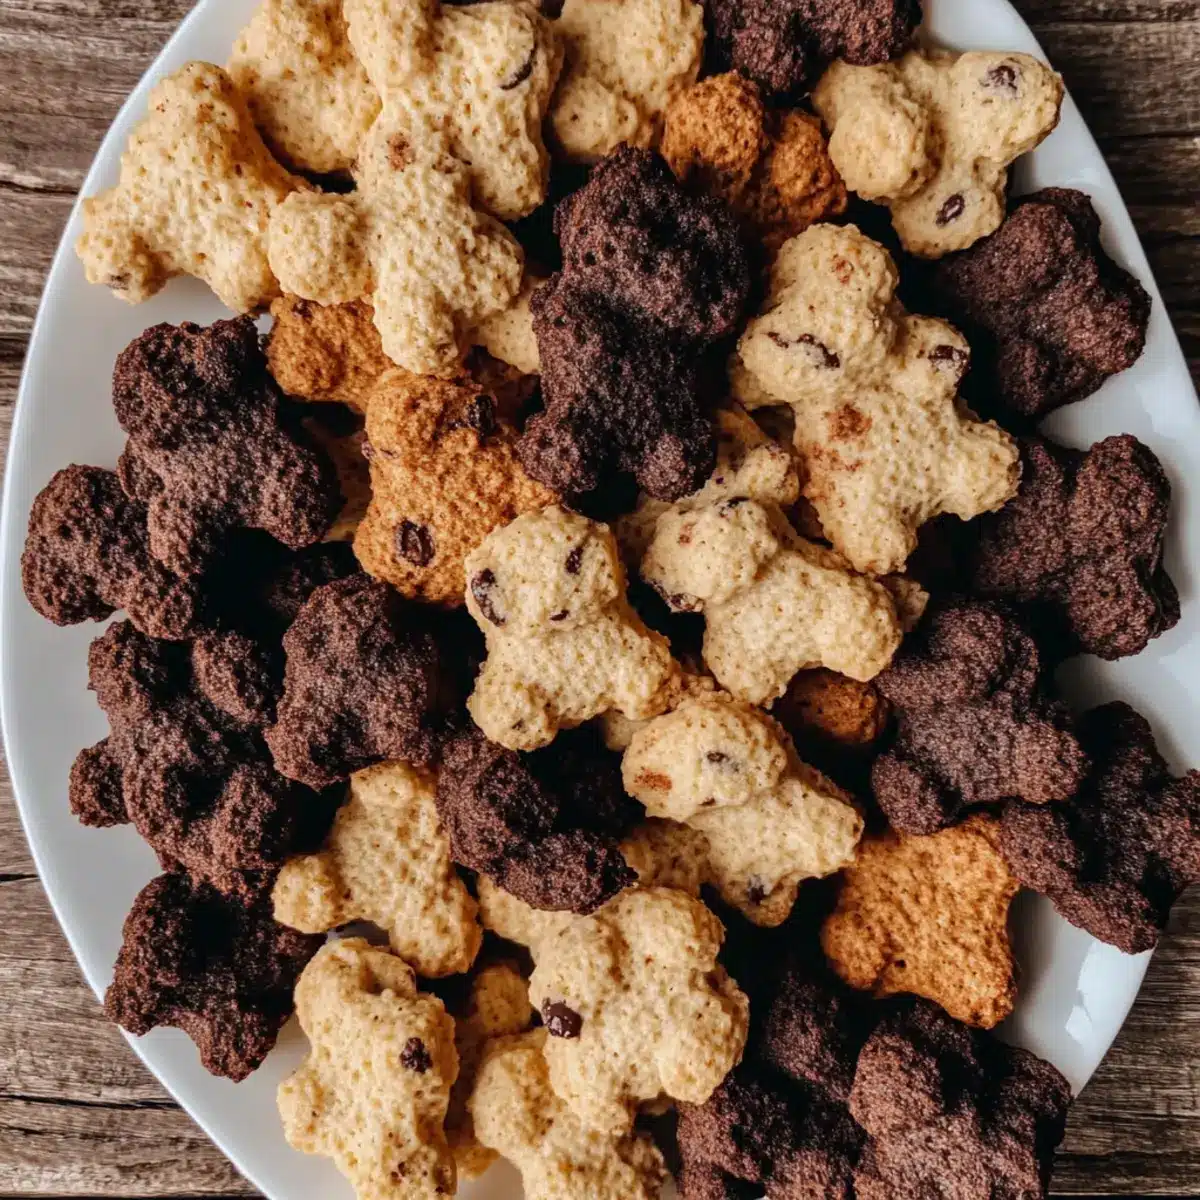
Flavor Variety: Choose from three delightful flavors—honey cinnamon, cocoa, or chocolatey chip—to satisfy any craving!
Kid-Friendly Fun: Involving the little ones in rolling and shaping makes baking together a memorable experience.
Healthy Twist: Enjoy vegan and gluten-free options that cater to multiple dietary needs without sacrificing flavor. For more delicious ideas, check out these Cranberry Bliss Bars that are great for a sweet treat!
Perfect for Sharing: These bear cookies are sure to impress at gatherings and snacks, making them a hit with family and friends!
Homemade Teddy Grahams Ingredients
For the Cookie Base
- Flour – Essential for providing structure; all-purpose flour can be used in a pinch.
- Plant Butter – This provides richness and moisture; feel free to substitute with regular butter if you prefer.
- Cocoa Powder – Delivers a deep chocolate flavor; use Dutch-processed for a milder taste in your homemade Teddy Grahams.
- Agave Syrup – Sweetens the cocoa version charmingly; swap in honey if you’re not sticking to vegan options.
For the Flavors
- Mini Chocolate Chips – Elevate the chocolatey chip appeal; stick with dark chocolate chips for a richer treat or omit for a lighter version.
- Cinnamon – Adds warmth and depth to the honey cinnamon variety; you can omit it if you want a more simplified cookie.
- Honey or Maple Syrup – Natural sweeteners that embody the essence of the honey cinnamon flavor; maple syrup is a great vegan alternative.
Step‑by‑Step Instructions for Homemade Teddy Grahams
Step 1: Prepare the Dough
In a large mixing bowl, cream together the softened plant butter and agave syrup until light and fluffy, about 3-4 minutes. Gradually incorporate the flour, stirring gently to combine. For the flavor variations, mix in the cocoa powder for chocolate and add cinnamon along with honey or maple syrup for the honey cinnamon version. Ensure the dough is smooth and well blended, achieving a cohesive texture.
Step 2: Shape the Cookies
Once your dough is ready, it’s time to shape the cookies! If you have a teddy graham mold, simply press the dough into it. If not, roll the dough into small balls and then flatten them slightly to form bear shapes, using your hands to add little ears and facial features. This whimsical shaping makes your Homemade Teddy Grahams both cute and fun!
Step 3: Chill (Optional)
To enhance the cookie consistency, consider refrigerating the shaped dough for about 10-15 minutes. This optional step helps firm up the dough, making it easier to work with while ensuring that your Homemade Teddy Grahams hold their adorable shapes during baking. Simply cover the shapes with plastic wrap and place them in the fridge.
Step 4: Bake
Preheat your oven to 350°F (175°C). Line a baking sheet with parchment paper, then place your shaped Teddy Grahams onto the sheet, leaving space between each. Bake in the preheated oven for 10-12 minutes, or until the edges are lightly golden brown, keeping an eye on them to avoid overbaking and ensure deliciously soft centers.
Step 5: Cool
After baking, remove the tray from the oven and let the cookies cool on the baking sheet for about 5 minutes. This allows them to firm up slightly. Then, transfer your Homemade Teddy Grahams to a wire rack to cool completely. This cooling step helps maintain their delightful texture and makes them perfect for snacking!
Expert Tips for Homemade Teddy Grahams
-
Perfect Butter: Ensure your plant butter is softened but not melted, as this is key for achieving the ideal dough consistency for your Homemade Teddy Grahams.
-
Molding Patience: If using a mold, take your time pressing the dough into the shapes. A gentle touch prevents any breakage or uneven edges.
-
Chill for Firmness: For healthier texture, chill the shaped dough for 10-15 minutes before baking. This helps prevent spreading during baking, creating the perfect bear silhouettes.
-
Storage Savvy: Store your Teddy Grahams in an airtight container at room temperature to keep them crunchy. Enjoy them fresh for up to one week!
-
Watch Baking Time: Be vigilant while baking. These cookies can go from perfectly baked to overdone quickly. A light golden edge is what you want!
Homemade Teddy Grahams Variations
Feel free to let your creativity shine by customizing these charming bear cookies in delightful and delicious ways!
- Honey Substitute: Swap agave syrup for brown rice syrup for a subtle, different taste that still satisfies your sweet tooth.
- Flavorful Extracts: Add a splash of vanilla or almond extract to the dough for an extra depth of flavor that will tantalize your taste buds.
- Gluten-Free Option: Substitute your regular flour with a certified gluten-free blend to enjoy the same scrumptiousness without gluten worries.
- Chewy Texture: Introduce rolled oats into the cookie dough for a chewy texture that pairs beautifully with the sweetness of the Teddy Grahams.
- Spice It Up: Experiment by adding a pinch of nutmeg or ginger to the honey cinnamon variation for a warm, spicy kick!
- Coconut Bliss: Incorporate shredded coconut into the chocolatey chip version for a tropical twist that will transport you to sunny shores.
- Nutty Flavor: Fold in chopped nuts or seeds for a crunchy element that adds both nutrition and texture—a delightful surprise in each bite!
- Mini Bear Sandwiches: Spread a layer of your favorite nut butter between two cookies for a fun and wholesome snack, perfect for kids of all ages!
For more creative snack ideas, consider making these delightful Burger Bowls to complement your baking adventures!
Make Ahead Options
These Homemade Teddy Grahams are perfect for meal prep fans! You can make the dough up to 3 days in advance and store it in the refrigerator, ensuring you have a delightful snack ready when needed. Simply follow the recipe to prepare your cookie dough, shape into bears, and refrigerate it in an airtight container to maintain their adorable forms (this prevents spreading). When you’re set to bake, preheat your oven and pop them in for 10-12 minutes. This way, you’ll enjoy fresh, delicious Homemade Teddy Grahams with minimal effort, allowing for more quality time with your family or peace in your busy schedule!
What to Serve with Homemade Teddy Grahams
These delightful bear-shaped cookies aren’t just a treat on their own; they make a charming addition to your snack table or dessert spread.
- Classic Almond Milk: The nutty, creamy flavor of almond milk pairs beautifully with the slight sweetness of the Teddy Grahams, creating a comforting snack.
- Fruit Salad: A bright mix of fresh fruits adds a refreshing contrast—the sweetness of berries and the crunch of apples will balance the cookies nicely.
- Peanut Butter Dip: A smooth and creamy peanut butter dip is irresistible alongside these cookies; it’s perfect for adding a protein punch to snack time.
- Vanilla Ice Cream: Serve these cookies as a playful topping for vanilla ice cream, creating an utterly delightful dessert that’s both nostalgic and indulgent.
- Hot Chocolate: The rich, velvety warmth of a cup of hot chocolate brings a cozy vibe to any gathering, especially with Teddy Grahams as a crunchy sidekick.
- Yogurt Parfaits: Layer with your favorite yogurt and fruits for a fun twist—these cookies add delightful sweetness and texture to a healthy breakfast or snack!
- Chewy Granola Bars: Their chewy texture provides a wonderful contrast with the crispiness of the Teddy Grahams, creating an enjoyable snack experience.
- Chai Latte: The warm spices of a chai latte complement the cookie’s sweetness, making it a lovely pairing for an afternoon treat.
- Chocolate Fondue: Dip these bear cookies into silky chocolate fondue for an interactive dessert that kids and adults alike will adore!
How to Store and Freeze Homemade Teddy Grahams
Room Temperature: Store your Homemade Teddy Grahams in an airtight container at room temperature for up to one week to keep them fresh and crunchy.
Fridge: If you prefer, you can refrigerate the cookies to extend their shelf life. They will stay good for up to two weeks—just make sure they’re well-wrapped!
Freezer: For longer preservation, freeze the cookies for up to three months. Spread them out on a baking sheet to freeze individually before transferring to a freezer-safe bag or container.
Reheating: To enjoy the cookies warm, reheat them in an oven at 300°F (150°C) for a few minutes until they soften. This is perfect for a cozy treat anytime!
Homemade Teddy Grahams Recipe FAQs
How do I choose the best ingredients for Homemade Teddy Grahams?
Absolutely! For the best results, ensure your flour is fresh and high-quality. If using plant butter, it should be softened, not melted—this helps create a perfectly creamy dough. Look for cocoa powder that’s Dutch-processed for a smoother chocolate flavor, and if you’re using agave syrup, opt for a light variety to prevent overpowering the sweetness.
How should I store Homemade Teddy Grahams, and how long will they last?
You can store your Homemade Teddy Grahams in an airtight container at room temperature for up to one week. If you want them to last a little longer, refrigerate them for up to two weeks—just make sure they are well-wrapped to maintain their freshness.
Can I freeze Homemade Teddy Grahams, and if so, how?
Very much! To freeze your Homemade Teddy Grahams, first arrange them on a baking sheet in a single layer and freeze them for about 1-2 hours until they’re firm. Once frozen, transfer the cookies to a freezer-safe bag or container. They can be stored in the freezer for up to three months. When you’re ready to enjoy, just thaw them at room temperature or reheat in the oven for a few minutes!
What should I do if my cookies spread too much while baking?
If your Homemade Teddy Grahams spread too much, it could be due to the dough being too warm or not firm enough. To fix this, try chilling the shaped dough for about 10-15 minutes before baking. This will help maintain their shape while they bake. If they still spread, don’t worry! They’ll still be delicious, just perhaps more of a “bear patch” than distinct teddy shapes.
Are Homemade Teddy Grahams safe for those with allergies?
These delightful teddy cookies are vegan and gluten-free, making them a great option for various dietary needs. However, always check that your ingredients, such as the flour and any chocolate chips, are certified gluten-free. If making for someone with allergies, avoid cross-contamination by using separate utensils and surfaces during preparation. Always consult with your guests regarding their specific allergies for peace of mind!
Can I customize the flavors of my Homemade Teddy Grahams?
The more the merrier! You can easily customize the flavors to your liking. Besides the classic variations of honey cinnamon, cocoa, and chocolatey chip, consider adding different extracts like vanilla or almond, or even experimenting with spices like nutmeg or ginger for an extra zing. Get creative and let your taste buds guide you!
Homemade Teddy Grahams: Fun, Vegan Treats in 3 Delicious Flavors
Ingredients
Equipment
Method
- In a large mixing bowl, cream together the softened plant butter and agave syrup until light and fluffy, about 3-4 minutes.
- Gradually incorporate the flour, stirring gently to combine.
- For the flavor variations, mix in the cocoa powder for chocolate and add cinnamon along with honey or maple syrup for the honey cinnamon version.
- Ensure the dough is smooth and well blended, achieving a cohesive texture.
- Once your dough is ready, it’s time to shape the cookies!
- If you have a teddy graham mold, simply press the dough into it.
- If not, roll the dough into small balls and then flatten them slightly to form bear shapes.
- Refrigerate the shaped dough for about 10-15 minutes to enhance consistency.
- Preheat your oven to 350°F (175°C). Line a baking sheet with parchment paper.
- Place your shaped Teddy Grahams onto the sheet, leaving space between each.
- Bake in the preheated oven for 10-12 minutes, or until edges are lightly golden brown.
- Remove from the oven and let cool on the baking sheet for about 5 minutes before transferring to a wire rack.
Leave a Reply