Every once in a while, I find myself craving something sweet, yet I want to keep things on the healthier side. Enter my Healthy 5-Ingredient Homemade Butterfingers—a guilt-free twist on a beloved classic! This recipe is perfect for anyone looking to indulge without sacrificing their health goals. With just five simple ingredients, these gluten-free, dairy-free treats are a joy to make and share. The combination of crispy cornflakes and creamy peanut butter gives you that satisfying crunch you love while being naturally sweetened. Plus, they’re incredibly quick to prepare, making them an ideal snack or dessert for busy days. Curious about how these scrumptious bars can elevate your sweet cravings? Let’s dive in!
Why make Healthy Homemade Butterfingers?
Guilt-Free Indulgence: You can satisfy your sweet tooth without compromising on health! These homemade Butterfingers are gluten-free and dairy-free.
Simple Ingredients: Using just five natural ingredients makes the preparation easy and fun!
Quick Prep Time: Perfect for busy schedules, you can whip up these bars in no time—ideal for unexpected sweet cravings.
Crowd-Pleasing Treat: These bars are a hit at get-togethers, appealing to both health-conscious friends and candy lovers alike.
Storage Friendly: Make a batch ahead and freeze them for a delightful treat whenever the mood strikes! Enjoy as a snack with your favorite beverage or grab one on the go, just like with the indulgent Cranberry Bliss Bars.
Homemade Butterfingers Ingredients
For the Base
- Peanut Butter – A natural, creamy choice; opt for unsweetened varieties to keep it healthy.
- Maple Syrup or Honey – Provides a delightful natural sweetness; choose maple syrup for a vegan option.
- Corn Flakes – Adds that irresistible crunchy texture; ensure you select gluten-free brands if needed.
For the Coating
- Chocolate Chips – Indulgent and sweet, make sure to use dairy-free chocolate for a healthier twist.
- Coconut Oil – Helps the chocolate melt smoothly and gives your coating a beautiful sheen.
Get ready to enjoy your guilt-free treats with these simple, wholesome ingredients for your Homemade Butterfingers!
Step‑by‑Step Instructions for Healthy Homemade Butterfingers
Step 1: Prepare Corn Flakes
Start by placing your corn flakes in a large zip-top bag. Seal the bag and crush the flakes into small pieces using a rolling pin or your hands, aiming for crumbs with some larger pieces for texture. This crunchy base is essential for your homemade Butterfingers, providing that perfect bite.
Step 2: Mix Base
In a large mixing bowl, combine creamy peanut butter with maple syrup or honey. Stir the mixture vigorously until it’s smooth and well blended. Then, add the crushed corn flakes directly into the bowl. Gently fold everything together until the corn flakes are evenly coated for a deliciously textured base.
Step 3: Shape Bars
Prepare a loaf pan by lining it with parchment paper, which will prevent sticking. Transfer your peanut butter-corn flakes mixture into the pan, using a spatula to spread it evenly. Press down firmly to create a compact layer, ensuring all corners are filled. This shaping step is critical for achieving the right consistency in your Healthy Homemade Butterfingers.
Step 4: Freeze
Once shaped, place the loaf pan in the freezer and let it chill for at least one hour. The cold temperature will firm up the mixture, making it easier to cut into bars later. Look for the mixture to be solid and hold its shape when gently pressed.
Step 5: Cut Bars
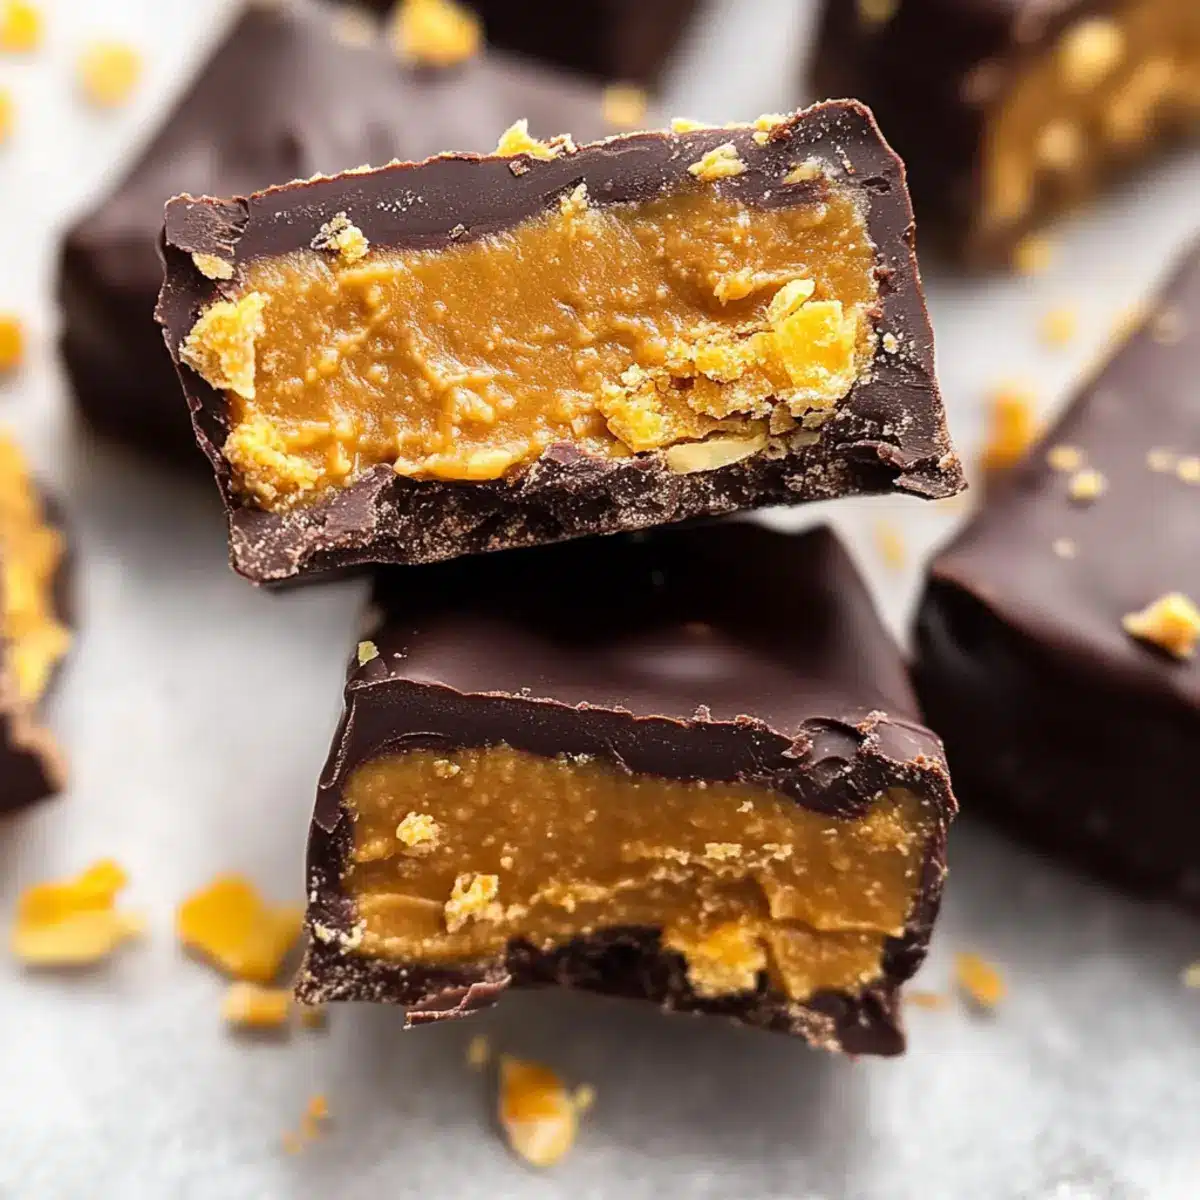
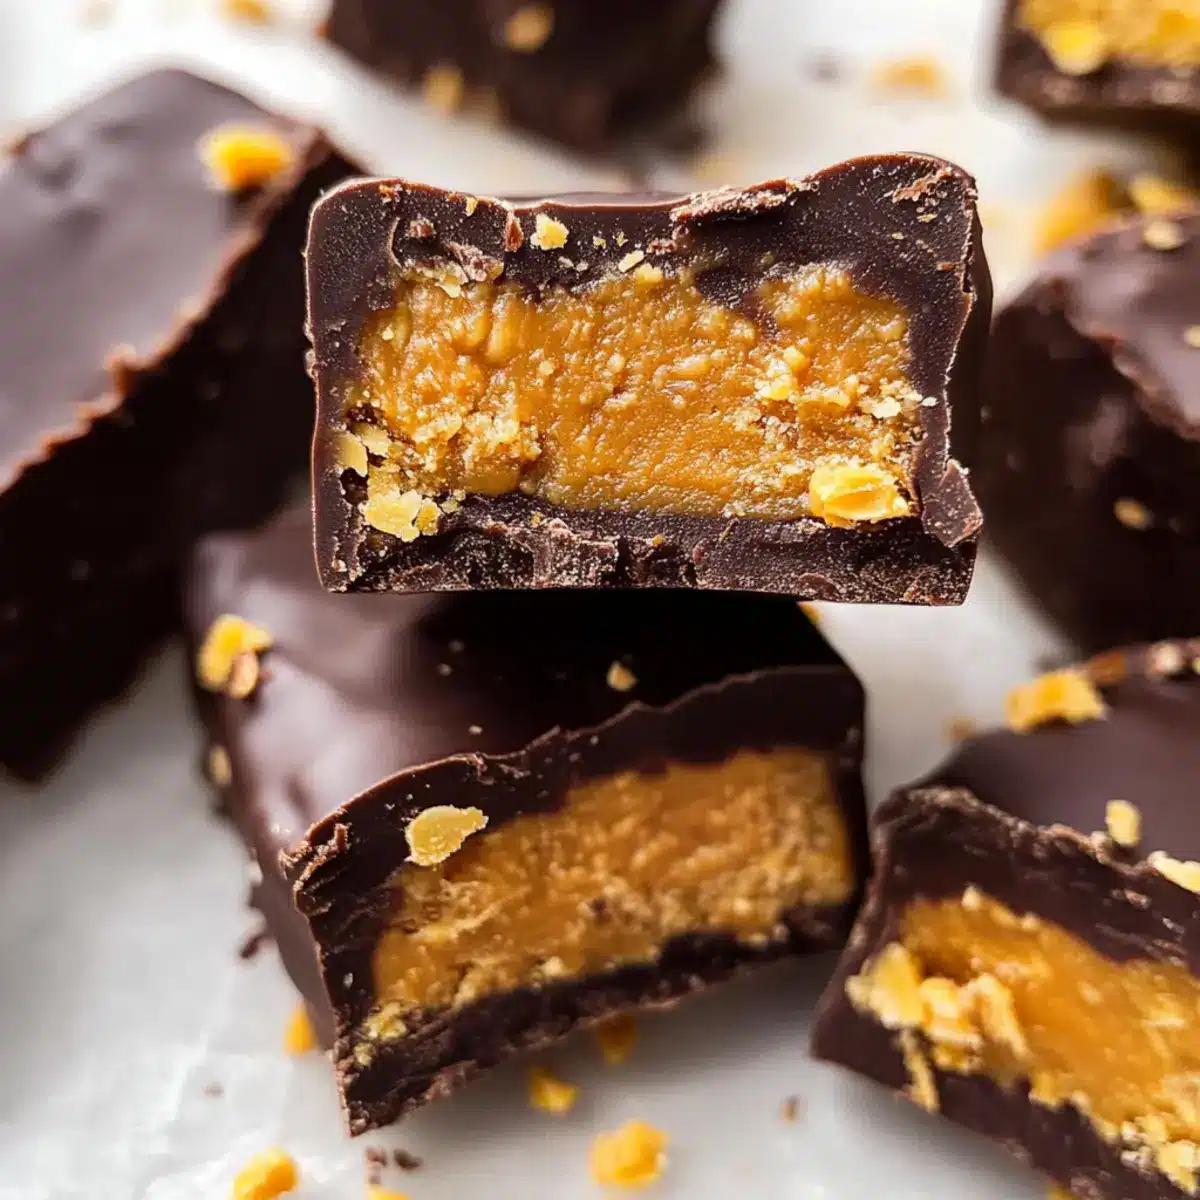
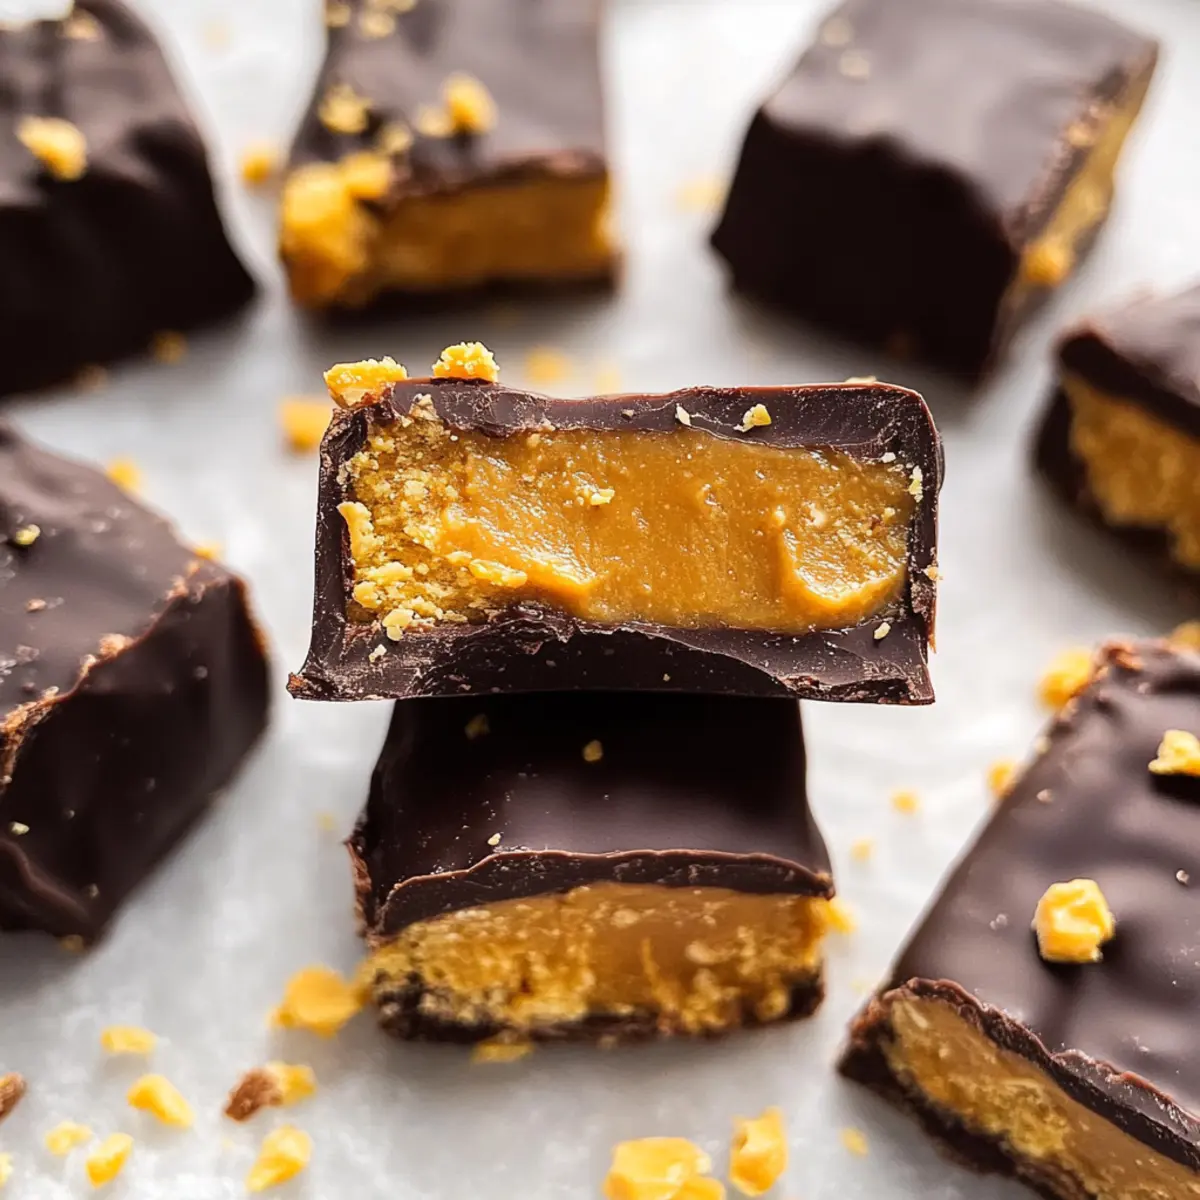
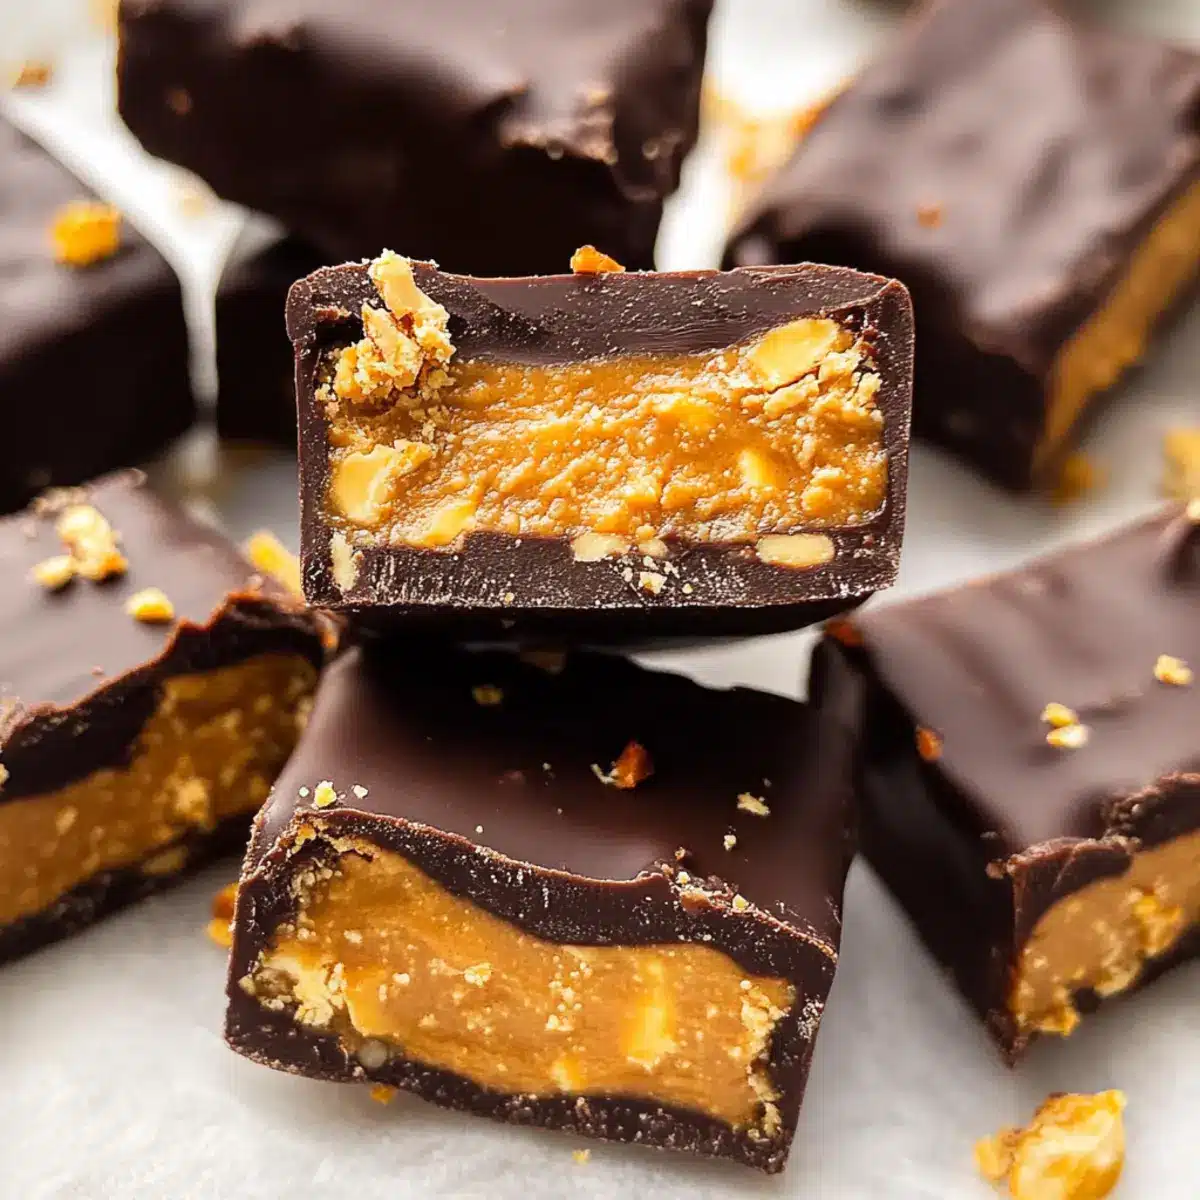
After an hour in the freezer, carefully remove your mixture from the loaf pan using the parchment paper as handles. Place it on a cutting board and slice into 12 equal bars. The bars should be crisp on the outside and have a smooth interior. Now, it’s time to coat them for that classic Butterfinger appeal!
Step 6: Melt Coating
In a small microwave-safe bowl, combine chocolate chips with coconut oil. Microwave in 30-second increments, stirring in between until smooth and fully melted. Aim for a shiny, liquid texture that will easily coat each bar. This rich chocolate layer will enhance the flavor of your Healthy Homemade Butterfingers beautifully.
Step 7: Coat Bars
Dunk each cut bar into the melted chocolate mixture, ensuring it’s fully covered. Use a fork to lift the bar out, allowing excess chocolate to drip off before placing it on parchment-lined plates. This step adds a rich, indulgent coat to your candy bars, elevating their deliciousness.
Step 8: Final Freeze
Return the coated bars to the freezer once more, letting them sit for about 10 minutes until the chocolate fully hardens. This final chilling enhances the texture and ensures that your Healthy Homemade Butterfingers maintain their shape. Once set, they’re ready to be enjoyed or stored for later!
What to Serve with Healthy 5-Ingredient Homemade Butterfingers?
Elevate your sweet experience with delightful pairings that complement the rich, crunchy goodness of these homemade treats!
- Coffee or Tea: The warmth of a freshly brewed beverage balances the crunchy sweetness, making each bite even more enjoyable.
- Fresh Fruit Medley: A mix of juicy berries or sliced apples adds a refreshing contrast, rounding out your snack beautifully.
- Coconut Yogurt: Creamy and tangy, yogurt enhances the dessert-like quality while adding protein, making for a satisfying snack.
- Dark Chocolate Drizzle: For chocolate lovers, a drizzle of melted dark chocolate intensifies the treat’s indulgence and adds an elegant touch.
- Nut Mix: A handful of mixed nuts provides a satisfying crunch and healthy fats, perfect for snacking alongside your Butterfingers.
- Coconut Milk Smoothie: Blend coconut milk with banana and spinach for a creamy drink that harmonizes perfectly with the bars’ flavors.
- Homemade Ice Cream: Indulge in a scoop of dairy-free ice cream to create a delectable dessert experience that’s hard to resist.
- Sparkling Water: A refreshing, fizzy beverage cleanses the palate while complementing the crunchy, sweet bars perfectly.
- Chocolate Almond Milk: A sweet, chocolaty drink that pairs harmoniously with the flavors of the Butterfingers adds a decadent finish.
- Maple Glazed Popcorn: For a fun twist, enjoy popcorn drizzled with maple syrup for an extra touch of sweetness that pairs beautifully!
Expert Tips for Healthy Homemade Butterfingers
• Choose Quality Ingredients: Opt for natural peanut butter without added sugars to enhance the flavor and healthiness of your homemade Butterfingers.
• Be Mindful of Texture: Avoid over-crushing your corn flakes; leaving some larger pieces contributes to the delightful crunch and authentic Butterfinger feel.
• Use the Right Pan: A non-stick or silicone loaf pan makes removing your bars a breeze, preventing any unnecessary breaking or sticking.
• Coating Consistency: Ensure your chocolate mixture is smooth and shiny for an even coating; stirring frequently while melting helps achieve that ideal consistency.
• Chill for Best Results: Don’t skip freezing the bars both after shaping and after coating; this ensures they hold their shape and have the perfect texture when you bite in.
Homemade Butterfingers Variations
Feel free to adapt this recipe to suit your taste buds and dietary needs, creating a unique twist on a classic treat!
-
Nut-Free: Replace peanut butter with sunbutter or a similar seed butter for a delightful allergy-friendly option.
-
Vegan: Use maple syrup for a vegan-friendly sweetener and ensure you choose dairy-free chocolate chips to keep it plant-based.
-
Crunchy Add-ins: Toss in some finely chopped nuts or seeds to the corn flakes mixture for an extra crunch and layer of flavor.
-
Spice It Up: Add a pinch of cinnamon or a dash of cayenne pepper for a warm spice kick that will surprise your taste buds in every bite.
-
Caramel Twist: Drizzle homemade or store-bought caramel on top of the chocolate coating for an indulgent treat reminiscent of classic candy bars.
-
Coconut Crunch: Mix in some unsweetened shredded coconut with the corn flakes for a tropical touch and a slightly chewier texture.
-
Maple Coconut: Swap out half of the peanut butter for coconut butter for a subtle coconut flavor that complements the chocolate beautifully.
-
Chocolate Variation: Experiment with different types of chocolate—dark, milk, or even white chocolate—for coating your bars to match your preference, just like in my Burger Bowls Savor to mix things up.
Let your creativity shine in the kitchen and enjoy your personalized homemade Butterfingers!
Make Ahead Options
These Healthy Homemade Butterfingers are perfect for meal prep, saving you time on busy weeknights! You can prepare the base mixture (peanut butter, maple syrup or honey, and corn flakes) up to 24 hours in advance, just keep it tightly covered in the refrigerator to maintain freshness. When you’re ready to serve, simply shape and freeze the bars as directed; this gives them that delightful crunch and snap. For the chocolate coating, melt it right before serving to ensure it stays smooth and glossy. You can also store the finished bars in an airtight container in the freezer for up to 3 months, allowing you to enjoy a sweet treat anytime!
How to Store and Freeze Homemade Butterfingers
Room Temperature: Keep your Homemade Butterfingers in an airtight container for up to 3 days to maintain their texture and freshness.
Fridge: Store the bars in the refrigerator for an extended shelf life of up to 1 week. Make sure they’re in a sealed container to avoid moisture.
Freezer: For long-term storage, keep them in an airtight container or freezer bag for up to 3 months. Thaw slightly before enjoying for the best texture.
Reheating: While they’re best enjoyed cold, if you prefer them slightly warm, microwave for 10-15 seconds. Just be careful not to overheat!
Healthy 5-Ingredient Homemade Butterfingers Recipe FAQs
How do I choose the right peanut butter for the recipe?
Absolutely! Opt for natural peanut butter that is free of added sugars and hydrogenated oils. Look for ingredients that list just peanuts (and possibly salt). This kind will yield a creamy base that complements the other flavors beautifully in your Healthy Homemade Butterfingers.
What’s the freezer life for these homemade bars?
You can store your Healthy Homemade Butterfingers in an airtight container or a freezer bag for up to 3 months. For the best quality, try to keep them flat and avoid stacking them too high. Allow the bars to thaw slightly at room temperature before enjoying, as this helps revitalize their delicious texture.
Can I substitute corn flakes for another ingredient?
Certainly! If you’re looking for alternatives, crushed gluten-free oats or puffed rice can work well for a similar crunch. Just ensure they suit your dietary needs. If using oats, you may wish to adjust the quantity slightly, as they can absorb more moisture than corn flakes.
How can I troubleshoot if the mixture is too crumbly?
If the base of your Healthy Homemade Butterfingers seems too crumbly and won’t hold together, you can add a bit more peanut butter or a splash of maple syrup. Mix well and let it sit for a short while to combine. This should help bind everything together into a lovely mixture before you shape and freeze it.
Are there any allergy considerations to keep in mind?
Very! Be cautious if cooking for someone with allergies; ensure that the peanut butter is safe and double-check the labels on your chocolate chips and corn flakes to avoid any hidden allergens, such as dairy or gluten. If you have nut allergies, consider using sun butter as a substitute for peanut butter to maintain the same flavor profile.
How do I store leftover chocolate after coating?
You can store any leftover melted chocolate in the refrigerator for up to 2 weeks in a sealed container. When ready to use again, gently reheat it in the microwave in 15-second intervals until it softens. Stir well before using to ensure a smooth consistency for a future batch of treats!
Healthy Homemade Butterfingers You'll Love Guilt-Free!
Ingredients
Equipment
Method
- Start by placing your corn flakes in a large zip-top bag. Seal the bag and crush the flakes into small pieces using a rolling pin or your hands.
- In a large mixing bowl, combine creamy peanut butter with maple syrup or honey. Stir until smooth.
- Add the crushed corn flakes and gently fold until coated.
- Prepare a loaf pan by lining it with parchment paper and transfer the mixture, pressing down firmly.
- Place the loaf pan in the freezer and let it chill for at least one hour.
- Carefully remove the mixture from the pan and slice into 12 equal bars.
- In a small microwave-safe bowl, combine chocolate chips and coconut oil. Microwave until fully melted and smooth.
- Dunk each bar into the melted chocolate, allowing excess to drip off before placing on parchment.
- Return coated bars to the freezer for about 10 minutes until chocolate hardens.
Leave a Reply