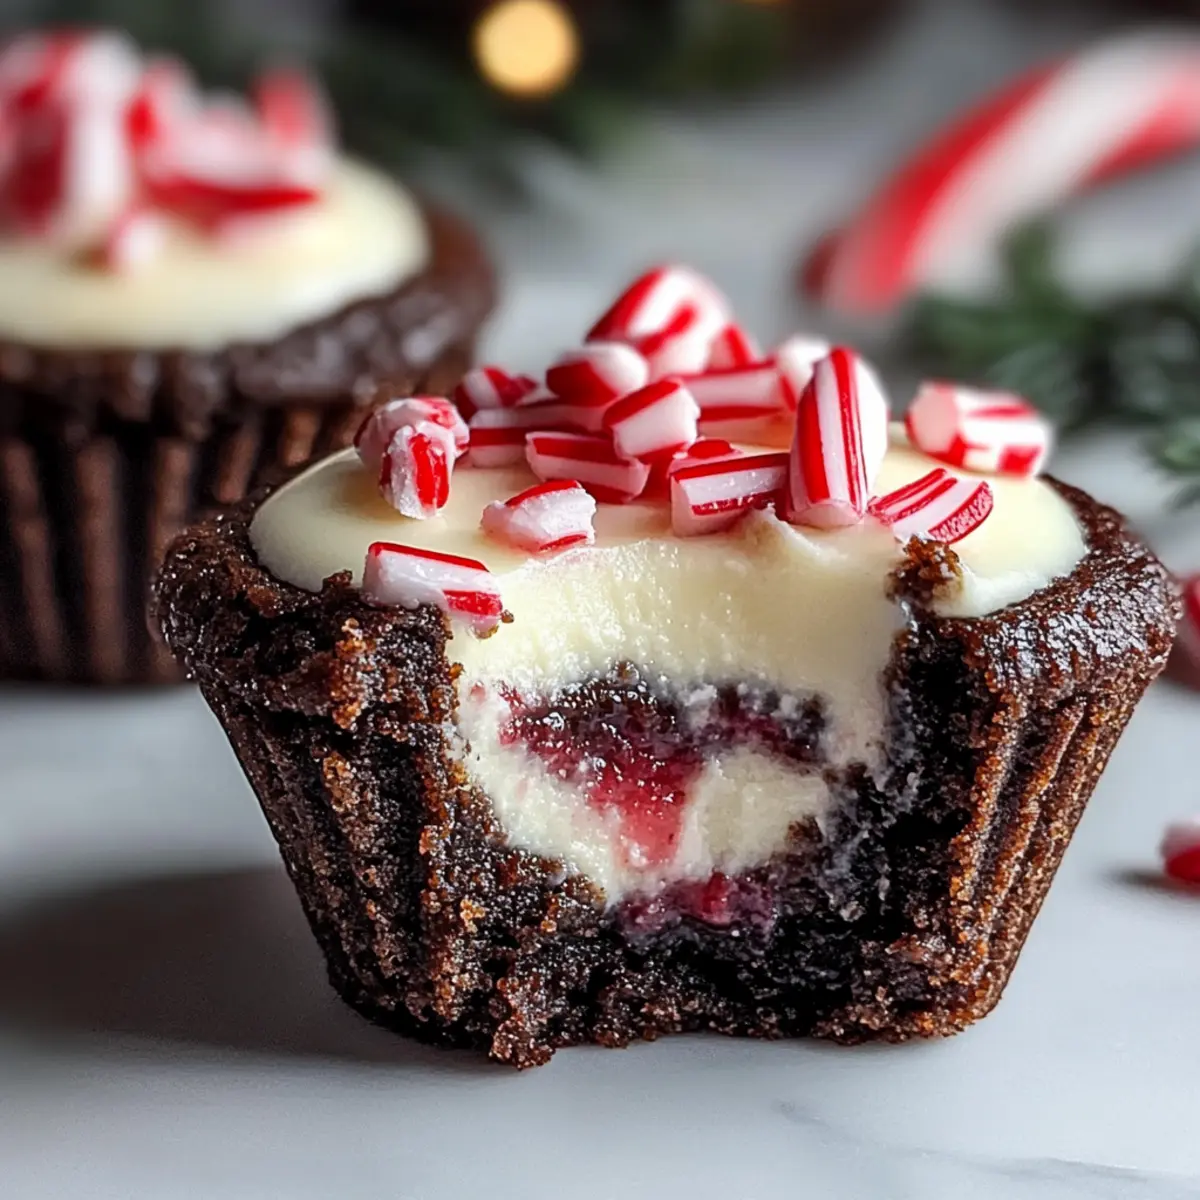
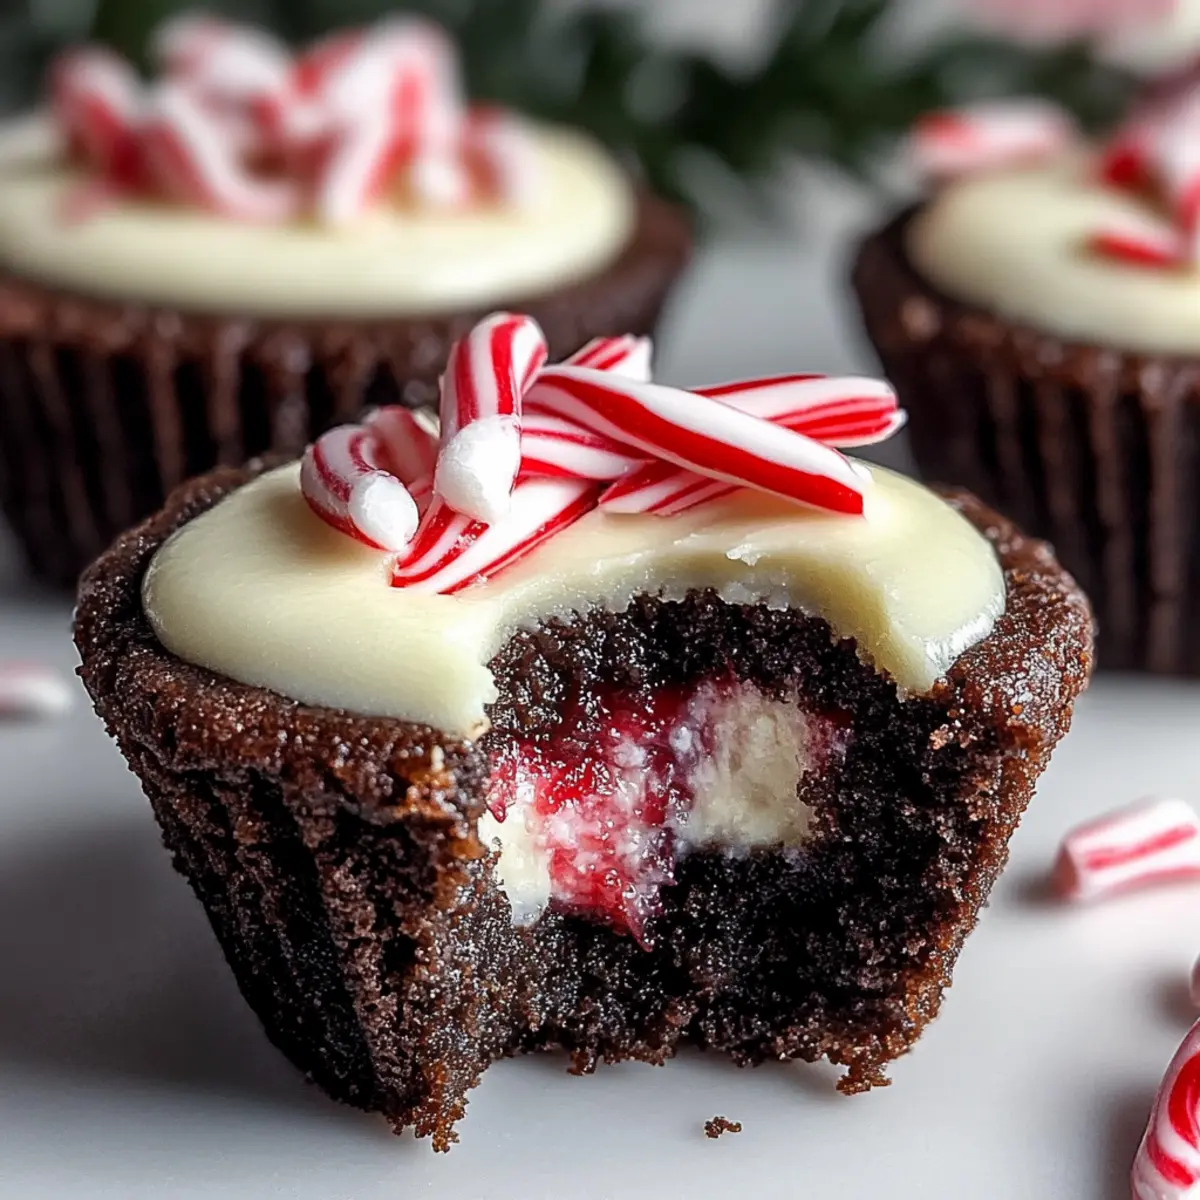
The scent of peppermint wafting through the kitchen instantly transports me to a cozy winter evening, where treats are plentiful and laughter fills the air. If you’re in search of an enchanting holiday dessert that marries rich chocolate with a refreshing mint twist, look no further than these delightful Chocolate Peppermint Cookie Cups. Not only are they a feast for the eyes with their festive presentation, but they also feature a creamy mint cheesecake filling that’s a guaranteed crowd-pleaser. With a quick prep time and the ability to customize ingredients for gluten-free diets, these treats will fit seamlessly into your holiday celebrations. Ready to impress your friends and family this season? Let’s dive in!
Why Are These Cookie Cups Special?
Irresistible Flavor: The blend of rich chocolate and refreshing peppermint makes these cookie cups a festive favorite that you’re sure to adore.
Easy to Make: With a straightforward recipe, even novice bakers can create these delights without any fuss.
Customizable Options: You can easily swap ingredients like using a *gluten-free flour for dietary needs, ensuring everyone can enjoy them.
Perfect for Sharing: Great for parties, these cookie cups are visually stunning and sure to leave a lasting impression, making them ideal for holiday gatherings with friends and family.
Make Ahead Friendly: These treats can be prepared in advance, allowing you to enjoy more time with your guests. Just add the garnish before serving to keep them fresh!
Chocolate Peppermint Cookie Cups Ingredients
For the Cookie Cups
• All-Purpose Flour – Provides structure to the cookie; consider a gluten-free flour blend if desired.
• Black Cocoa Powder – Adds a rich chocolate flavor and deep color; regular Dutch-processed cocoa can be substituted if needed.
• Granulated Sugar – Essential for sweetness and moisture; brown sugar can enhance the flavor with a hint of caramel.
• Brown Sugar – Contributes additional moisture and a slightly caramel taste.
• Baking Soda – Acts as a leavening agent to help the cookies rise.
• Salt – Enhances sweetness and balances out flavors.
• Unsalted Butter – Provides richness and a soft texture; can be replaced with margarine for a dairy-free version.
• Eggs – Binds the ingredients together and contributes to the texture.
• Vanilla Extract – Adds a depth of flavor that complements the chocolate.
For the Cheesecake Filling
• Heavy Cream – Creates a light, fluffy texture; whipped Greek yogurt is a lighter alternative.
• Cream Cheese – Forms the base of the cheesecake filling, providing richness.
• Powdered Sugar – Sweetens the filling, balancing the cream cheese’s tanginess.
• Peppermint Extract – Infuses a refreshing mint flavor into the filling.
For the Topping
• Chopped Candy Canes – Adds texture and festive flair to garnish each cookie cup.
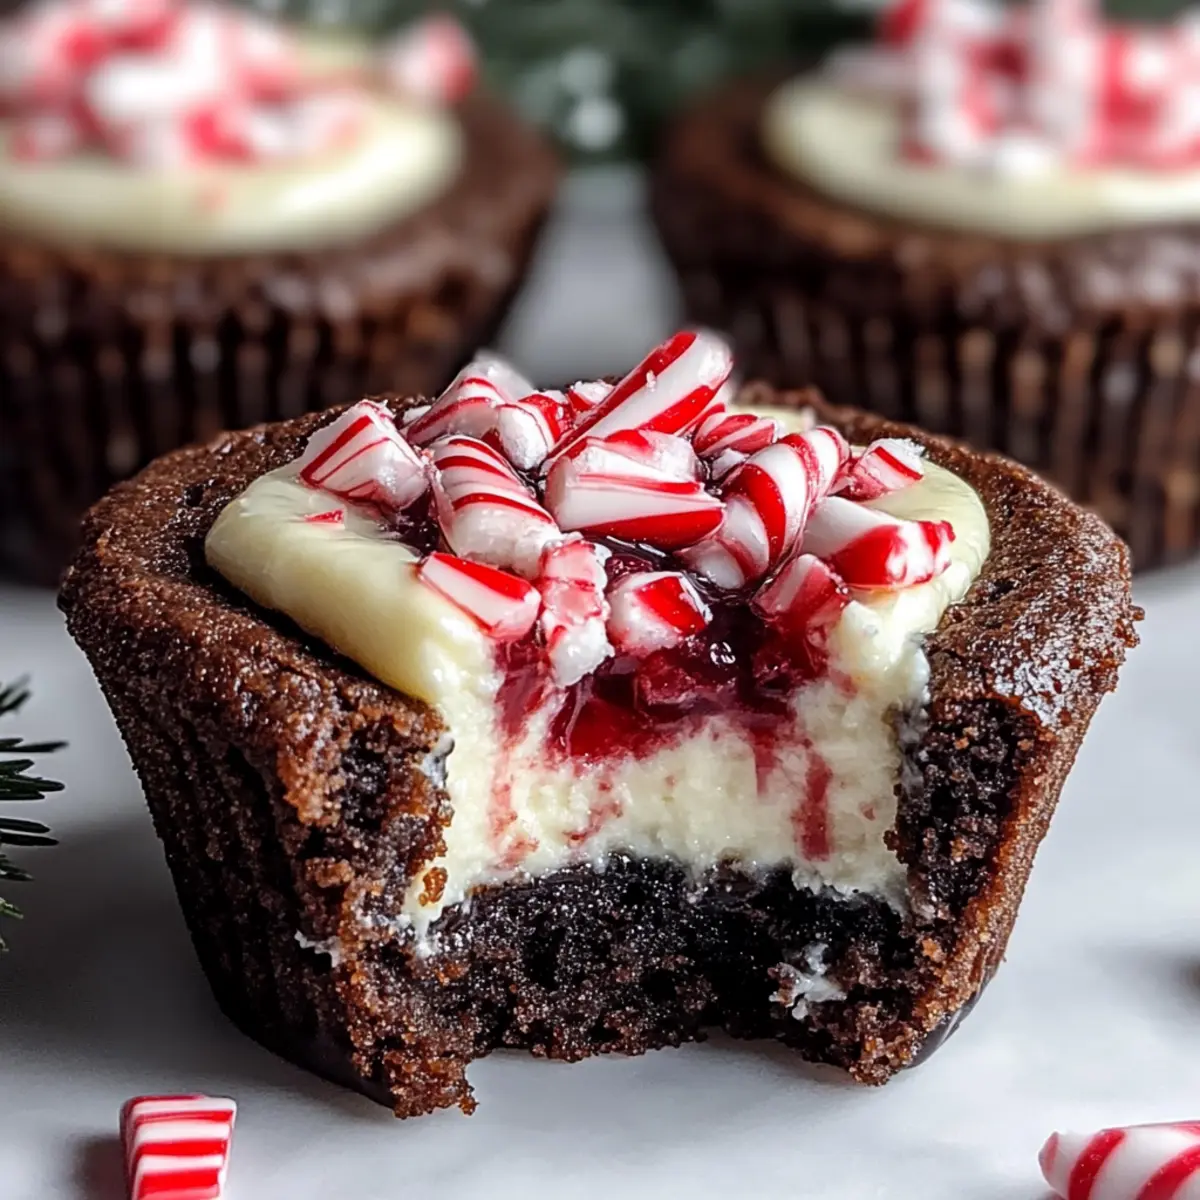
These delightful packs of joy—the Chocolate Peppermint Cookie Cups—are waiting to be the highlight of your holiday dessert table!
Step‑by‑Step Instructions for Chocolate Peppermint Cookie Cups
Step 1: Preheat and Prepare
Begin by preheating your oven to 350°F (175°C) and greasing a cupcake tin with cooking spray. This ensures that your Chocolate Peppermint Cookie Cups will release easily once baked. While the oven warms, gather all your ingredients for a smooth creation process and set them within reach.
Step 2: Mix Dry Ingredients
In a medium bowl, combine all-purpose flour, black cocoa powder, baking soda, and salt. Whisk these dry ingredients together until fully blended, taking care to eliminate any lumps. This step ensures your cookies will have a uniform texture, setting the foundation for your rich Chocolate Peppermint Cookie Cups.
Step 3: Cream Butter and Sugars
In a large mixing bowl, cream together unsalted butter, granulated sugar, and brown sugar using an electric mixer on medium speed until the mixture is light and fluffy, about 3-5 minutes. The sugars should dissolve into the butter, creating a smooth, creamy base that adds moisture and flavor to your cookie cups.
Step 4: Add Eggs and Vanilla
Incorporate the eggs one at a time, mixing well after each addition to ensure they are fully combined. Then add the vanilla extract, mixing until just blended. This step enhances the flavor profile of your Chocolate Peppermint Cookie Cups, making them even more delicious.
Step 5: Combine Mixtures
Gradually fold the dry ingredient mixture into the wet ingredients using a spatula. Mix until the dough forms, being careful not to overwork it. The dough should be thick and slightly sticky, providing the perfect base for your chocolate cookie cups that will goodness and richness.
Step 6: Bake the Cookie Cups
Scoop generous portions of the dough into each cavity of the prepared cupcake tin, filling each about two-thirds full. Bake in the preheated oven for 10-13 minutes. The cookie cups should look set at the edges but remain soft in the center. This is crucial for achieving that perfect texture.
Step 7: Create a Well
Immediately after baking, press the bottom of a small container or shot glass into the center of each cookie. This will create a well for your cheesecake filling. As they cool slightly, the cookie cups will take on their unique shape, ready to hold delightful creaminess.
Step 8: Cool the Cookie Cups
Allow the cookie cups to cool in the tin for about 10 minutes before transferring them to a wire rack. This cooling period is essential for maintaining their shape and achieving a delightful fudgy texture in your Chocolate Peppermint Cookie Cups.
Step 9: Prepare the Cheesecake Filling
While the cookie cups cool, whip the heavy cream in a bowl until stiff peaks form. In another bowl, beat the cream cheese with powdered sugar and peppermint extract until smooth and creamy. This combination creates a delectable filling that pairs perfectly with the chocolate cookie base.
Step 10: Fold and Fill
Gently fold the whipped cream into the cream cheese mixture until there are no streaks left. This creates a light and airy filling. Once combined, pipe the filling into each cooled cookie cup, filling them generously to create a beautiful and mouthwatering display.
Step 11: Chill and Garnish
Refrigerate the filled cookie cups for 1-2 hours to allow the filling to set. Just before serving, garnish each cup with chopped candy canes for a festive touch. This adds a delightful crunch and enhances the minty flavor of your Chocolate Peppermint Cookie Cups.
Step 12: Serve and Enjoy
Serve your Chocolate Peppermint Cookie Cups chilled or at room temperature, and watch them disappear at your holiday gatherings. The combination of fudgy cookie and creamy mint filling will have everyone raving about your delicious creation!
What to Serve with Chocolate Peppermint Cookie Cups
Imagine cozying up with a warm drink and festive sides that perfectly complement your sweet creations.
-
Peppermint Hot Chocolate: Rich and creamy, this drink enhances the minty notes of the cookie cups while warming you from the inside out. It’s like a hug in a mug!
-
Vanilla Ice Cream: The smooth, creamy texture and subtle flavor of vanilla ice cream provide a delightful contrast to the rich chocolate of the cookie cups. A scoop of ice cream on the side elevates the dessert experience.
-
Chocolate Drizzle: A quick drizzle of melted chocolate over the tops adds an indulgent touch, intensifying the chocolate flavor and making them even more tempting.
-
Fruit Salad: Fresh seasonal fruits like strawberries, blueberries, or kiwi create a refreshing balance and cut through the sweetness, making every bite exciting.
-
Spiced Apple Cider: Warm spiced apple cider is a lovely fall-inspired drink pairing, offering a cozy ambiance with its aromatic spices that harmonize with the cookie cups.
-
Creamy Mashed Potatoes: If you’re feeling adventurous, the creamy texture of mashed potatoes brings unexpected comfort that contrasts wonderfully with the cookie cups’ sweetness, making for a surprisingly delightful meal.
-
Gingerbread Cookies: Embrace the holiday spirit with gingerbread cookies as a fun, complementary dessert to create an array of festive flavors on your table.
-
Sugary Almonds: For a crunchy, subtly sweet snack, candied or roasted almonds are a perfect match that enhances the cookie cups’ textures while adding a nutty flavor.
-
Christmas Punch: A non-alcoholic Christmas punch can serve as a fun beverage option, with tart and sweet notes that refresh the palate between bites of rich cookies.
With these delightful pairings, your Chocolate Peppermint Cookie Cups will shine even brighter at your holiday gatherings!
Expert Tips for Chocolate Peppermint Cookie Cups
-
Avoid Overbaking: Keep an eye on the timer; overbaking can result in hard cookie cups, losing their soft, fudgy center essential for the ultimate Chocolate Peppermint Cookie Cups experience.
-
Creating the Well: Instead of a container, use a teaspoon or small measuring cup to shape the well. This ensures a perfect mold for your cream cheese filling.
-
Chill Well: Let the filled cookie cups chill for at least 1-2 hours. This allows the mint filling to set properly, making every bite a creamy delight.
-
Customize Ingredients: Feel free to swap cream cheese for whipped Greek yogurt for a lighter cheesecake filling, keeping the flavors festive without compromising on taste.
-
Garnishing: Add the chopped candy canes right before serving. This keeps them crunchy and prevents them from getting soggy, presenting a beautiful touch to your Chocolate Peppermint Cookie Cups.
How to Store and Freeze Chocolate Peppermint Cookie Cups
Fridge: Store filled cookie cups in an airtight container for up to 3 days. This will help maintain their fresh taste and creamy filling.
Freezer: Individually wrap unfilled cookie cups in plastic wrap and place in an airtight container or freezer bag. They can be frozen for up to 4 weeks.
Reheating: If frozen, thaw cookie cups in the refrigerator overnight before filling. Avoid reheating, as they are best served cold or at room temperature to retain the texture of the Chocolate Peppermint Cookie Cups.
Garnishing: Add chopped candy cane topping right before serving for a festive crunch and freshness. This ensures they maintain their delightful texture.
Chocolate Peppermint Cookie Cups Variations
Feel free to make these delightful cookie cups your own with some easy adjustments that still bring all the festive cheer!
-
Gluten-Free: Use a gluten-free flour blend to ensure everyone at your gathering can enjoy these treats without worry. It’s simply enriching everyone’s holiday spirit!
-
Dairy-Free: Swap the unsalted butter for margarine and replace the cream cheese with a dairy-free cream cheese alternative. This way, everyone can indulge freely!
-
Lower Sugar: Replace granulated sugar with coconut sugar or a sugar substitute to reduce sweetness while still enjoying that delicious flavor. You’ll be surprised at how well these swaps hold up!
-
Minty Extra: Layer in mini chocolate chips or mint chips into the cookie dough for an extra chocolatey delight. This boosts flavor and gives each bite a lovely surprise!
-
Texture Twist: Experiment with crushed nuts in the cheesecake filling for a delightful crunch. Chopped walnuts or almonds provide a nice contrast to the smooth filling, making each bite even more interesting.
-
Peppermint Variation: Use fresh peppermint leaves in the filling instead of extract for a fresh and vibrant flavor. It’ll take your minty flavor profile to new heights and impress everyone!
-
Candy Cane Boost: Instead of using just chopped candy canes as a topping, mix some into the cheesecake filling too. This adds a festive and crunchy element while echoing those classic peppermint vibes.
-
Chocolate Variation: You can replace black cocoa powder with regular cocoa powder for a sweeter, less intense chocolate flavor. Sometimes a little change can bring about a delightful new experience!
For more festive inspiration, don’t forget to check out my classic Salted Caramel Cookie or the delightful Maple Cookies that can elevate your dessert table this season!
Make Ahead Options
These Chocolate Peppermint Cookie Cups are perfect for meal prep, allowing you to relish the holiday spirit without the last-minute rush! You can bake the cookie cups up to 2 days in advance and store them in an airtight container at room temperature. Once baked and cooled, simply prepare the cheesecake filling, pipe it into the cookie cups, and refrigerate for 1-2 hours to set. To maintain their freshness and vibrant flavor, topping them with chopped candy canes should be done just before serving. With this make-ahead strategy, you’ll impress your guests with delectable treats that taste just as delicious as if they were freshly made!
Chocolate Peppermint Cookie Cups Recipe FAQs
What type of flour should I use for these cookie cups?
Absolutely! You can use all-purpose flour for a traditional cookie cup, but if gluten is a concern, a gluten-free flour blend works wonderfully, allowing everyone to enjoy these delicious treats!
How should I store my Chocolate Peppermint Cookie Cups?
To keep your filled cookie cups fresh, store them in an airtight container in the refrigerator for up to 3 days. This helps preserve the creamy filling and prevents the cookies from becoming soggy.
Can I freeze the cookie cups and how?
Yes! For freezing, individually wrap the unfilled cookie cups in plastic wrap and place them in an airtight container or freezer bag. They can be frozen for up to 4 weeks. When you’re ready to enjoy, simply thaw them in the refrigerator overnight before filling.
What do I do if my cookie cups are hard after baking?
If your cookie cups turn out hard, you may have overbaked them. To avoid this, keep an eye on the baking time; they should be set at the edges but soft in the center. Remember, they will continue to cook slightly while cooling.
Are there any dietary considerations for these cookie cups?
Definitely! If you’re concerned about dairy, substitute cream cheese with whipped Greek yogurt for a lighter alternative, and use margarine instead of butter for a dairy-free option. Always double-check ingredients for allergies if serving to guests.
How long can I keep these treats before serving them?
You can prepare the chocolate peppermint cookie cups a day in advance! Just refrigerate them after piping the filling and add the candy cane garnish right before serving for the best texture and flavor.
Decadent Chocolate Peppermint Cookie Cups You’ll Love
Ingredients
Equipment
Method
- Preheat your oven to 350°F (175°C) and grease a cupcake tin with cooking spray.
- In a medium bowl, combine all-purpose flour, black cocoa powder, baking soda, and salt. Whisk until fully blended.
- In a large mixing bowl, cream together unsalted butter, granulated sugar, and brown sugar until light and fluffy, about 3-5 minutes.
- Incorporate the eggs one at a time and mix well, then add vanilla extract until blended.
- Gradually fold the dry ingredient mixture into the wet ingredients until the dough forms.
- Scoop the dough into each cavity of the prepared cupcake tin, filling each about two-thirds full, and bake for 10-13 minutes.
- Immediately after baking, press the bottom of a small container or shot glass into the center of each cookie.
- Allow the cookie cups to cool in the tin for about 10 minutes before transferring to a wire rack.
- Whip the heavy cream in a bowl until stiff peaks form. In another bowl, beat the cream cheese with powdered sugar and peppermint extract until smooth.
- Gently fold the whipped cream into the cream cheese mixture until no streaks remain, then pipe the filling into each cookie cup.
- Refrigerate the filled cookie cups for 1-2 hours to set the filling, then garnish with chopped candy canes before serving.
- Serve your Chocolate Peppermint Cookie Cups chilled or at room temperature.
Leave a Reply