The moment I unwrapped my favorite bakery’s cannoli, a wave of nostalgia washed over me, reminding me of family gatherings and festive celebrations. That’s the inspiration behind this Easy Cannoli Snack Cake with Chocolate Chips. It beautifully combines a luscious chocolate chip cake with the creamy indulgence of classic cannoli filling, making it an absolute crowd-pleaser. Not only is it incredibly simple to whip up in just 30 minutes, but it’s also an irresistible treat that allows you to satisfy your sweet tooth without the fuss of traditional pastries. Whether you’re treating yourself after a long day or impressing guests at your next gathering, this dessert is sure to bring smiles all around. Curious to see how easy it is to create this delicious masterpiece? Let’s dive in!
Why is this Cannoli Snack Cake irresistible?
Decadent Fusion: This Cannoli Snack Cake perfectly blends rich chocolate chip cake and creamy cannoli filling, creating flavors that dance in your mouth.
Quick & Easy: With just 30 minutes of baking, it’s a time-saver for those busy days when you crave something special.
Universal Appeal: Perfect for any occasion, this cake is a guaranteed crowd-pleaser, ensuring everyone leaves with a smile!
Customizable Pleasure: Feel free to switch up the filling or add nuts for a unique twist, just like I did in my Gingerbread Latte Cake — the possibilities are endless!
Serve with Style: Pair it with whipped cream or ice cream for an extra touch of indulgence, just like you would with my Strawberry Crunch Cheesecake!
Cannoli Snack Cake Ingredients
For the Cake
• All-Purpose Flour – Provides structure and stability; can use gluten-free flour for a gluten-free option.
• Baking Powder – Acts as a leavening agent; ensure it’s fresh for best results.
• Salt – Enhances flavor; essential for balancing sweetness.
• Granulated Sugar – Adds sweetness and moisture; substitute with brown sugar for a richer flavor.
• Unsalted Butter (room temperature) – Adds richness and moisture; can substitute with margarine or specific buttery spreads.
• Eggs (room temperature) – Binds ingredients and adds moisture; use flax eggs for a vegan option.
• Vanilla Extract – Provides flavor depth; pure vanilla extract is recommended, but imitation can work in a pinch.
• Buttermilk – Contributes to tenderness; sour cream or plain yogurt can be used as substitutes.
• Mini Chocolate Chips – Adds bursts of chocolate flavor; dark chocolate chips can enhance richness.
For the Cannoli Filling
• Whole Milk Ricotta (drained) – The base of the cannoli filling, adding a creamy texture; substitute with mascarpone cheese for a different flavor.
• Powdered Sugar – Sweetens the cannoli filling; for less sweetness, reduce the amount used.
• Cannoli Shells – Provides traditional cannoli texture; can omit if unavailable.
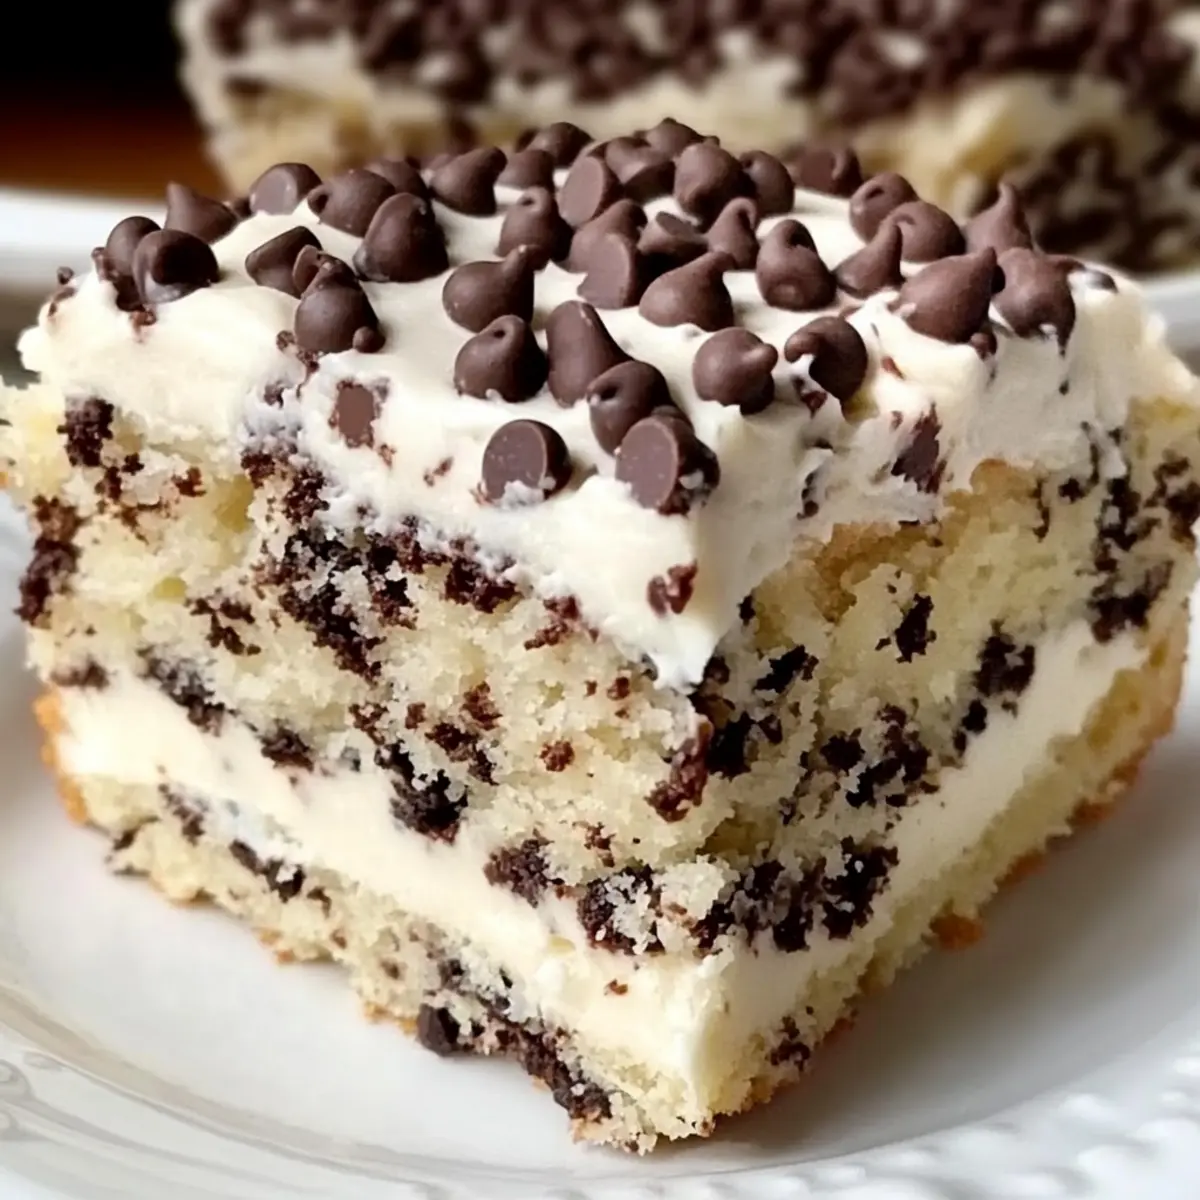
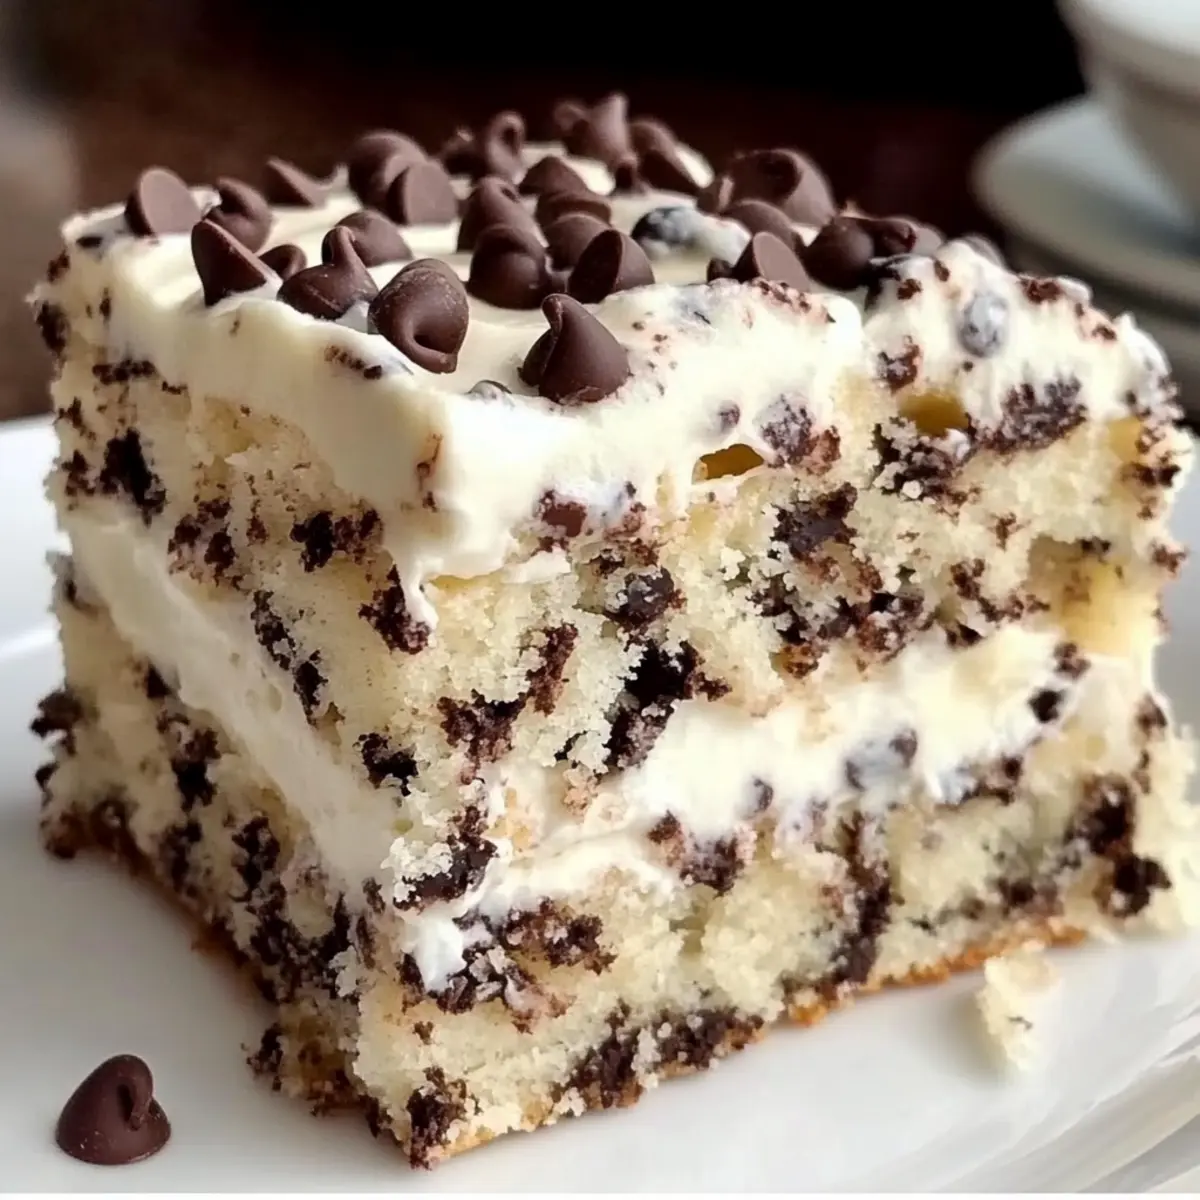
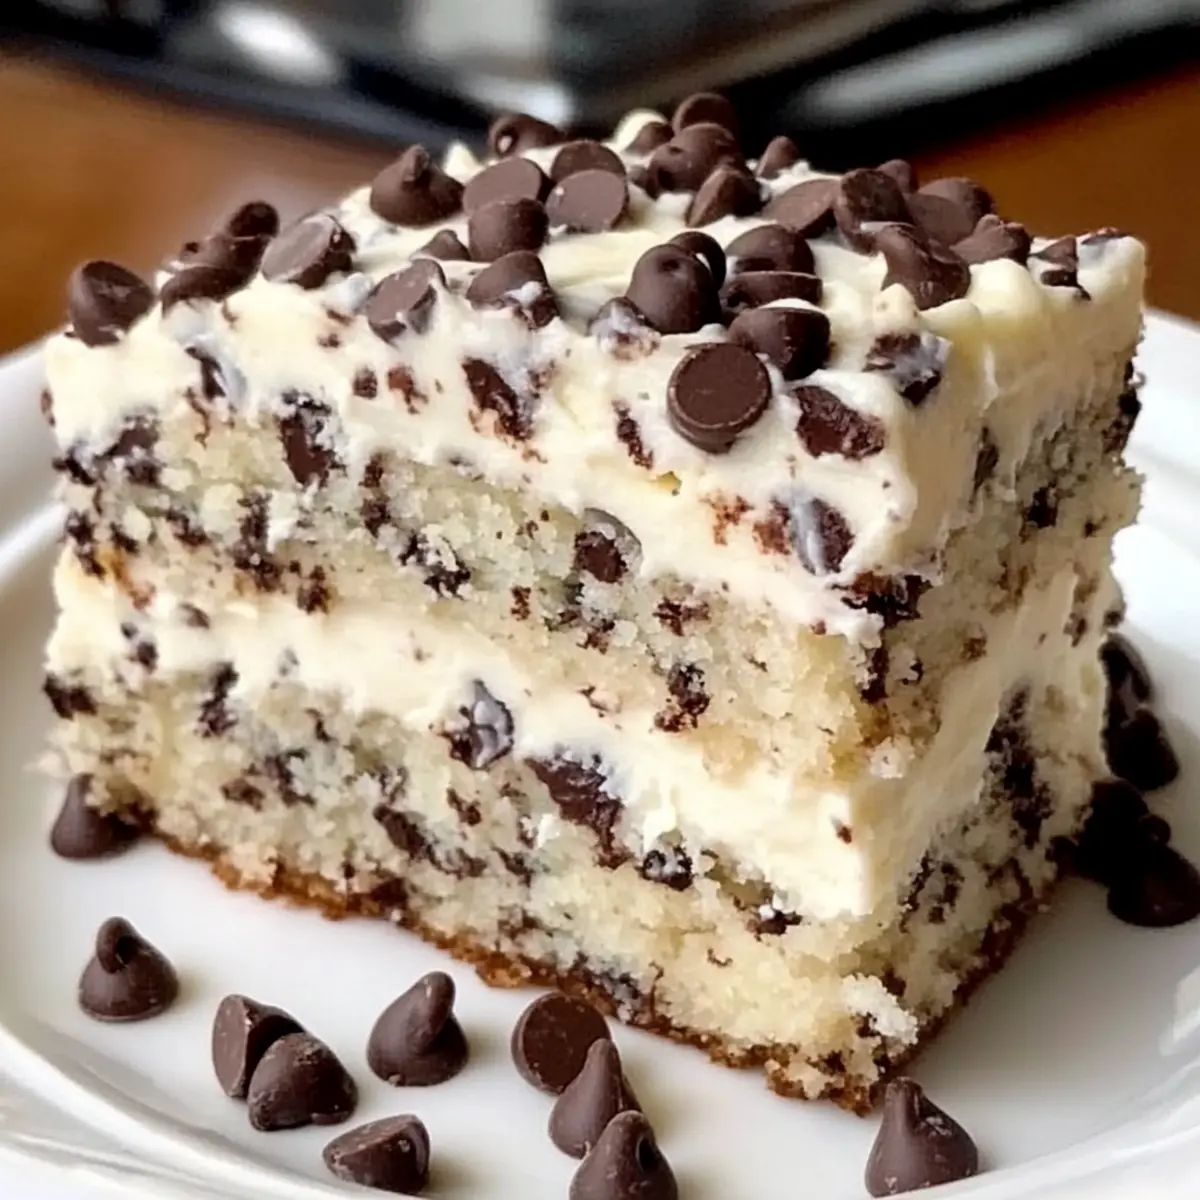
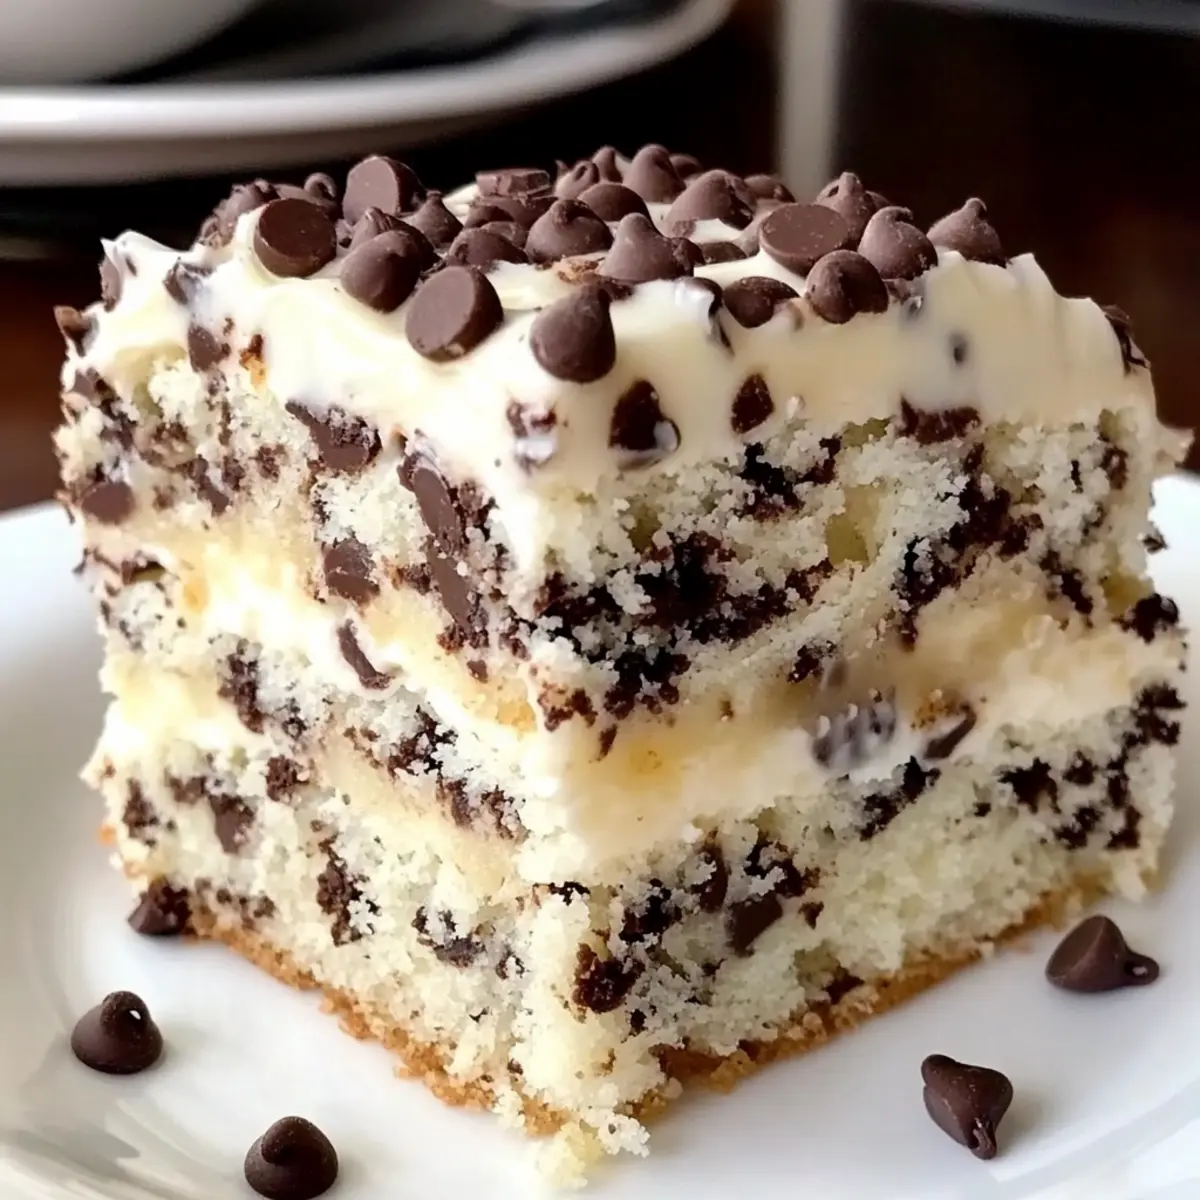
• Extra Mini Chocolate Chips – For topping; optional but enhances visual appeal.
Step‑by‑Step Instructions for Cannoli Snack Cake
Step 1: Preheat the Oven
Begin by preheating your oven to 350°F (175°C). This step is crucial for ensuring an even bake for your Cannoli Snack Cake. While the oven heats, prepare your baking pans by greasing two round cake pans with butter or non-stick spray, ensuring your cake layers will release easily after baking.
Step 2: Mix the Dry Ingredients
In a large mixing bowl, whisk together 2 cups of all-purpose flour, 2 teaspoons of baking powder, and a pinch of salt. This combination creates a balanced foundation for your cake. Set it aside, allowing the mixture to settle while you focus on the wet ingredients.
Step 3: Cream Butter and Sugar
In a separate bowl, cream together ½ cup of unsalted butter and 1 cup of granulated sugar using an electric mixer. Beat the mixture until it becomes light and fluffy, approximately 3-5 minutes. This step will introduce air, ensuring your cake is moist and fluffy.
Step 4: Incorporate Eggs and Vanilla
Add 2 room-temperature eggs to the creamed butter and sugar, mixing one at a time, followed by 1 teaspoon of vanilla extract. Ensure each egg is fully integrated before adding the next. This will contribute to the rich flavor profile of your Cannoli Snack Cake.
Step 5: Blend in Buttermilk
Now, pour in 1 cup of buttermilk, stirring until the mixture is completely smooth and free of lumps. This addition not only makes the batter creamy but also enhances the cake’s moisture, setting the stage for a tender crumb throughout your Cannoli Snack Cake.
Step 6: Combine Wet and Dry Ingredients
Gradually add the dry flour mixture to the wet ingredients, mixing gently until just combined. Be careful not to overmix, as this can lead to a dense cake. The batter should be smooth and slightly thick, full of anticipation for the delightful flavors it will soon bring.
Step 7: Fold in the Chocolate Chips
Gently fold in 1 cup of mini chocolate chips into the batter using a spatula or wooden spoon. This step adds bursts of chocolate flavor throughout your Cannoli Snack Cake, creating a delicious contrast to the creamy filling you will prepare next.
Step 8: Prepare the Cake Layers
Evenly divide the batter between the two greased cake pans. Smooth the tops with a spatula to create an even layer, ensuring each cake layer will bake uniformly — a crucial step for the final presentation of your Cannoli Snack Cake.
Step 9: Bake the Cake
Place the cake pans in the preheated oven and bake for 20-25 minutes. The cakes are done when a toothpick inserted into the center comes out clean. Keep an eye on the baking process, as oven times may vary. Once baked, allow the cakes to cool in the pans for 10 minutes.
Step 10: Prepare the Cannoli Filling
In a mixing bowl, combine 1 cup of drained whole milk ricotta, ½ cup of powdered sugar, and a teaspoon of vanilla extract. Blend until the mixture is smooth and creamy. This delightful cannoli filling will bring rich, sweet flavors to your layered cake, enhancing every bite.
Step 11: Assemble the Cannoli Snack Cake
Once the cake layers have cooled, place one layer on a serving plate. Spread half of the cannoli filling generously over the first layer, then carefully place the second cake layer on top. Finish by topping your Cannoli Snack Cake with the remaining filling and decorating with extra mini chocolate chips for a beautiful presentation.
What to Serve with Easy Cannoli Snack Cake
The rich layers of cream and cake call for delightful companions to elevate your indulgent experience.
-
Whipped Cream: A light dollop of fresh whipped cream balances the sweetness, adding a fluffy texture that complements each slice.
-
Vanilla Ice Cream: The cool and creamy indulgence of vanilla ice cream enhances the warm cake’s richness, a perfect match for a cozy dessert moment.
-
Fresh Berries: Juicy strawberries or raspberries provide a fresh, tangy contrast to the sweet cannoli filling, adding vibrant color and flavor.
-
Chocolate Drizzle: A simple drizzle of melted chocolate over each slice intensifies the dessert experience with an extra layer of decadence while echoing the chocolate chips.
-
Coffee or Espresso: A rich cup of coffee or a shot of espresso pairs beautifully with the dessert, balancing its sweetness while enhancing the cannoli flavors.
-
Hazelnut Liqueur: Serve with a splash of hazelnut liqueur for an adult twist. The nutty tones enhance the cake’s flavors, making each bite feel luxurious and festive.
Make Ahead Options
These Easy Cannoli Snack Cakes are perfect for busy weeknights, allowing you to prepare in advance and savor the deliciousness without the last-minute rush. You can make the cake layers up to 3 days in advance; simply cool them completely, wrap them well in plastic wrap, and refrigerate. Additionally, the cannoli filling can be prepared up to 24 hours ahead — just mix the ricotta, powdered sugar, and vanilla, then refrigerate in an airtight container. To maintain quality, avoid assembling the cake until you’re ready to serve to keep it fresh. When it’s time to indulge, simply layer the cooled cakes with the filling and garnish with extra chocolate chips for that delightful finish! Enjoy a homemade treat with minimal effort, perfect for sharing!
How to Store and Freeze Cannoli Snack Cake
Fridge: Store leftovers in an airtight container in the refrigerator for up to 5 days. This helps maintain the cake’s moisture and flavor.
Freezer: Wrap the Cannoli Snack Cake tightly in plastic wrap and then in aluminum foil. It can be frozen for up to 2 months, preserving its deliciousness for special occasions.
Reheating: To enjoy leftover slices, thaw in the fridge overnight, then warm briefly in the microwave for a delightful, fresh taste.
Serving Tip: Enhance the cake while serving by adding a dollop of whipped cream or a scoop of ice cream for a truly indulgent experience!
Cannoli Snack Cake Variations
Feel free to adapt this Cannoli Snack Cake to fit your taste and preferences—it’s all about bringing joy to your table!
- Richer Filling: Substitute ricotta with mascarpone for an ultra-creamy filling that elevates the cake’s decadence. You’ll love the smooth texture!
- Citrusy Twist: Add a splash of orange zest to the filling for a refreshing burst of flavor that brightens each bite. It complements the chocolate beautifully!
- Nutty Crunch: Incorporate chopped pistachios into the cake batter or filling for added texture and a delightful nutty flavor. Imagine that extra crunch!
- Spiced Delight: Mix a pinch of cinnamon or nutmeg into the batter for a warm, spiced flavor that’ll give your cake a cozy touch. It’s like a hug in dessert form!
- Gluten-Free Option: Use a gluten-free flour blend in place of all-purpose flour to make this wonderful cake accessible for everyone. No one will miss the gluten!
- Vegan Alternative: Replace eggs with flax eggs and use almond milk instead of buttermilk for a completely plant-based version without sacrificing taste.
- Layer of Chocolate Ganache: Brush the top layer with chocolate ganache for a lush, chocolate finish that takes the cake to the next level! Your guests won’t be able to resist.
- Choco-Peanut Butter Fusion: Swirl some creamy peanut butter into the filling for a rich flavor contrast sure to please any peanut butter lover! It’s a match made in dessert heaven.
Feel inspired? Explore even more creativity with your variations! Just like my delectable Gingerbread Latte Cake or vibrant Strawberry Crunch Cheesecake, the possibilities are truly endless. Enjoy your baking adventure!
Tips for the Best Cannoli Snack Cake
-
Room Temperature Ingredients: Ensure all ingredients are at room temperature for a smooth, well-mixed batter. This helps in achieving a light and fluffy Cannoli Snack Cake.
-
Gentle Mixing: Don’t overmix the batter. Stir just until combined to avoid a dense texture, allowing the cake to rise beautifully.
-
Cool Completely: Allow the cake layers to cool completely before frosting. This prevents the filling from melting and keeps the cake layers intact.
-
Taste as You Go: Don’t hesitate to taste the cannoli filling as you mix it. Adjust the sweetness by adding more or reducing the powdered sugar according to your preference.
-
Decoration Idea: Use extra mini chocolate chips as a topping for a visual treat, making your Cannoli Snack Cake not just delicious but also appealing.
-
Storage Advice: Properly store leftovers in an airtight container in the fridge for up to 5 days. This keeps the flavors fresh and the texture delightful!
Cannoli Snack Cake Recipe FAQs
What type of flour should I use for my Cannoli Snack Cake?
I recommend using all-purpose flour for the best texture and structure in this Cannoli Snack Cake. If you’re looking for a gluten-free option, you can substitute it with a gluten-free flour blend, but make sure it contains xanthan gum to mimic the elasticity of all-purpose flour.
How should I store leftovers of my Cannoli Snack Cake?
To keep your Cannoli Snack Cake fresh, store any leftovers in an airtight container in the refrigerator for up to 5 days. This method ensures that the cake remains moist and flavorful, ready to indulge in whenever you like! If you’re planning to enjoy it later, freezing is a great option.
Can I freeze my Cannoli Snack Cake?
Absolutely! To freeze your Cannoli Snack Cake, wrap it tightly in plastic wrap and then in aluminum foil to prevent freezer burn. You can freeze it for up to 2 months. When you’re ready to enjoy it, simply thaw it overnight in the fridge, and if you’d like, warm individual slices in the microwave for a cake that tastes freshly baked!
What should I do if my cake layers are too dense?
If you find that your Cannoli Snack Cake layers are too dense, it’s likely due to overmixing the batter. Remember, gentle mixing is key! Always stop mixing just when the dry ingredients are combined with the wet. This will help keep the cake light and fluffy. Also, ensure that your baking powder is fresh; old leavening agents can lead to flat cakes.
Is this Cannoli Snack Cake safe for people with nut allergies?
Yes, this Cannoli Snack Cake can be made nut-free! However, some people like to add nuts like pistachios for a flavorful twist. If serving to someone with nut allergies, simply omit any nuts, and feel free to enjoy this delicious treat without worry!
Can I use something other than ricotta for the filling?
Certainly! If you’re not a fan of ricotta or simply want to try something different, you can substitute it with mascarpone cheese. It creates a luscious and creamy filling, enhancing the indulgent experience of your Cannoli Snack Cake. Alternatively, try blending in some whipped cream for a lighter, fluffier texture!
Irresistible Cannoli Snack Cake with Chocolate Chips
Ingredients
Equipment
Method
- Preheat your oven to 350°F (175°C). Grease two round cake pans with butter or non-stick spray.
- In a large mixing bowl, whisk together the flour, baking powder, and salt. Set aside.
- In a separate bowl, cream together the unsalted butter and granulated sugar until light and fluffy, about 3-5 minutes.
- Add the eggs one at a time and mix well, then add the vanilla extract.
- Pour in the buttermilk, stirring until smooth.
- Gradually mix the dry ingredients into the wet ingredients until just combined.
- Fold in the mini chocolate chips gently with a spatula.
- Divide the batter evenly between the two greased cake pans and smooth the tops.
- Bake for 20-25 minutes or until a toothpick comes out clean. Let cool for 10 minutes.
- In a separate bowl, combine the ricotta, powdered sugar, and vanilla extract. Blend until smooth.
- Once cooled, spread half of the cannoli filling over one cake layer, place the second layer on top and finish with the remaining filling and extra chocolate chips.
Leave a Reply