As I stood in my kitchen, the warm aroma of Biscoff cookies wafting through the air, it hit me: I needed a quick yet indulgent dessert that would impress my friends without taking all day to make. Enter the Biscoff Cookie Butter Truffles—a delightful no-bake treat that comes together in just 30 minutes! Not only are these truffles rich and creamy, but they also nail that perfect balance of sweetness and spice, making them a surefire crowd-pleaser for any occasion. Whether you’re treating yourself during a cozy movie night or gifting them in a cute box to a friend, these truffles pack a punch in flavor while keeping the prep simple and stress-free. Curious about how to transform just a few ingredients into this heavenly treat? Let’s dive into the delicious details!
Why Make Biscoff Cookie Butter Truffles?
Irresistible Flavors: The spiced and creamy Biscoff cookie butter pairs beautifully with cream cheese for an indulgent filling that melts in your mouth.
No-Bake Convenience: Enjoy the ease of a no-bake dessert that comes together in just 30 minutes—perfect for those spontaneous cravings!
Versatile Treat: Customize with different cookie butters or coatings like cocoa powder for a unique twist.
Gathering Favorite: These truffles are always a hit at parties, making them ideal for sharing.
Perfectly Portable: Pack them in a cute box for a thoughtful gift or keep them on hand for yourself during cozy nights in.
Try whipping up these delights and experience the magic for yourself!
Biscoff Cookie Butter Truffles Ingredients
For the Truffle Filling
• Biscoff Cookie Butter – Adds creaminess and a spiced flavor; use any cookie butter if Biscoff isn’t available.
• Biscoff Cookies – Provides texture and flavor; crush into fine crumbs, or substitute with similar cookies if necessary.
• Cream Cheese – Contributes to the truffle’s rich and creamy consistency; can substitute with dairy-free cream cheese for a dairy-free version.
For the Coating
• Chocolate Chips – Provides a rich finish that complements the inner filling; use dark, milk, or dairy-free chocolate chips based on preference.
• Coconut Oil (optional) – Helps with melting the chocolate and can add a subtle flavor; this can be omitted if desired.
Step‑by‑Step Instructions for Biscoff Cookie Butter Truffles
Step 1: Crush Cookies
Begin by placing Biscoff cookies in a zip-top bag; use a rolling pin to crush them into fine crumbs, or opt for a food processor for a quicker method. Aim for a sandy texture that holds well when combined, which will give our Biscoff Cookie Butter Truffles their delicious base.
Step 2: Mix Filling
In a medium bowl, combine softened cream cheese and Biscoff cookie butter using a spatula or electric mixer until you achieve a smooth consistency. Gradually add in the crushed cookie crumbs, mixing until a thick dough forms that holds together well, perfect for rolling.
Step 3: Form Truffles
Using a tablespoon, scoop out a portion of the mixture and roll it between your palms to form a round ball. Place each truffle on a parchment-lined baking sheet, ensuring they are evenly spaced. You should have about 20-24 Biscoff Cookie Butter Truffles ready for chilling.
Step 4: Chill
Transfer the baking sheet to the freezer and chill the truffles for 20-30 minutes, or until they are firm to the touch. This step is crucial for maintaining their shape during the chocolate coating process, so be sure not to skip it!
Step 5: Melt Chocolate
While the truffles chill, prepare the coating by melting chocolate chips in a microwave-safe bowl. Heat in 30-second increments, stirring after each interval until the mixture is completely smooth. If you choose to use coconut oil, stir it in now for added richness and smoother melted chocolate.
Step 6: Coat Truffles
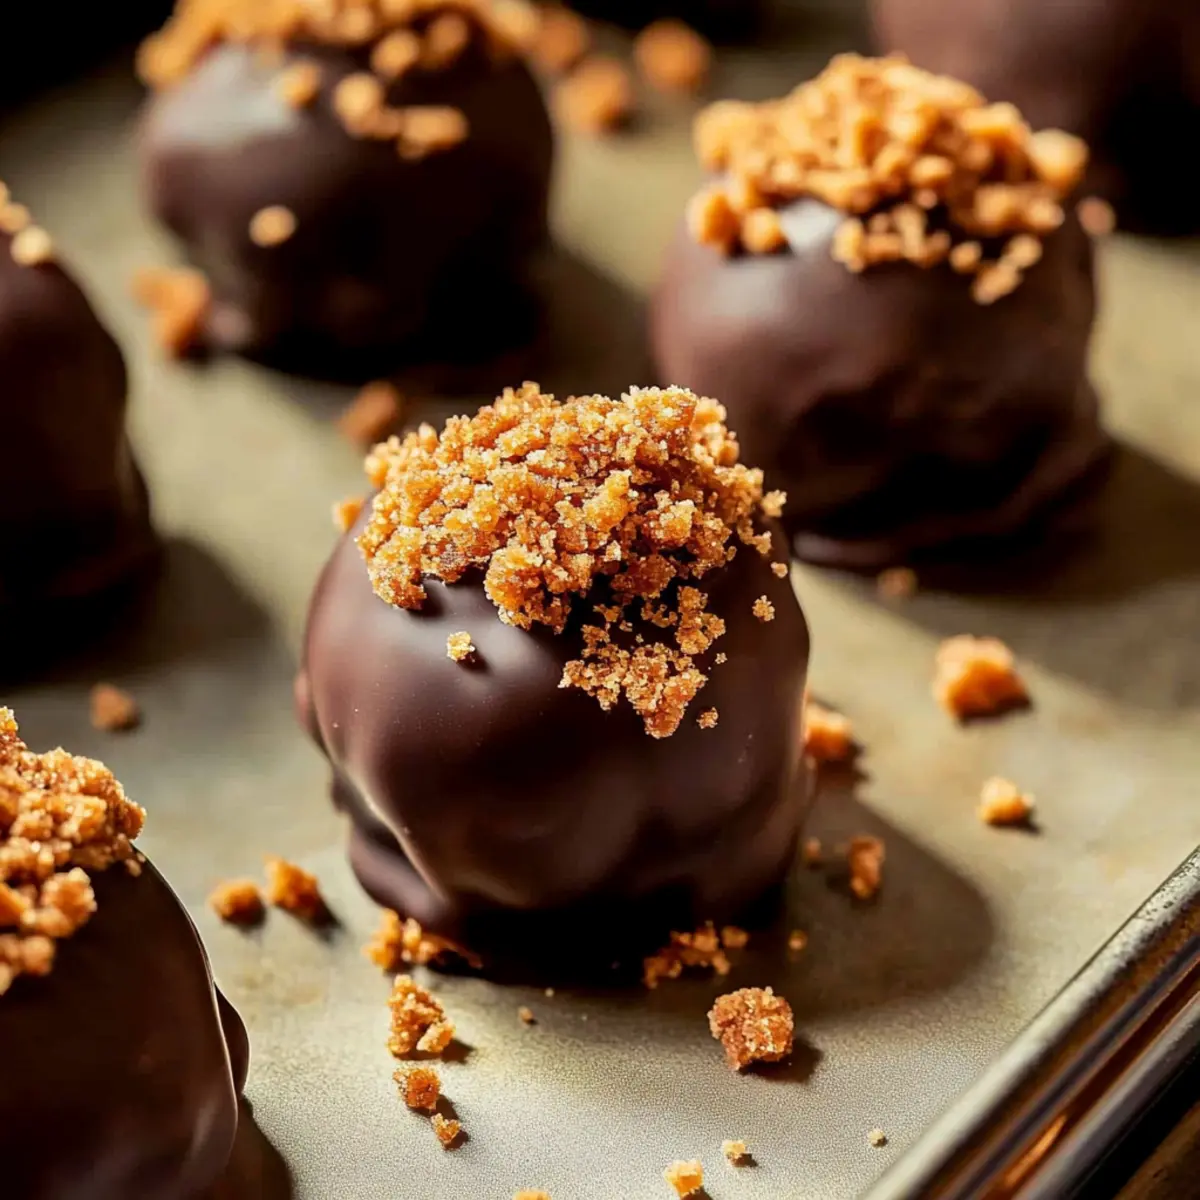
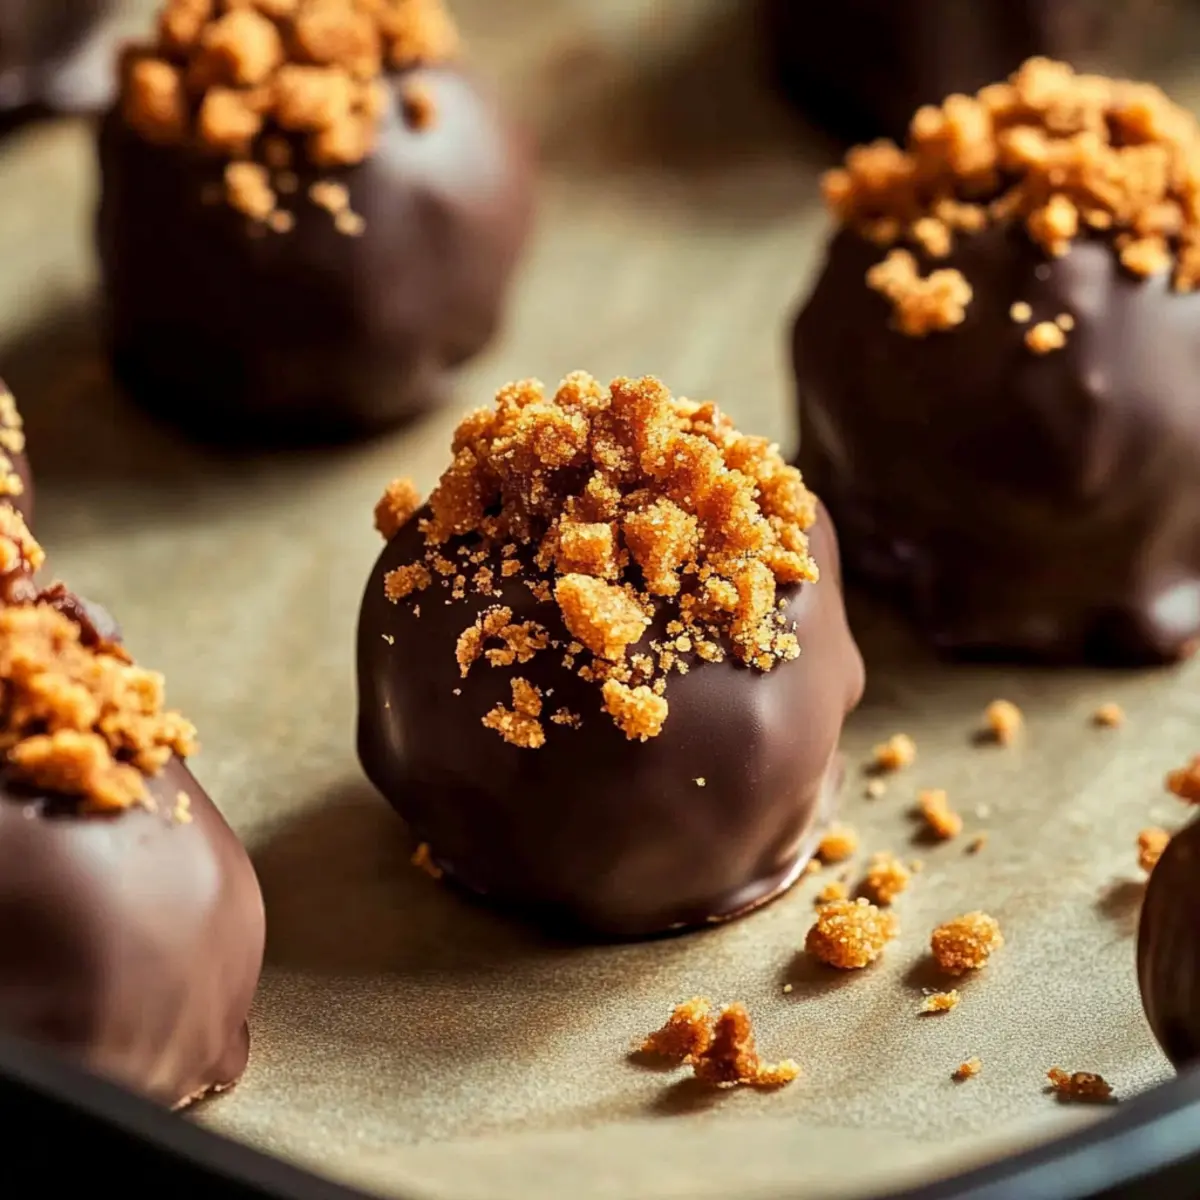
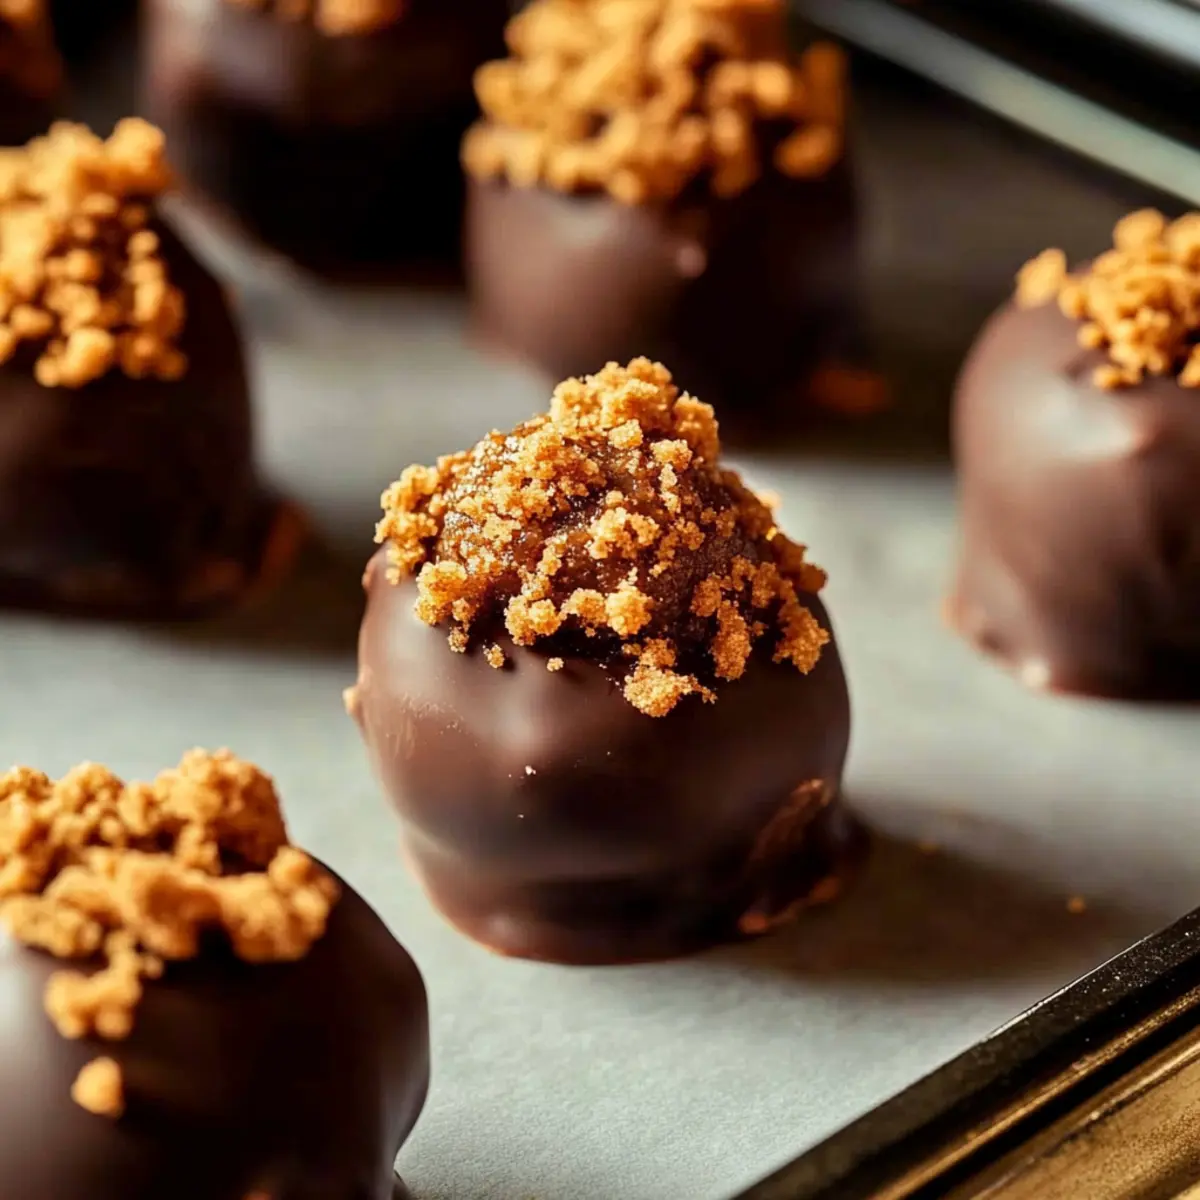
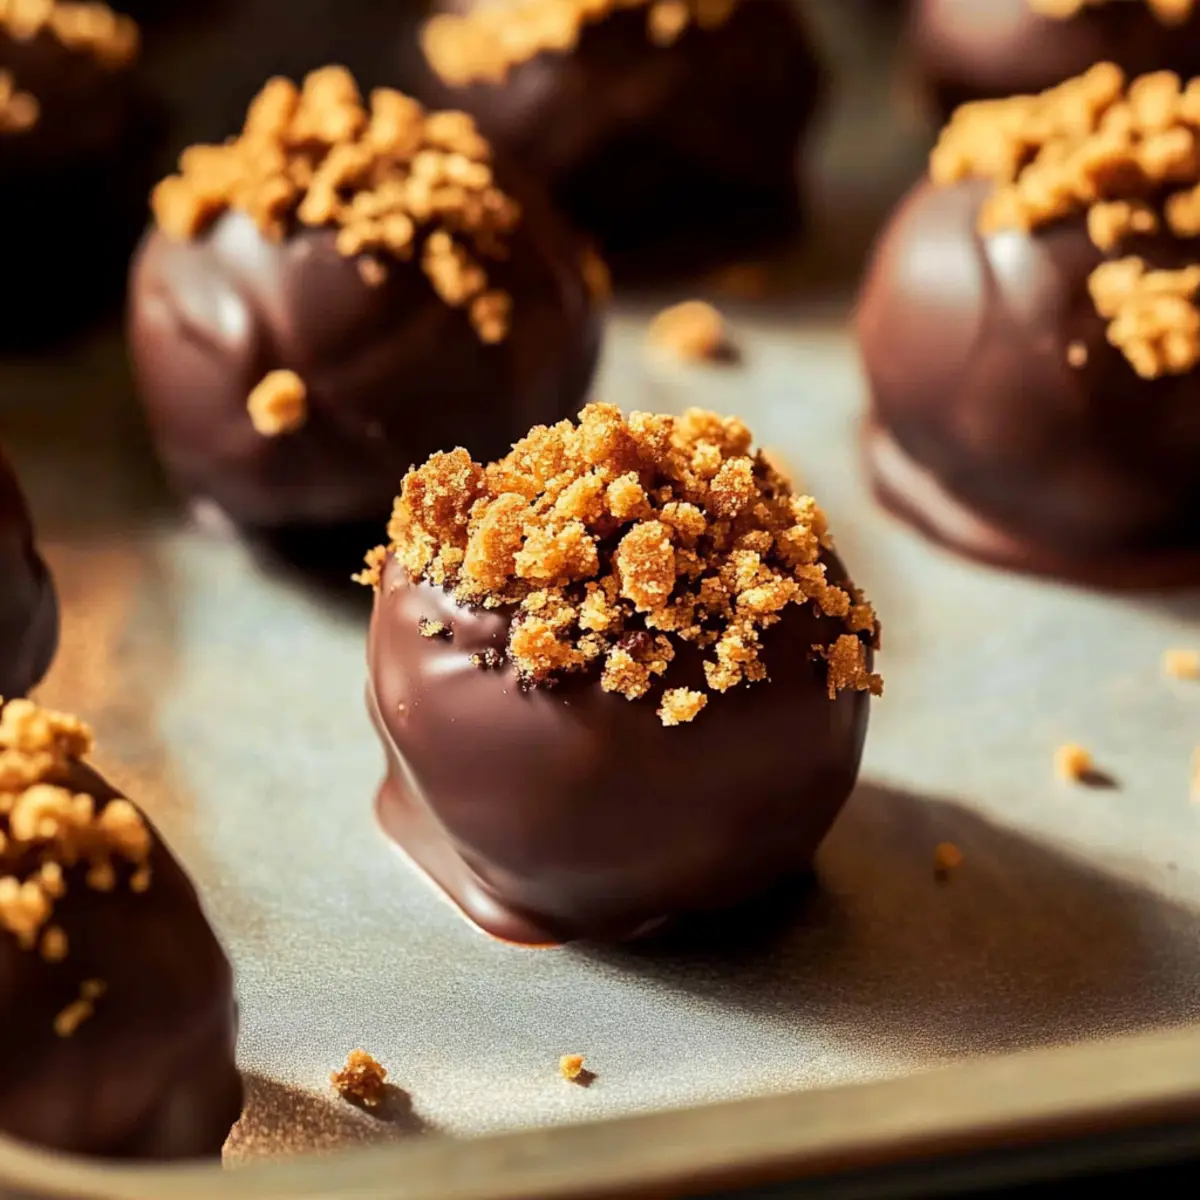
Once the truffles have chilled and the chocolate is melted, dip each one into the chocolate using a fork. Tap the fork against the bowl’s edge to remove excess chocolate, creating a lovely even coating. Return them to the parchment-lined sheet and ensure they are placed apart for easy coating.
Step 7: Set & Serve
For a decorative touch, sprinkle crushed Biscoff cookies over the truffles before the chocolate sets. Place the tray in the fridge for 15-20 minutes, allowing the chocolate to firm up completely. These Biscoff Cookie Butter Truffles are now ready to be enjoyed or gifted!
Tips for the Best Biscoff Cookie Butter Truffles
Chilling Time: Ensure the truffles are adequately chilled before dipping; this helps them hold their shape when coated in chocolate.
Chocolate Melting: Melt chocolate slowly in short intervals to avoid scorching. Overheating can lead to a clumpy texture that won’t coat smoothly.
Cookie Substitutes: If you can’t find Biscoff cookies, feel free to use similar spiced cookies for a delicious twist in your Biscoff Cookie Butter Truffles.
Coating Choices: Experiment with different coatings like crushed nuts or cocoa powder for a unique finish—next-level indulgence awaits!
Dairy-Free Option: For a dairy-free treat, simply use dairy-free cream cheese and chocolate chips without sacrificing taste or texture.
What to Serve with Biscoff Cookie Butter Truffles?
These delightful truffles are a sweet treat on their own, but pairing them with the right accompaniments can elevate your dessert experience to new heights.
-
Fresh Berries: Tangy raspberries or sweet strawberries provide a refreshing contrast to the creamy sweetness of the truffles, balancing the richness perfectly.
-
Vanilla Ice Cream: A scoop of velvety vanilla ice cream enhances each bite, creating a delightful temperature contrast that is absolutely divine.
-
Coffee: Sip on a warm cup of coffee or espresso; the robust flavors complement the truffles beautifully, making for a cozy pairing after dinner.
-
Chocolate-Covered Pretzels: The salty crunch of chocolate-covered pretzels pairs remarkably well, offering a delightful texture contrast with each creamy bite of the truffle.
-
Nutty Biscotti: Dipping crispy biscotti in your truffles creates a lovely textural experience, plus the nuts enhance the overall flavor profile.
-
Sparkling Wine: Celebrate special occasions with a glass of bubbly—its effervescence cleanses the palate, making each truffle even more enjoyable.
-
Coconut Whipped Cream: Light and fluffy, this topping adds a tropical twist and enhances the creaminess of the truffles, making every bite a celebration.
Pair these options with your Biscoff Cookie Butter Truffles, and you’re sure to impress your family or friends at any gathering!
How to Store and Freeze Biscoff Cookie Butter Truffles
Room Temperature: Keep Biscoff Cookie Butter Truffles at room temperature for up to 2 hours during events or gatherings. After that, they should be refrigerated to maintain their freshness.
Fridge: Store the truffles in an airtight container in the fridge for up to 1 week. This helps retain their creamy texture and prevents them from drying out.
Freezer: For longer storage, freeze the truffles in a single layer on a baking sheet, then transfer them to an airtight container or freezer bag. They can be frozen for up to 3 months.
Reheating: When ready to enjoy frozen truffles, simply thaw them in the refrigerator for a few hours. Avoid microwave reheating, as it can alter their texture and flavor.
Make Ahead Options
These Biscoff Cookie Butter Truffles are perfect for meal prep, making your life a little sweeter during busy times! You can prepare the filling—mixing the Biscoff cookie butter, cream cheese, and crushed cookies—up to 24 hours in advance. Simply cover the mixture tightly and refrigerate until you’re ready to roll it into truffles. Just before serving, scoop and shape the mixture into balls and chill them for about 30 minutes to firm up nicely. When you’re ready to enjoy, melt the chocolate and coat the truffles; they’ll taste just as delicious as if you made them fresh! This time-saving technique means you can impress with minimal effort.
Biscoff Cookie Butter Truffles Variations
Feel free to personalize these irresistible truffles with delightful twists and swaps!
-
Flavored Cookie Butter: Substitute Biscoff cookie butter with any flavored cookie butter, like almond or chocolate for a unique taste.
-
Coating Alternatives: Roll the truffles in crushed nuts, cocoa powder, or powdered sugar for a different look and texture. Each option brings a new exciting dimension!
-
Dairy-Free Treat: Use dairy-free cream cheese and chocolate chips to make this recipe dairy-free, ensuring everyone can indulge without worry.
-
Crunchy Texture: Add a handful of finely chopped nuts or crushed pretzels into the filling for added crunch and flavor contrast. These truffles will surprise your taste buds!
-
Spicy Kick: Add a pinch of cayenne pepper to the filling for a spicy, sweet flavor combination, turning up the heat in every delectable bite.
-
Mocha Boost: Mix in a teaspoon of instant coffee granules with the filling, adding a delightful coffee flavor that pairs perfectly with the cookie butter richness.
-
Mini Truffles: For bite-sized indulgence, roll smaller truffles (about 1/2 tablespoon each) for easy snacking, perfect for parties or gatherings.
-
Chocolate Variation: Experiment with milk, dark, or even white chocolate for coating, tailoring the sweetness to your liking. Each chocolate type offers a different flavor experience!
If you’re looking for more sweet treats, don’t miss trying our Salted Caramel Cookie or baking up some Maple Cookies Melt. Enjoy crafting your own version of these Biscoff Cookie Butter Truffles!
Biscoff Cookie Butter Truffles Recipe FAQs
What type of Biscoff cookie butter should I use?
Absolutely! The recipe works wonderfully with any brand of cookie butter, so feel free to experiment with your favorite! If you can’t find Biscoff, brands like Trader Joe’s or even homemade versions can be excellent substitutes.
How long can I store these truffles?
You can keep your Biscoff Cookie Butter Truffles in an airtight container in the fridge for up to a week. Just be sure to keep them chilled to maintain that dreamy consistency. If you plan to indulge later, storing them in the freezer can extend their life to about 3 months!
Can I freeze Biscoff Cookie Butter Truffles? How?
Absolutely! To freeze your truffles, first, lay them out in a single layer on a baking sheet and place them in the freezer until firm, about 1-2 hours. Then, transfer them to an airtight container or freezer bag, and they’ll be good for up to 3 months. When you’re ready to enjoy, thaw them in the refrigerator for a few hours before serving.
What should I do if the chocolate coating is clumpy?
Very! If your chocolate becomes clumpy while melting, it’s likely been overheated. To fix this, try stirring in a small amount of coconut oil or vegetable oil to smooth it out. If it’s too far gone, you might need to start with a fresh batch of chocolate and ensure you melt it slowly in 30-second increments.
Are Biscoff Cookie Butter Truffles suitable for people with allergies?
These truffles include common allergens like dairy and gluten. If you’re looking to make them allergy-friendly, opt for dairy-free cream cheese and check to ensure your cookie butter and cookies are gluten-free. Always read labels carefully, and feel free to substitute where needed!
Can I use different coatings for the truffles?
The more the merrier with coatings! If you want a twist, rolling the truffles in crushed nuts or cocoa powder instead of chocolate gives delightful flavors and textures. Just ensure the truffles are adequately chilled before rolling to help the coating adhere properly.
Biscoff Cookie Butter Truffles: Easy No-Bake Bliss
Ingredients
Equipment
Method
- Begin by placing Biscoff cookies in a zip-top bag; use a rolling pin to crush them into fine crumbs, or opt for a food processor for a quicker method.
- In a medium bowl, combine softened cream cheese and Biscoff cookie butter using a spatula or electric mixer until you achieve a smooth consistency. Gradually add in the crushed cookie crumbs, mixing until a thick dough forms that holds together well.
- Using a tablespoon, scoop out a portion of the mixture and roll it between your palms to form a round ball. Place each truffle on a parchment-lined baking sheet, ensuring they are evenly spaced.
- Transfer the baking sheet to the freezer and chill the truffles for 20-30 minutes, or until they are firm to the touch.
- While the truffles chill, prepare the coating by melting chocolate chips in a microwave-safe bowl. Heat in 30-second increments, stirring after each interval until the mixture is completely smooth.
- Once the truffles have chilled and the chocolate is melted, dip each one into the chocolate using a fork. Tap the fork against the bowl's edge to remove excess chocolate.
- For a decorative touch, sprinkle crushed Biscoff cookies over the truffles before the chocolate sets. Place the tray in the fridge for 15-20 minutes, allowing the chocolate to firm up completely.
Leave a Reply