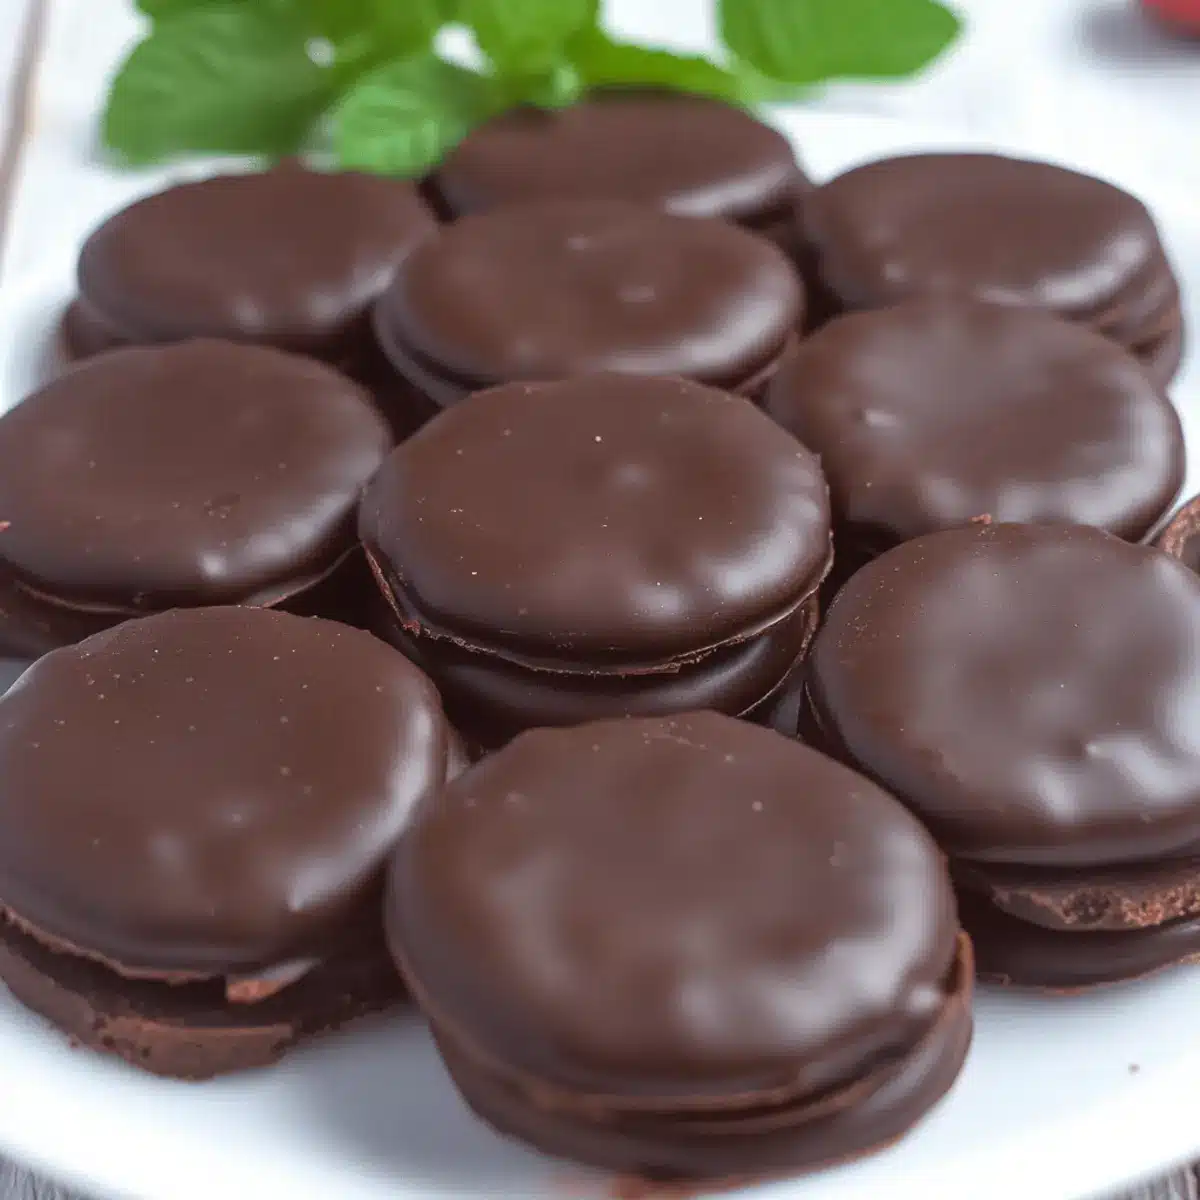
Last weekend, I found myself in the kitchen, craving the nostalgic taste of those crunchy, minty delights I used to buy from the Girl Scouts. That’s when inspiration struck me: why not create my own Homemade Thin Mints? These copycat cookies offer not just the classic minty flavor and rich chocolate coating, but also the satisfaction of knowing exactly what’s in them—no preservatives here! With simple pantry staples and an easy process, these cookies are perfect for cookie exchanges or simply indulging yourself after a long day. Imagine biting into a crisp cookie that balances the comforting richness of chocolate with that refreshing mint sensation. Are you ready to skip the store-bought version and dive into this sweet adventure with me?
Why Make Homemade Thin Mints?
Irresistible Crunch: These cookies offer a satisfying texture, blending a crisp cookie base with a smooth chocolate coating that’s hard to resist.
Natural Ingredients: You control what goes into these treats with simple pantry staples—no preservatives and no mystery ingredients!
Memorable Treats: Perfect for cookie exchanges, these homemade Thin Mints will impress friends and family alike, providing a nostalgic taste they’ll adore.
Versatile Flavor: Swap out the chocolate coating for white chocolate or experiment with different extracts for a unique twist!
Quick and Easy: Made in just a few steps, this recipe can save you time compared to the hassle of scouting for store-bought versions.
Bite into the nostalgia of Homemade Thin Mints and enjoy them with a glass of milk or as a delightful afternoon treat in lunch boxes. You might also enjoy making these Cranberry Bliss Bars for another sweet surprise!
Homemade Thin Mints Ingredients
• Here’s everything you need!
For the Cookie Base
- Unsalted Butter (¾ cup) – Provides richness and moisture; let it sit at room temperature for easy creaming.
- Sugar (1 cup) – Adds sweetness and creates a tender texture; swap with coconut sugar for a lower glycemic option.
- Large Egg (1) – Binds the ingredients together and adds moisture; opt for free-range eggs for better flavor.
- Vanilla Bean Paste (1 teaspoon) – Enhances flavor depth; pure vanilla extract works in a pinch.
- Peppermint Extract (¼ teaspoon) – Infuses the cookies with classic mint flavor; adjust to taste for bolder minty goodness.
- All-Purpose Flour (1½ cups) – Creates structure; use a 1:1 gluten-free flour blend if necessary.
- Cocoa Powder (¾ cup) – Provides rich chocolate flavor; Dutch-processed cocoa deepens both color and taste.
- Baking Powder (1 teaspoon) – Helps cookies rise slightly for a lighter texture.
- Salt (⅛ teaspoon) – Balances sweetness and enhances overall flavor.
For the Chocolate Coating
- Semi-Sweet Chocolate Chips (14 ounces) – For coating, providing a rich chocolate flavor; dark chocolate can intensify the taste.
- Vegetable Oil (1 tablespoon) – Smoothens and adds shine to your chocolate coating; coconut oil offers a unique flavor twist.
- Additional Peppermint Extract (½ teaspoon) – For an extra minty touch in the chocolate mixture.
Step‑by‑Step Instructions for Homemade Thin Mints
Step 1: Preheat the Oven
Start by preheating your oven to 350°F (175°C). This ensures your Homemade Thin Mints will bake evenly and create that perfectly crisp texture. Gathering all your ingredients and equipment now will streamline the process. Make sure you have your baking sheets lined with parchment paper ready for the cookies.
Step 2: Cream the Butter and Sugar
In a large mixing bowl, cream together ¾ cup of softened unsalted butter and 1 cup of sugar until light and fluffy, approximately 3-5 minutes. Use a hand mixer or stand mixer for the best results. This step is essential for aerating the mixture, which will contribute to the airy texture of your cookies.
Step 3: Add the Wet Ingredients
Next, beat in 1 large egg, 1 teaspoon of vanilla bean paste, and ¼ teaspoon of peppermint extract until fully combined. Take a moment to enjoy the delightful aroma that fills your kitchen as you mix these ingredients together. Ensuring everything is well mixed will set a solid foundation for your Homemade Thin Mints.
Step 4: Combine Dry Ingredients
In a separate bowl, sift together 1½ cups of all-purpose flour, ¾ cup of cocoa powder, 1 teaspoon of baking powder, and ⅛ teaspoon of salt. This step is crucial as it incorporates air into the flour, preventing clumps and promoting a smooth cookie dough. Mix until well combined, then set it aside.
Step 5: Mix Everything Together
Gradually add the dry mixture to the wet ingredients, stirring until just combined. Avoid overmixing to ensure your Homemade Thin Mints maintain a tender texture. The dough should be thick, cohesive, and slightly sticky, making it easy to handle in the next steps.
Step 6: Chill the Dough
Divide the dough in half and roll each portion between two sheets of parchment paper to about ¼-inch thick. Refrigerate the rolled dough for at least 2 hours. Chilling is vital to prevent the cookies from spreading too much while baking, so don’t skip this step—it’s key for maintaining their shape.
Step 7: Cut the Cookies
Once chilled, remove the dough from the refrigerator and use a 2-inch round cookie cutter to cut out circles. Place your shaped cookies on the prepared baking sheets about 1 inch apart. The dough should be firm, allowing for clean cuts and a great final shape for your Homemade Thin Mints.
Step 8: Bake the Cookies
Bake the cookies in your preheated oven for 8 minutes. Keep an eye on them as they bake; they should look set but still soft in the middle. Once done, let them cool on the baking sheet for 5 minutes before transferring them to a cooling rack. This cooling time helps them firm up.
Step 9: Melt Chocolate for Coating
To make the coating, melt 14 ounces of semi-sweet chocolate chips in a microwave-safe bowl. Heat in 30-second intervals, stirring in between until smooth and melted. This method prevents the chocolate from burning. The shiny melted chocolate will be what gives your Homemade Thin Mints that delicious exterior.
Step 10: Mix in Oil and Extra Mint
Once the chocolate is melted and smooth, stir in 1 tablespoon of vegetable oil and an additional ½ teaspoon of peppermint extract. This mixture will enhance the shine and taste of the coating. The extra mint provides that signature flavor that perfectly complements the chocolate.
Step 11: Dip the Cookies
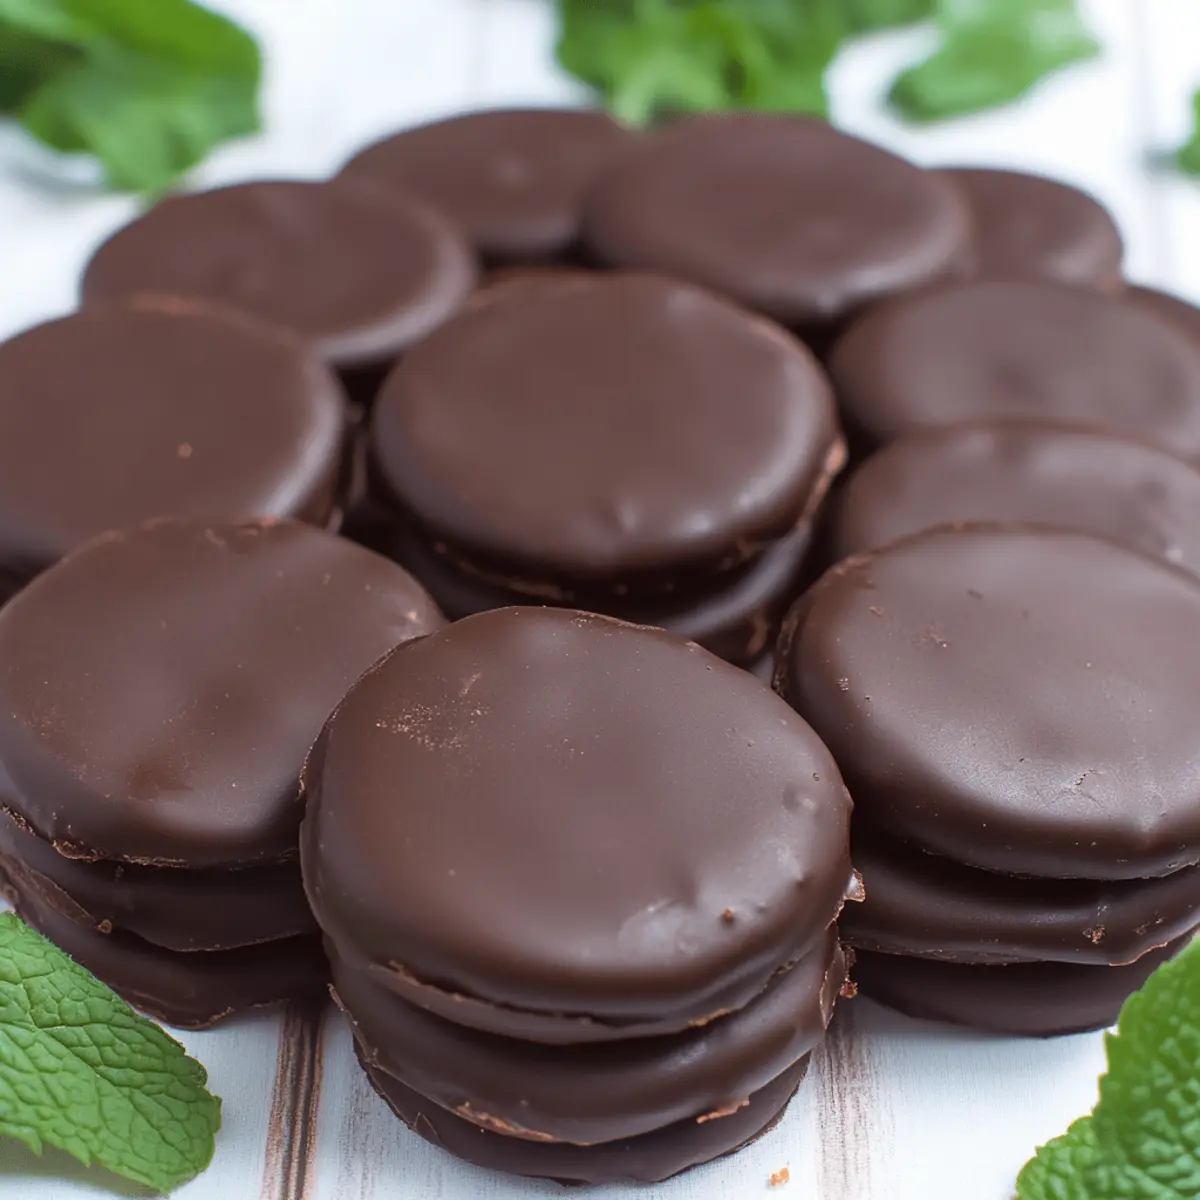
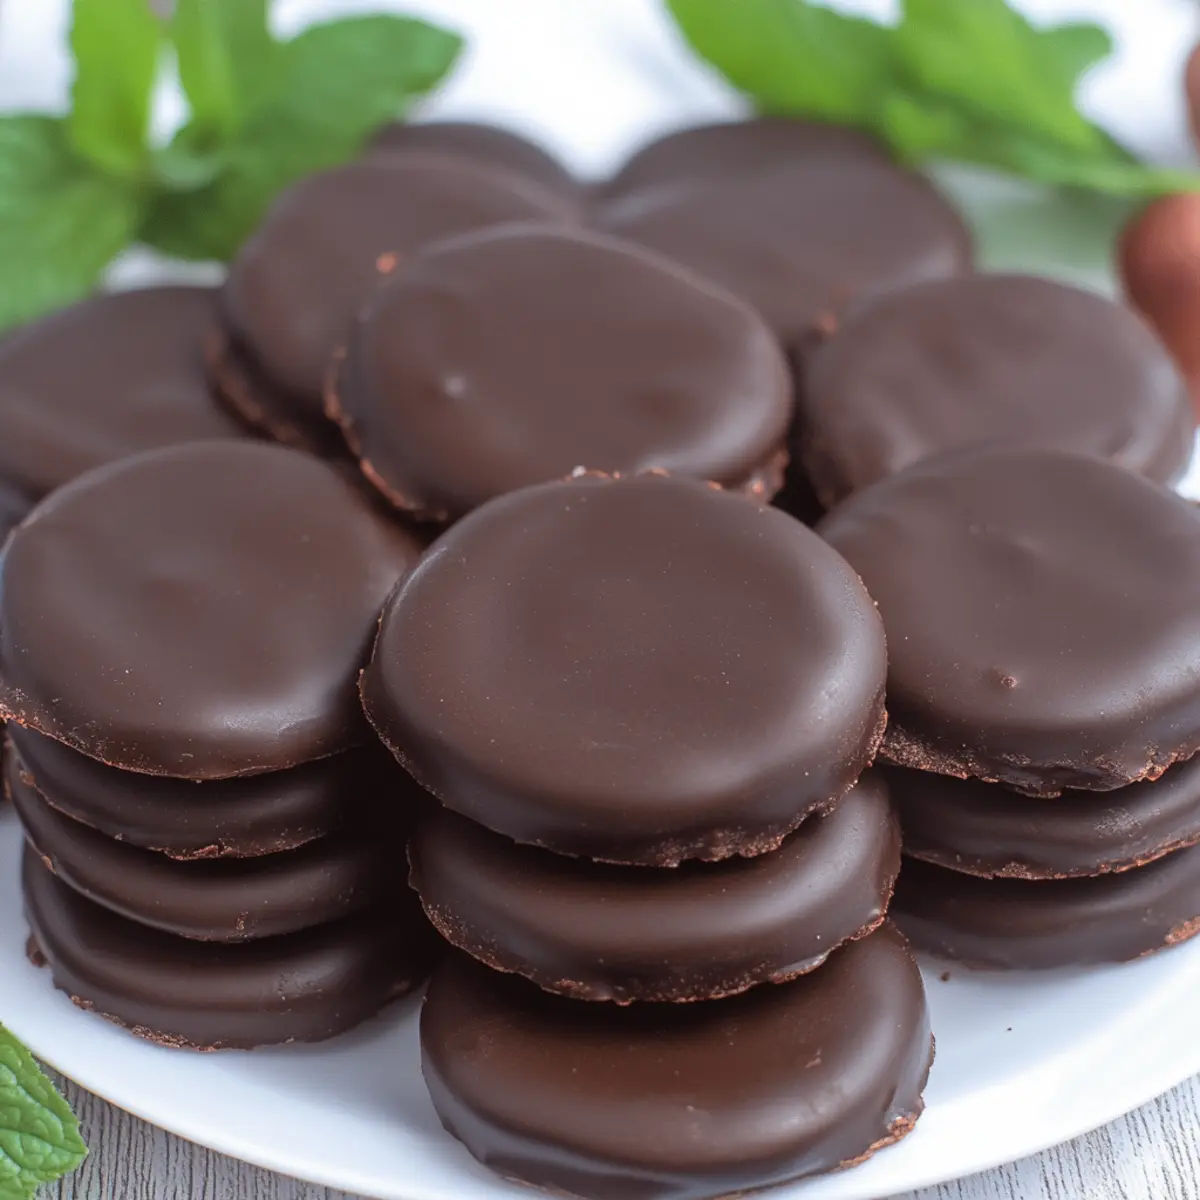
Carefully dip each cooled cookie into the chocolate mixture using a fork, allowing any excess chocolate to drip off before placing them onto parchment paper to cool. Ensure each cookie is thoroughly coated; this is where you make your Homemade Thin Mints truly shine!
Step 12: Let the Coating Set
Allow the cookies to sit at room temperature until the chocolate coating hardens, which should only take about 30-60 minutes. You can also speed up this process by placing them in the refrigerator. Once the chocolate is set, your Homemade Thin Mints will be ready to enjoy!
Make Ahead Options
These Homemade Thin Mints are perfect for busy home cooks who love meal prep! You can prepare the cookie dough up to 24 hours in advance by rolling it out between parchment paper, then refrigerating it until you’re ready to bake. Alternatively, you can bake the cookies and store them in an airtight container for up to 3 days before coating them with chocolate. To maintain that delicious freshness, make sure your container is sealed tightly. When it’s time to indulge, simply melt your chocolate coating and dip each cookie, allowing them to set before serving. This way, you’ll have these delightful treats ready to impress at a moment’s notice!
What to Serve with Perfect Homemade Thin Mints?
Imagine a delightful spread that elevates your cookie experience beyond just chocolate and mint!
-
Creamy Vanilla Ice Cream: The cool, creamy texture pairs beautifully with the crunch of homemade Thin Mints, creating a delightful contrast that enhances every bite. It’s a classic combination that reminds you of summer treats enjoyed on the porch.
-
Fresh Berry Medley: A mix of strawberries, raspberries, and blueberries brings a burst of color and freshness. Their natural sweetness complements the rich chocolate and mint, adding brightness to your dessert table.
-
Rich Hot Cocoa: A warm cup of hot cocoa provides a comforting drink to enjoy alongside your cookies. The smooth, chocolatey flavor and warmth create a cozy atmosphere, perfect for sharing with loved ones.
-
Minty Green Tea: Serve these cookies with a refreshing mint-infused green tea for a light yet flavorful pairing. The tea’s subtle earthiness balances the cookies’ sweetness and rounds out the snack beautifully.
-
Chocolate Dipped Strawberries: For an elegant touch, serve chocolate-dipped strawberries as an indulgent accompaniment. They echo the chocolatey goodness of your Thin Mints while adding a fresh element.
-
Homemade Whipped Cream: Light and fluffy whipped cream can elevate the enjoyment of these cookies. Top your chocolate desserts or enjoy a dollop alongside your cookies for added richness without overpowering their flavor.
-
Sparkling Water with Citrus: For something refreshing, serve fizzy water infused with citrus slices. This effervescent drink cleanses the palate and enhances the flavors of your Thin Mints.
-
Coffee or Espresso: A freshly brewed cup of coffee or a shot of espresso offers a robust complement to the sweetness of the cookies and enhances the rich chocolate flavor. It’s perfect for an afternoon treat or after-dinner indulgence.
Homemade Thin Mints Variations
Feel free to get creative with your Homemade Thin Mints! Each twist will add a delightful touch, making these cookies uniquely yours.
-
Espresso Boost: Add a pinch of espresso powder to the cookie dough for a flavor enhancement that accentuates the chocolatey depths. It’ll add a whole new layer of richness!
-
White Chocolate Coating: Swap the semi-sweet chocolate for white chocolate if you’re craving a different flavor experience. The contrast of sweet white chocolate and refreshing mint is heavenly!
-
Gluten-Free Option: Substitute all-purpose flour with a gluten-free 1:1 flour blend to accommodate dietary needs. No need to compromise on taste—these cookies remain just as delicious!
-
Nutty Surprise: Mix in finely chopped nuts like almonds or hazelnuts into your cookie dough for an added crunch and nutty flavor explosion. This creates an enticing texture that will surprise your taste buds!
-
Minty Orange Twist: Experiment with a few drops of orange extract alongside the peppermint for a refreshing citrus twist. The bright flavor combo will take your Homemade Thin Mints to a whole new level!
-
Adjustable Heat: For those who enjoy a little kick, add a sprinkle of cayenne pepper to the chocolate coating. Just a hint can transform the familiar into something exciting and unexpected!
-
Cookie Sandwiches: Create cookie sandwiches by adding a layer of mint-flavored frosting or whipped cream between two cookies. It turns these treats into a decadent dessert that friends and family will love.
-
Seasonal Variations: Use seasonal flavored extracts like peppermint during the holidays or coconut extract in summer for a tropical vibe! Each season can bring a new favorite twist to these beloved cookies.
With these variations, your Homemade Thin Mints will always have a little something special to offer. And if you’re looking for another fun treat, why not try making these delightful Cranberry Bliss Bars next? They’re sure to impress your guests!
Expert Tips for Homemade Thin Mints
-
Cream Don’t Skimp: Beat the butter and sugar until light and fluffy to ensure a tender texture in your Homemade Thin Mints—at least 3-5 minutes is ideal.
-
Chill Time Matters: Allow the dough to chill for at least 2 hours. This prevents spreading and maintains their classic cookie shape, so don’t rush this essential step!
-
Cool Completely: Always let your cookies cool completely before dipping them in chocolate. This prevents breakage and ensures a smooth coating.
-
Chocolate Adjustments: If using milk chocolate chips for coating, consider reducing sugar in the cookie base as they add more sweetness than semi-sweet chips.
-
Experiment with Flavors: Feel free to play with the peppermint extract amount. Start with less and add more for a minty flavor that suits your palate; adjust it to your taste.
Storage Tips for Homemade Thin Mints
Room Temperature: Store your Homemade Thin Mints in an airtight container at room temperature for up to 1 week to keep them fresh and crunchy.
Refrigerator: If you prefer a firmer texture, you can also store them in the fridge; however, let them come to room temperature before serving for the best flavor experience.
Freezer: To enjoy your cookies later, wrap them tightly and freeze for up to 6 months. Thaw at room temperature for a convenient treat anytime.
Reheating: If desired, reheat in a warm oven for a few minutes before serving to revive their crispiness; just be careful not to overheat them.
Homemade Thin Mints Recipe FAQs
How do I select the best ingredients for my Homemade Thin Mints?
Absolutely! For the unsalted butter, make sure it’s at room temperature for easy creaming—this helps achieve that fluffy texture. When selecting peppermint extract, opt for pure if possible for a more robust mint flavor. Of course, pick chocolate chips that you love, and remember, dark chocolate can add a richer taste compared to semi-sweet.
How should I store my Homemade Thin Mints?
Store your Homemade Thin Mints in an airtight container at room temperature for up to 1 week to keep them fresh and crunchy. If you prefer, you can also refrigerate them for a firmer texture—just be sure to let them come to room temperature before diving in for the best flavor experience!
Can I freeze my Homemade Thin Mints?
Certainly! To freeze them, wrap the cookies tightly in plastic wrap or foil, and then place them in a freezer-safe container or zip-top bag. They can be stored in the freezer for up to 6 months. When you’re ready to enjoy, simply thaw them at room temperature. For those who like a crispy texture, a quick pop in a warm oven for a few minutes can bring them back to life!
What should I do if my cookie dough is too sticky?
If your dough is too sticky, don’t worry! Lightly flour your hands and the work surface when handling the dough. You can also chill it for an additional 30 minutes if needed—just remember that chilling is vital to avoid spreading. If the dough seems overly sticky while rolling, dust the parchment paper lightly with flour to prevent it from sticking.
Are there any dietary considerations for Homemade Thin Mints?
Very much so! If you or anyone you’re serving has gluten sensitivities, substitute the all-purpose flour with a 1:1 gluten-free flour blend. Additionally, if you’re concerned about sugar, you can swap regular sugar for coconut sugar for a lower glycemic option. For pet owners, keep in mind that chocolate is toxic to dogs, so store these cookies safely away from furry friends!

Irresistibly Crunchy Homemade Thin Mints You’ll Love!
Ingredients
Equipment
Method
- Preheat your oven to 350°F (175°C). Prepare your baking sheets lined with parchment paper.
- Cream together ¾ cup unsalted butter and 1 cup sugar until light and fluffy, approximately 3-5 minutes.
- Beat in 1 large egg, 1 teaspoon vanilla bean paste, and ¼ teaspoon peppermint extract until fully combined.
- In a separate bowl, sift together 1½ cups all-purpose flour, ¾ cup cocoa powder, 1 teaspoon baking powder, and ⅛ teaspoon salt.
- Gradually add the dry mixture to the wet ingredients, stirring until just combined.
- Divide the dough in half and roll each portion between two sheets of parchment paper to about ¼-inch thick. Refrigerate for at least 2 hours.
- Once chilled, use a 2-inch round cookie cutter to cut out circles and place them on the prepared baking sheets.
- Bake the cookies in the preheated oven for 8 minutes. Let cool on the baking sheet for 5 minutes before transferring them to a cooling rack.
- Melt 14 ounces of semi-sweet chocolate chips in a microwave-safe bowl, heating in 30-second intervals until smooth.
- Stir in 1 tablespoon vegetable oil and ½ teaspoon peppermint extract once the chocolate is melted.
- Dip each cooled cookie into the chocolate mixture, allowing excess chocolate to drip off.
- Allow the cookies to sit at room temperature until the chocolate hardens, about 30-60 minutes.
Leave a Reply