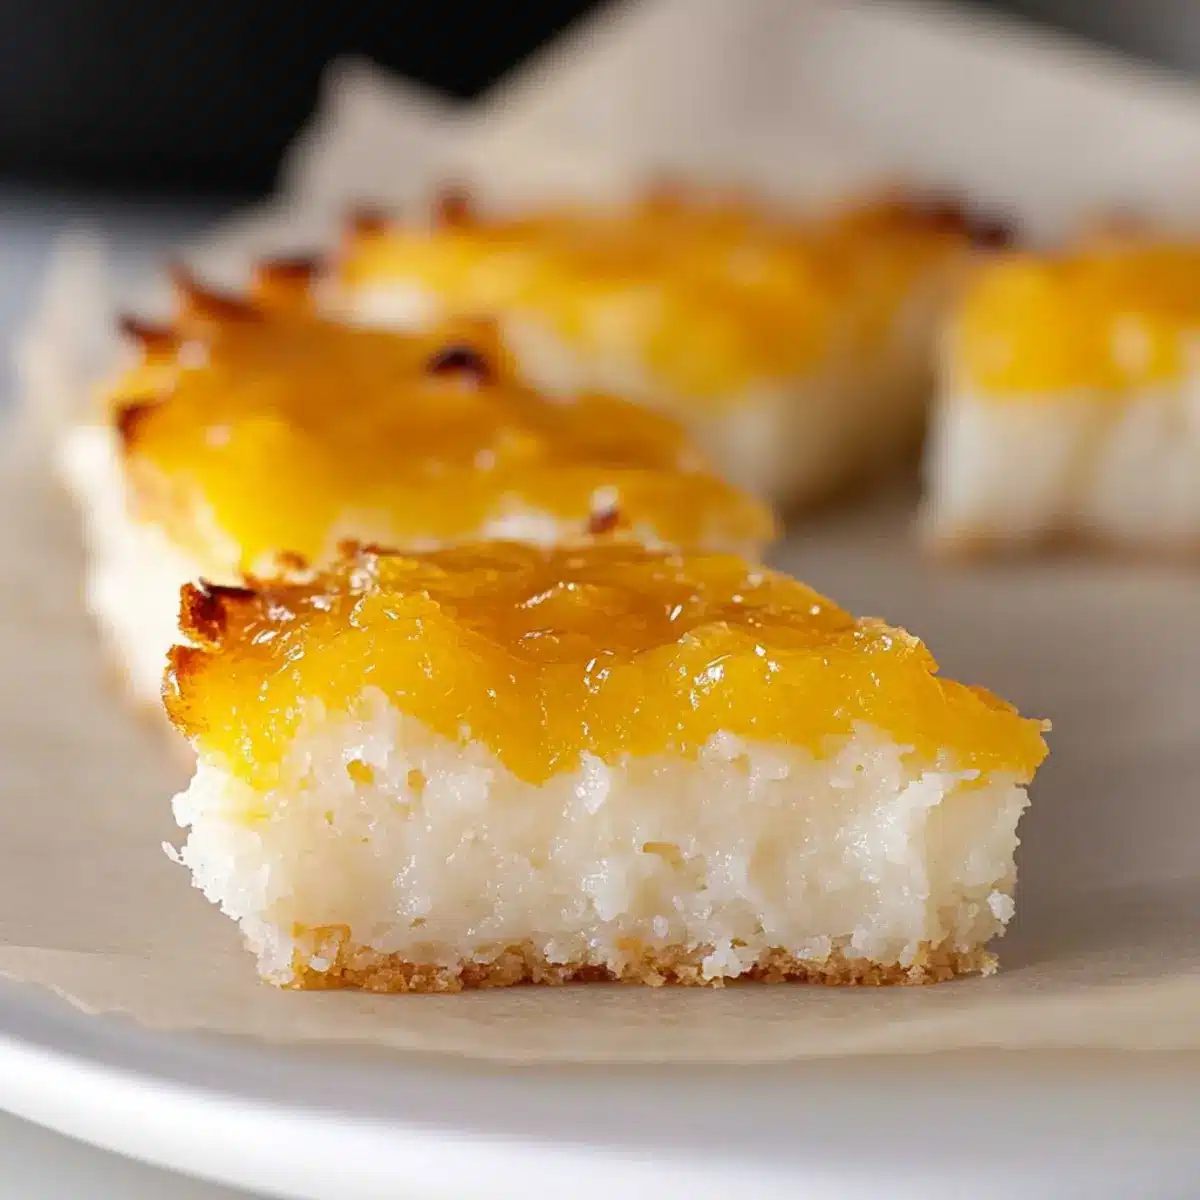
As I stood in my kitchen, the sweet aroma of freshly baked goods wafted through the air, instantly transporting me to the vibrant streets of Indonesia. This Easy Gluten-Free Indonesian Sticky Coconut Cake, known as Wingko Babat, is a nostalgic treat that brings warmth and comfort in every bite. Not only is this recipe a delight for coconut lovers, but it’s also incredibly easy to make, perfect for both special gatherings and those random cravings for something indulgent. With its fudgy, chewy texture and golden crust, this cake is a guaranteed crowd-pleaser, and it also fits elegantly into a gluten-free lifestyle. Curious how you can whip up this aromatic masterpiece and make your taste buds dance? Let’s dive into the recipe that’s sure to become a cherished favorite!
Why is Sticky Coconut Cake a must-try?
Irresistible texture: Each bite of this cake is a heavenly blend of fudgy and chewy, delivering a unique dessert experience that leaves you wanting more.
Tropical flavor bomb: The prominent coconut taste comes from luscious coconut milk and sweetened shredded coconut, making it a tropical paradise on your palate.
Quick and easy: With minimal ingredients and straightforward instructions, this recipe is perfect for any skill level, from novice bakers to culinary pros.
Gluten-free goodness: Designed to cater to gluten-free diets without sacrificing flavor, this cake is a delightful treat for everyone.
Perfect for any occasion: Serve it at your next gathering, alongside a warm beverage, or enjoy it as a satisfying afternoon snack. For more coconut inspiration, check out my recipe for Coconut Curry Soup.
Sticky Coconut Cake Ingredients
To create this delightful Sticky Coconut Cake, gather these simple yet essential ingredients.
For the Batter
- Eggs (2, separated) – Provide structure and moisture; for a vegan version, consider using aquafaba as an egg replacement.
- Granulated Sugar (1¼ cup) – Adds just the right sweetness and helps develop the cake’s lovely texture.
- Full Fat Canned Coconut Milk (2¼ cups) – This is your magic ingredient, adding needed moisture and tropical flavor; make sure to shake it well before use.
- Shredded Sweetened Coconut (3 cups) – A star player that infuses intense coconut flavor and delightful texture; sweetened gives the best results.
- Glutinous Rice Flour (1½ cups) – This is key for the chewy texture; do not swap it for regular flour. Mochiko (Japanese sweet rice flour) can work as a substitute.
- Vanilla Extract (1 teaspoon) – Enhances the flavor beautifully; no substitution needed for that warm note.
Indulge in this Sticky Coconut Cake and savor its delicious charm!
Step‑by‑Step Instructions for Sticky Coconut Cake
Step 1: Preheat the Oven
Begin by preheating your oven to 350°F (175°C). This ensures that when you place the Sticky Coconut Cake batter inside, it bakes evenly and achieves that delightful golden crust. While the oven is warming up, gather your 8×8-inch baking pan and lightly grease it to prevent sticking later on.
Step 2: Whisk the Egg Whites and Sugar
In a medium bowl, add the separated egg whites and granulated sugar. Using a hand mixer or a whisk, beat them together until the mixture becomes frothy and slightly thickened, about 2-3 minutes. This step not only incorporates air but also helps create a lovely structure for your cake, enhancing its chewy texture.
Step 3: Combine Coconut Milk and Ingredients
Gradually pour the full-fat canned coconut milk into the egg mixture while continuously whisking to prevent lumps. Next, add the shredded sweetened coconut, glutinous rice flour, and vanilla extract, stirring until the mixture is smooth and well combined. Aim for a creamy batter with no lumps; this is the foundation of your delightful Sticky Coconut Cake.
Step 4: Bake the Cake Batter
Pour the batter into the prepared 8×8-inch baking pan, spreading it evenly with a spatula. Place the pan in the preheated oven and bake for 45 minutes, or until the edges turn golden brown and a toothpick inserted in the center comes out clean. Your kitchen will soon fill with the mouthwatering aroma of the cake baking!
Step 5: Brush the Egg Yolk
Once the Sticky Coconut Cake is baked, remove it from the oven. In a small bowl, whisk together the reserved egg yolks and a splash of water. Brush this mixture generously over the surface of the cake to create a shiny glaze. This step adds flavor and a beautiful color to your cake’s golden crust.
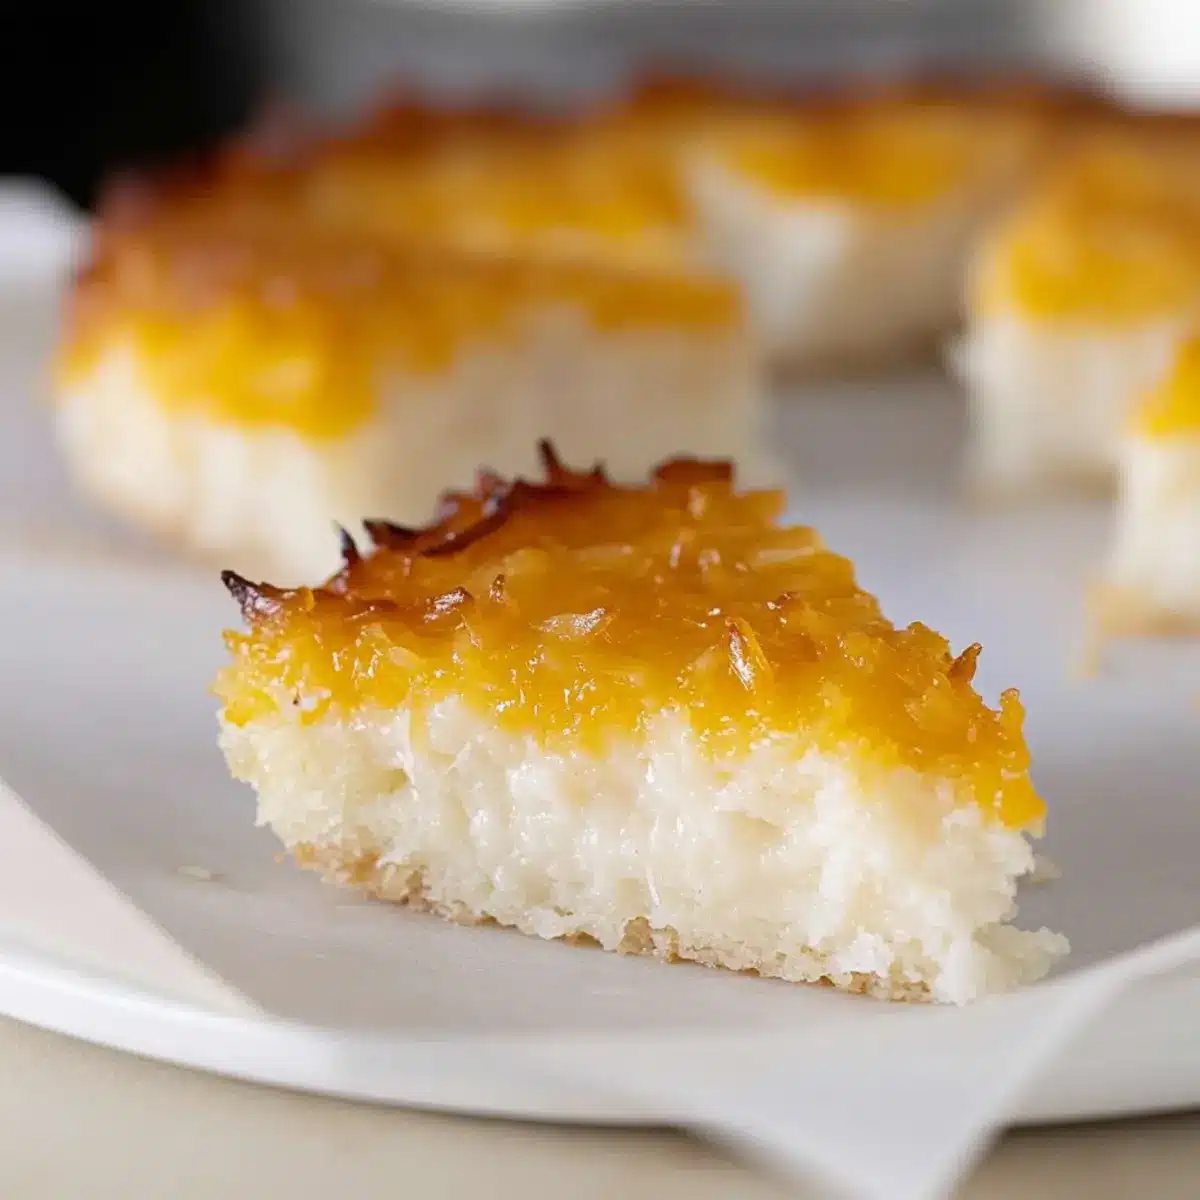
Step 6: Broil for a Golden Finish
Return the cake to the oven on a high broil setting for 5-10 minutes, keeping a close watch. You want the surface to caramelize to a deep golden brown without burning. This caramelization will contribute to the cake’s enticing texture and flavor, making every bite irresistible.
Step 7: Cool Completely
Remove the cake from the oven and let it cool in the pan at room temperature. Once it’s cool enough to handle, transfer it to a wire rack to cool completely. This will take about 30 minutes, and cooling is important for setting the texture of your Sticky Coconut Cake.
Step 8: Chill Before Serving
For the best flavor and texture, cover the cooled cake and refrigerate it for at least 8 hours, or preferably overnight. Chilling allows the flavors to meld beautifully, resulting in a truly delectable treat. Once chilled, it’s time to slice the cake into squares or triangles for serving. Enjoy!
How to Store and Freeze Sticky Coconut Cake
Fridge: Keep the cake in an airtight container for up to 2 weeks to maintain its moist texture and delicious flavor.
Freezer: For longer storage, wrap slices in plastic wrap and place them in a freezer bag. The Sticky Coconut Cake can be frozen for up to 3 months.
Reheating: To enjoy, thaw in the fridge overnight or at room temperature for 1-2 hours. Reheat in the microwave for a few seconds for a warm treat!
Serving After Storage: If chilled, it’s best to let the cake sit at room temperature for a few minutes before serving, allowing those incredible flavors to shine through!
Make Ahead Options
These Easy Gluten-Free Indonesian Sticky Coconut Cakes are perfect for meal prep enthusiasts! You can prepare the batter up to 24 hours in advance—simply whisk together the egg whites and sugar, mix in the coconut milk, shredded coconut, glutinous rice flour, and vanilla, then store the mixture in an airtight container in the refrigerator. When you’re ready to bake, pour the cold batter into the greased pan and follow the baking and broiling steps as outlined. For best results, allow the cake to chill for at least 8 hours after cooling to enhance the flavors and texture. By prepping ahead, you’ll save precious time on busy weeknights while still enjoying this delightful Sticky Coconut Cake!
Expert Tips for Sticky Coconut Cake
- Proper Coconut Milk: Ensure your coconut milk is well mixed before using; this prevents lumps in your cake batter, resulting in a smoother texture.
- Monitor the Broil: Keep a close eye on the broiling process; it can quickly go from golden to burnt, altering the cake’s flavor.
- Chill for Flavor: Letting the cake chill in the refrigerator for at least 8 hours enhances the flavor and improves its texture, making it even more enjoyable.
- Storage Secrets: If you have leftovers, store them in an airtight container in the fridge for up to two weeks, or freeze slices for up to three months.
- Serving Style: For a fun presentation, serve the Sticky Coconut Cake in colorful cupcake liners at parties; it will elevate your dessert table beautifully.
What to Serve with Easy Gluten-Free Indonesian Sticky Coconut Cake
Indulging in this delightful treat opens up a world of exciting pairings that will elevate your dessert experience!
- Coconut Milk Latte: A warm cup of coconut milk latte enhances the cake’s tropical flavor while offering a cozy vibe to your dessert time.
- Tropical Fruit Salad: Fresh strawberries, kiwi, and mango provide a bright and refreshing contrast, adding vibrant color and brightness to your dessert table.
- Whipped Coconut Cream: Light and fluffy, this dairy-free whipped cream complements the cake’s chewy texture, making each bite heavenly and rich.
- Vanilla Ice Cream: The classic combo of warm cake and cold ice cream creates a satisfying juxtaposition. It melts into the dense cake, making every slice indulgently creamy.
- Green Tea: The earthy notes of green tea balance the sweetness of the Sticky Coconut Cake beautifully, offering a calming, aromatic experience.
- Chai Tea: Spicy and fragrant, chai tea adds warmth and depth, providing a cozy pairing that’s perfect for sharing on rainy afternoons.
- Chocolate Drizzle: A little melted dark chocolate drizzled over the cake adds decadence and a touch of elegance, appealing to chocolate lovers.
- Sliced Almonds: A sprinkle of toasted sliced almonds adds crunch and nuttiness, harmonizing with the cake’s fudgy and chewy qualities.
- Mango Sorbet: This light, fruity dessert is refreshing and palate-cleansing, making it an excellent accompaniment to the rich flavors of the cake.
- Coconut Macaroons: For the ultimate coconut experience, pair your cake with these chewy delights, enhancing the tropical theme with every bite!
Sticky Coconut Cake Variations
Feel free to personalize this delightful recipe, and let your creativity shine in the kitchen!
- Vegan: Use aquafaba instead of eggs for a plant-based version without compromising texture.
- Milk Substitute: Almond or oat milk can replace coconut milk; just know this will alter the coconut flavor profile.
- Add Spices: Incorporate a touch of cinnamon or nutmeg for a warm spice twist that complements the coconut beautifully.
- Chocolate Swirl: Fold in some melted dark chocolate into the batter for a rich chocolate-coconut fusion.
- Nutty Crunch: Add chopped walnuts or almonds for added texture and a delightful nutty flavor.
For a truly tropical experience, you could consider pairing your Sticky Coconut Cake with my yummy recipe for Coconut Curry Soup. A perfect combination of sweet and savory!
- Fruity Delight: Experiment with mixed dried fruits like raisins or apricots within the batter for a fruity surprise in every bite.
- Extra Coconut: Try using toasted coconut flakes on top for an aromatic touch that amplifies that cherished coconut flavor.
Enjoy creating your own unique twist on this heaven-sent dessert, and happy baking!
Sticky Coconut Cake Recipe FAQs
What type of coconut milk should I use for the Sticky Coconut Cake?
Absolutely! For the best results, use full-fat canned coconut milk, as it provides the rich flavor and moisture essential for this cake. Make sure to shake the can well before use to mix any solids that may have separated. If you need a substitute, you can try coconut cream, though the texture may differ slightly.
How should I store my Sticky Coconut Cake after baking?
I recommend storing your cake in an airtight container in the refrigerator for up to 2 weeks. This will help retain its moist texture and delightful flavor. If you want to enjoy it later, freezing is an excellent option!
Can I freeze Sticky Coconut Cake? How do I do it?
Yes, you can freeze Sticky Coconut Cake! To do this, wrap slices individually in plastic wrap and then place them in a freezer bag. Make sure to remove as much air as possible to prevent freezer burn. It can maintain its deliciousness in the freezer for up to 3 months!
What should I do if my cake turns out too dense or gummy?
Very! If your cake is dense or gummy, it could be due to overmixing the batter or incorrect measurements of the glutinous rice flour. Ensure you measure the flour accurately and mix just until combined to preserve the desired texture. If your coconut milk is too thick, consider adding a bit more to achieve a smoother batter.
Is this recipe suitable for people with nut allergies?
Definitely! The Sticky Coconut Cake recipe is inherently nut-free, focusing on coconut as the only allergenic ingredient used. However, always double-check labels for cross-contamination when using packaged ingredients! If you have a coconut allergy, it’s best to avoid this recipe altogether.
How does chilling the Sticky Coconut Cake enhance the flavors?
Chilling your Sticky Coconut Cake for at least 8 hours before serving allows the flavors to meld and deepen, resulting in a more delicious and harmonious taste! After baking, let it cool completely, cover it, and place it in the refrigerator. For the best experience, it’s often been said that the next day is when it truly shines!
Indulge in Easy Sticky Coconut Cake Bliss at Home
Ingredients
Equipment
Method
- Preheat your oven to 350°F (175°C) and grease an 8x8-inch baking pan.
- In a medium bowl, whisk egg whites and granulated sugar together until frothy and slightly thickened.
- Gradually add coconut milk to the egg mixture while whisking, then stir in shredded coconut, rice flour, and vanilla.
- Pour the batter into the prepared baking pan and bake for 45 minutes until golden brown.
- Whisk reserved egg yolks with a splash of water and brush over the baked cake.
- Broil the cake on high for 5-10 minutes until the surface caramelizes.
- Allow the cake to cool in the pan, then transfer to a wire rack to cool completely.
- Cover and refrigerate the cake for at least 8 hours before slicing and serving.
Leave a Reply