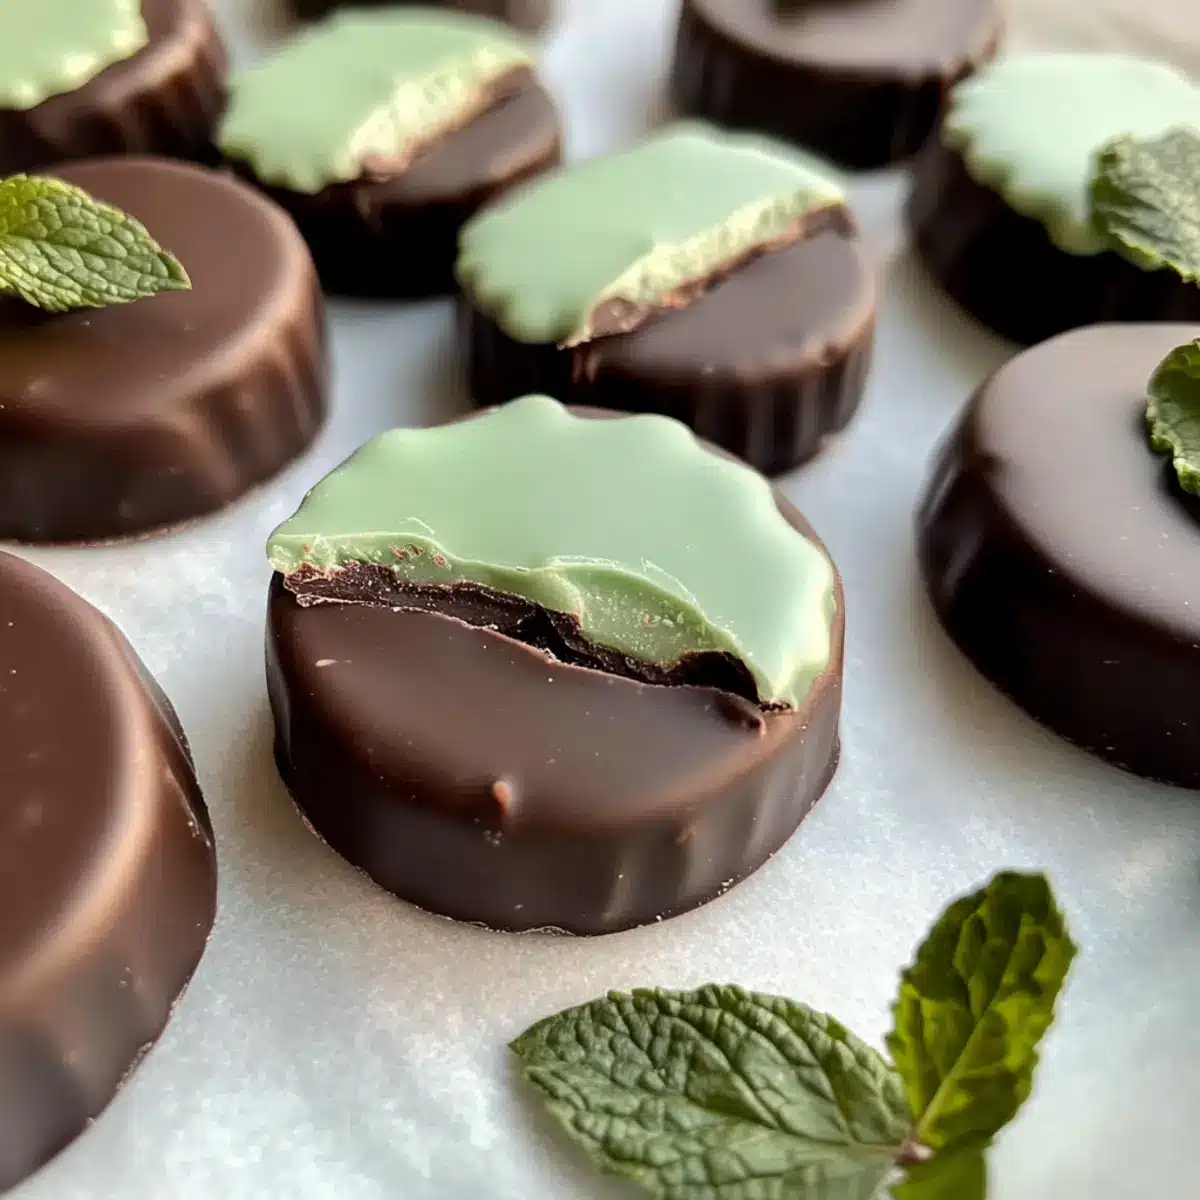
As I stood in my kitchen, the sweet scent of melting chocolate filled the air, instantly transporting me back to delightful holiday memories. Today, I’m excited to share my take on Homemade Andes Mint Chocolates, a treat that celebrates the perfect blend of rich chocolate and refreshing mint, all while aligning with Paleo, Keto, and Vegan diets. Not only are these mint chocolates low in sugar, but they also make a wonderful guilt-free indulgence that satisfies your sweet tooth. Whether you’re looking to impress guests at a gathering or simply wanting to treat yourself, these minty morsels are your new go-to! Curious about how to whip up your batch? Let’s dive into this deliciously simple recipe together!
Why Make Mint Chocolates at Home?
Indulgence Without Guilt: These Homemade Andes Mint Chocolates are a delicious way to satisfy your sweet cravings without compromising your health goals. Easy to Prepare: With only a few simple ingredients, you’ll love how quickly you can whip up these treats. Diet-Friendly: Designed to fit Paleo, Keto, and Vegan diets, they ensure everyone at your table can indulge. Flavor Explosion: The refreshing mint shines through in every bite, perfectly complemented by rich dark chocolate. Think of serving them during special occasions or as a delightful treat to enjoy with friends, much like these lovely Roasted Carrots Mint. Versatile Variations: Feel free to customize your mint chocolates with flavors like orange or coconut for a unique twist!
Mint Chocolates Ingredients
For the Filling
- Cacao Butter – Provides a smooth, creamy filling; coconut butter can be used, but texture will differ.
- Powdered Monk Fruit – Acts as a sweetener without calories; substitute with any powdered sugar if preferred.
- Peppermint Flavoring – Imparts a refreshing minty taste; use peppermint extract cautiously as it’s potent.
- Spirulina – Used for natural green coloring; alternatives include matcha, chlorella, or spinach powder; optional for flavor adjustment.
For the Coating
- Dark Chocolate Chips – Forms the outer coating, ensuring the mints remain Paleo, Keto, and Vegan; choose extra dark chocolate (85-100% cacao) for a perfect sweetness balance.
Step‑by‑Step Instructions for Mint Chocolates
Step 1: Melt Cacao Butter
In a small saucepan over low heat, melt ½ cup of cacao butter, stirring frequently to ensure it melts evenly without burning. This process should take around 5–7 minutes, and you’ll know it’s ready when the cacao butter is completely liquid and smooth, with a velvety appearance.
Step 2: Mix Filling
Once the cacao butter is melted, remove the saucepan from the heat and whisk in ½ cup of powdered monk fruit and 1 teaspoon of peppermint flavoring. Feel free to adjust the peppermint to your taste. Add 1 teaspoon of spirulina for color, creating a vibrant green mixture that complements the chocolate beautifully.
Step 3: Mold Filling
Pour ½-1 tablespoon of the mint filling mixture into silicone mini muffin molds, filling each cup about three-quarters full. Smooth the tops with a spatula, then place the molds in the freezer for 10–20 minutes, or until the filling is firmly set and slightly firm to the touch.
Step 4: Melt Chocolate
While the mint fillings are freezing, clean the saucepan and melt 1 cup of dark chocolate chips over low heat, stirring continuously. This should take about 3–5 minutes. The chocolate is ready when it is fully melted and glossy, allowing for a perfect coating for your mint chocolates.
Step 5: Dip Fillings
Once the mint fillings are set, carefully remove them from the molds. Dip each filling into the melted dark chocolate, using a fork to ensure it’s evenly coated. Allow the excess chocolate to drip off back into the saucepan. This step will create a decadent outer shell for your mint chocolates.
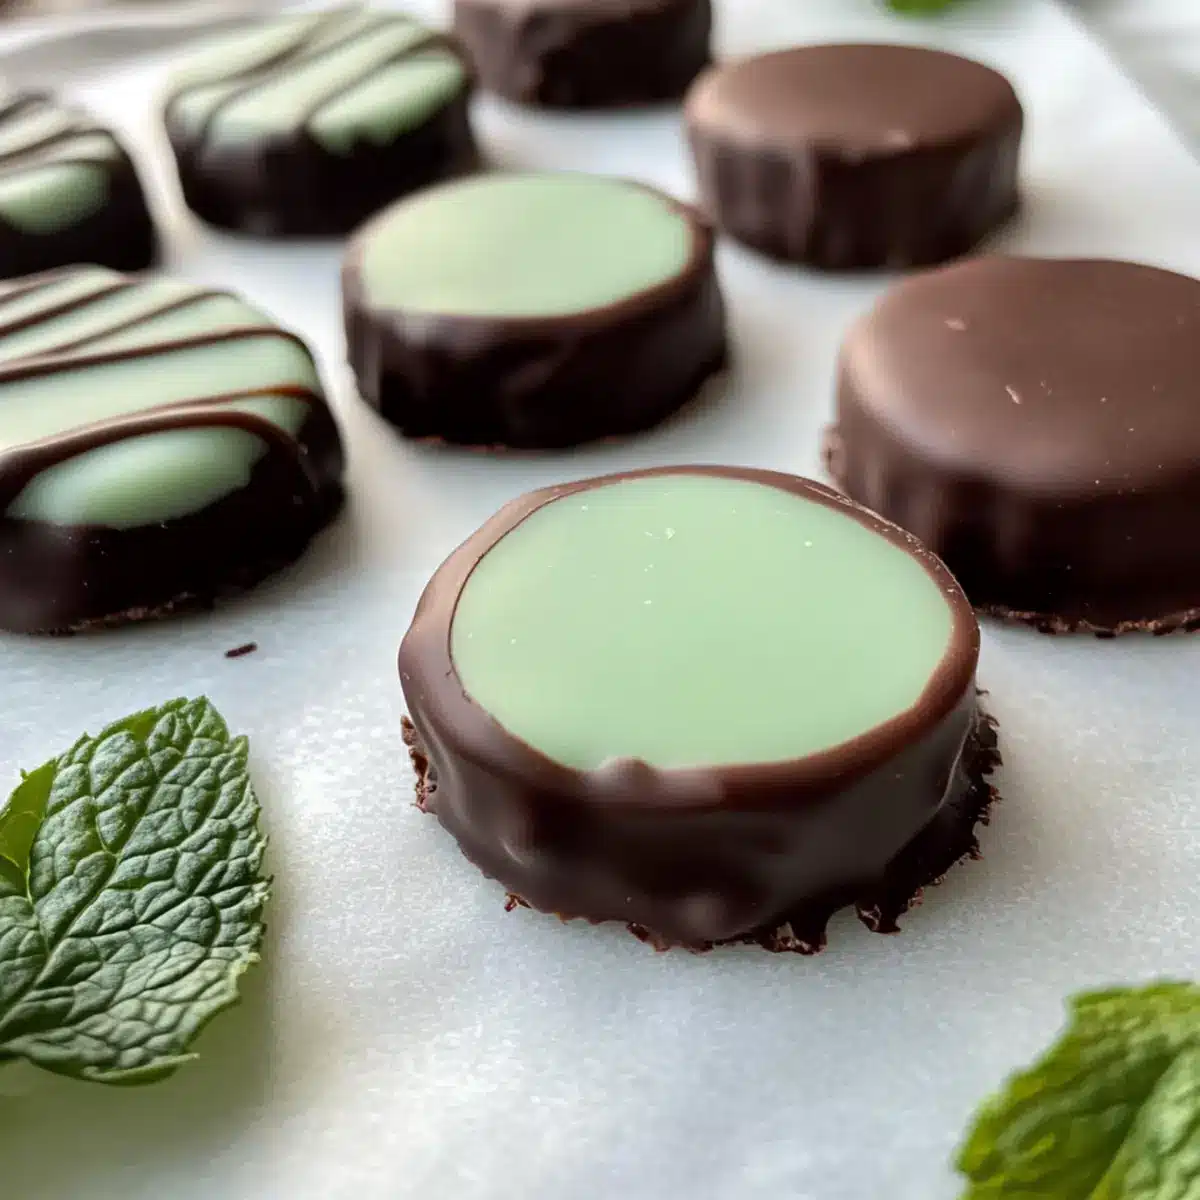
Step 6: Final Touches
Place the dipped mint chocolates on a parchment-lined baking sheet. To add a decorative touch, drizzle any remaining melted chocolate over the tops of the chocolates. If you’d like, garnish them with a small piece of fresh mint for a lovely presentation. Freeze the chocolates for another 10 minutes to set completely before enjoying your delicious mint chocolates!

Make Ahead Options
These Homemade Andes Mint Chocolates are perfect for busy home cooks who want to save time without sacrificing flavor! You can prepare the mint filling up to 24 hours ahead by making the mixture and pouring it into molds, then storing it in the freezer. This not only saves you time on the day you plan to serve them but also ensures the flavors have melded beautifully. When you’re ready to finish the mint chocolates, simply dip the frozen fillings in melted dark chocolate and set them back in the freezer for another 10 minutes. This way, the chocolates will stay just as delicious, allowing you to indulge in a delightful homemade treat with minimal effort on that special occasion!
How to Store and Freeze Mint Chocolates
Fridge: Keep your mint chocolates in an airtight container for up to 1 week. This ensures they remain fresh and retain their lovely firmness.
Freezer: For longer storage, freeze mint chocolates in a sealed container or freezer bag for up to 3 months. Just allow them to defrost in the fridge before indulging!
Reheating: If your chocolates soften, gently place them in the fridge for a short time to restore firmness. Avoid microwave reheating, as it can cause melting and texture loss.
Avoid Exposure: Make sure to keep the container sealed tightly, as exposure to air can alter the taste and freshness of these delightful mint chocolates.
Mint Chocolates Variations & Substitutions
Feel free to mix things up and create a unique version of these luscious mint chocolates that suits your taste buds!
-
Coconut Butter: Swap cacao butter for coconut butter for a delightful coconut-infused flavor.
-
Citrus Twist: Replace peppermint flavoring with orange extract to add a refreshing citrus note; it’s a lovely summer change!
-
Different Coloring Agents: Opt for matcha or even a pinch of turmeric as a natural color enhancer, depending on your availability. A vibrant hue can make your chocolates pop!
-
Nutty Crunch: Incorporate crushed nuts, like walnuts or almonds, into the filling before molding for an added texture that pairs beautifully with the mint.
-
Sweetener Swap: Use agave nectar or honey if you prefer a liquid sweetener over powdered monk fruit. Just adjust the amount based on desired sweetness.
-
Spicy Kick: For a surprising twist, add a dash of cayenne pepper to your filling or chocolate coating to bring a touch of heat to the chocolate-mint combination.
-
Alternative Chocolates: If you want to experiment, try using white chocolate for a different flavor profile, making sure it’s also Keto-friendly.
-
Herbal Infusion: Add a few drops of vanilla extract to the filling for a lovely layer of flavor that complements the mint nicely. This can also mellow out the intensity of the peppermint.
These variations will turn your mint chocolates into a delicious, personalized treat. Enjoy every bite with friends and family, just like these amazing Roasted Carrots Mint that can inspire more fresh flavors in your kitchen!
Expert Tips for Mint Chocolates
• Adjust Sweetness: Tailor the sweetness of your filling by increasing or reducing the powdered monk fruit; this allows for personal preference in your mint chocolates.
• Chocolate Melting: Always melt the dark chocolate slowly over low heat to prevent clumping or burning, ensuring a smooth coating for your chocolates.
• Use Silicone Molds: Opt for silicone mini muffin molds for easy removal. They help retain the perfect shape while keeping your mint chocolates intact.
• Storage Awareness: Store your chocolates in the fridge for optimal firmness and freshness. With fresh mint garnishes, they should be used within a week.
• Experiment with Flavors: Don’t hesitate to play with flavorings like orange extract or coconut butter to customize your mint chocolates to taste!
What to Serve with Homemade Andes Mint Chocolates
Indulging in sweet minty bliss pairs wonderfully with several delightful options that can enhance your dessert experience.
-
Fresh Berries: Juicy raspberries or strawberries offer a tangy contrast that brightens every bite of chocolate.
-
Nutty Brownies: Rich, fudgy brownies provide a satisfying chewiness, complementing the smooth texture of the mint chocolates.
-
Coconut Whipped Cream: Light and airy, this topping adds a tropical flair that works beautifully with the minty freshness.
-
Tea Selection: A warm cup of peppermint or chai tea complements the chocolates’ flavor, creating a cozy and inviting atmosphere.
-
Vanilla Almond Milk: Serve chilled, this creamy drink adds a touch of sweetness and nutty flavor that balances the chocolate perfectly.
-
Minty Fruit Salad: Tossing together a mix of melon, kiwi, and mint creates a refreshing side that enhances the after-dinner treat experience.
Whether you’re preparing a special gathering or simply treating yourself, each pairing elevates the enjoyment of your homemade Andes Mint Chocolates, making for a delightful day!

Homemade Andes Mint Chocolates Recipe FAQs
What type of cacao butter should I use?
Absolutely! For the best results, I recommend using food-grade, organic cacao butter that’s minimally processed. This ensures a smooth, creamy filling that’s rich in flavor. You can also use virgin coconut oil if you’re in a pinch, but keep in mind the texture will be softer and slightly different.
How should I store my mint chocolates?
Keep your mint chocolates in an airtight container in the fridge for up to 1 week to maintain their freshness and firmness. If you want to extend their shelf life, you can freeze them in a sealed container for up to 3 months. Just remember to let them thaw in the fridge before enjoying!
Can I freeze mint chocolates?
Very! To freeze your mint chocolates, first place them in a single layer on a parchment-lined baking sheet and freeze for about 2 hours until solid. Once frozen, transfer them to a sealable freezer bag or airtight container. Make sure to label the container with the date so you can enjoy them for up to 3 months!
What if my chocolate is clumping when melting?
No worries, this sometimes happens! If your chocolate is clumping, it could be due to overheating. To fix this, remove the pan from heat and let it cool slightly before continuing to stir. You can add a small amount of coconut oil to help loosen it up—this will ensure a smooth, glossy coating for your mint chocolates.
Are these mint chocolates allergy-friendly?
These mint chocolates are quite adaptable! They are naturally gluten-free, Paleo, Keto, and Vegan. If you’re concerned about nut allergies, be cautious with the brand of dark chocolate you choose, as some may have traces of nuts. Always check labels to be safe!
Can I customize the flavoring in the filling?
Absolutely! Feel free to get creative with your mint chocolates by using different extracts. For a citrusy twist, you can substitute the peppermint flavoring with orange or lemon extract. Adjust the amount slightly, as these flavors can be more potent than peppermint, ensuring each bite is deliciously unique!
Mint Chocolates That Are Paleo, Keto, and Vegan Friendly
Ingredients
Equipment
Method
- In a small saucepan over low heat, melt ½ cup of cacao butter, stirring frequently to ensure it melts evenly without burning (about 5–7 minutes).
- Remove the saucepan from the heat and whisk in ½ cup of powdered monk fruit and 1 teaspoon of peppermint flavoring. Adjust the peppermint to your taste and add 1 teaspoon of spirulina for color.
- Pour ½-1 tablespoon of the mint filling mixture into silicone mini muffin molds and place in the freezer for 10–20 minutes.
- Melt 1 cup of dark chocolate chips in the cleaned saucepan over low heat for about 3–5 minutes, stirring continuously.
- Carefully remove the mint fillings from the molds, dip into the melted dark chocolate, and allow excess to drip off.
- Place the dipped mint chocolates on a parchment-lined baking sheet, drizzle remaining chocolate over the tops, and garnish with fresh mint. Freeze for another 10 minutes.
Leave a Reply