As I savored the last spoonful of dessert at my favorite café, I couldn’t help but think—why shouldn’t I create a little magic at home? That moment sparked my journey to whip up these delightful No-Bake Biscoff Cheesecake Cups, where the iconic caramelly flavor of Biscoff cookies transforms into a creamy, dreamy layered dessert. With an easy preparation process, these cups are a lifesaver whether you’re entertaining friends or looking for a quick indulgence after a long day. Plus, they’re family-friendly—perfect for satisfying everyone’s sweet tooth! Curious about how to recreate that charming café vibe in your own kitchen? Let’s dive into this recipe that will elevate your dessert game!

Why is this cheesecake so irresistible?
Indulgent Flavor: The rich, spiced taste of Biscoff cookies is elevated into a creamy dream, making each bite a heavenly experience.
Effortless Preparation: With no baking required, you’ll find this recipe is perfect for busy days or spontaneous gatherings.
Visual Appeal: Serving them in individual cups not only makes for a stunning presentation but also adds a personal touch for your guests.
Family-Friendly Delight: Both kids and adults will be reaching for seconds, creating cherished memories around the dessert table.
Make-Ahead Magic: Prepare these cups a day in advance for a hassle-free entertaining option—simply chill and serve!
For more delectable cheesecake ideas, check out my Caramel Crunch Cheesecake Fruit Salad or the delicious Cheesecake Pumpkin Swirl to keep your dessert choices exciting!
No-Bake Biscoff Cheesecake Ingredients
-
For the Crust
-
Lotus Biscoff biscuits – These cookies provide the essential crunchy base; you can use graham crackers if needed.
-
Unsalted butter – Binds the cookie crumbs; coconut oil works great for a dairy-free option.
-
For the Filling
-
Heavy cream – Whips up into a light, fluffy filling; coconut cream is a suitable dairy-free alternative.
-
Cream cheese – Offers creaminess and structure; vegan cream cheese is a wonderful option for those avoiding dairy.
-
Powdered sugar – Sweetens the filling beautifully; granulated sugar can be swapped, but might alter the texture.
-
Biscoff spread (cookie butter) – Imparts the signature caramel flavor; you can try almond or peanut butter for a twist.
-
Vanilla extract – Enhances overall flavor; feel free to leave it out for a simpler taste.
-
For Garnishing
-
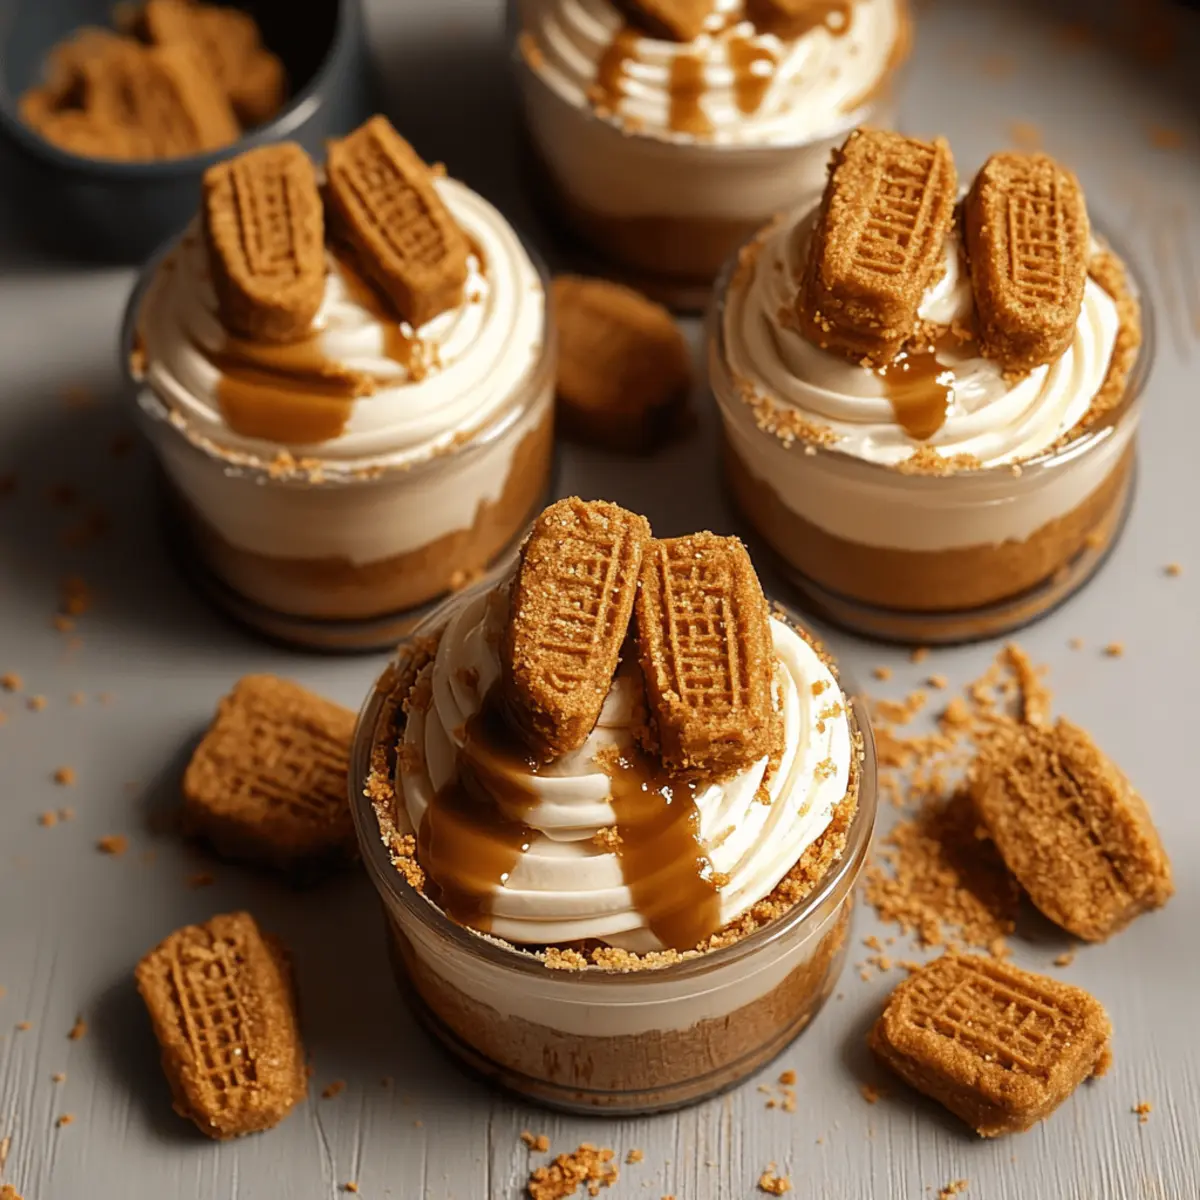
Halved Biscoff cookies – Adds visual appeal and an extra crunch to the dessert.
-
Reserved cookie crumbs – Use these for sprinkling on top for added texture and flavor.
This No-Bake Biscoff Cheesecake will not only satisfy your sweet cravings but also impress your family and friends—perfect for any occasion!
Step‑by‑Step Instructions for No-Bake Biscoff Cheesecake Cups
Step 1: Prepare the Crust
Start by crushing the Biscoff biscuits into fine crumbs using a food processor or a rolling pin. Melt the unsalted butter in a microwave-safe bowl, then combine with the cookie crumbs until evenly coated. Spoon this mixture into dessert cups, pressing it down firmly with a small glass or your fingers to create a stable base. Set aside while you prepare the filling.
Step 2: Make the Filling
In a mixing bowl, pour in the heavy cream and whip it with an electric mixer until stiff peaks form, which should take about 3-5 minutes. In another large bowl, beat the softened cream cheese, powdered sugar, Biscoff spread, and vanilla extract together until smooth and creamy. Gently fold the whipped cream into the cream cheese mixture, making sure to keep it light and airy for that fluffy texture reminiscent of a perfect No-Bake Biscoff Cheesecake.
Step 3: Layer the Cups
Carefully transfer the fluffy cheesecake filling into a piping bag or a zip-lock bag with a corner snipped off. Pipe the filling into each dessert cup over the set crust, creating a lovely layered effect. Fill the cups nearly to the top, leaving some space for the topping, and smooth the surface with a spatula or the back of a spoon for an elegant finish.
Step 4: Add Topping
In a microwave-safe bowl, melt the Biscoff spread for about 15-20 seconds until it’s pourable. Drizzle the melted spread evenly over the tops of the cheesecake filling in each cup for that glossy layer we all love. For a decorative touch, sprinkle the reserved cookie crumbs over the top and add halved Biscoff cookies to each cup, enhancing both the flavor and presentation.
Step 5: Chill
Cover the cheesecake cups with plastic wrap or a lid and refrigerate them for at least 4 hours, or preferably overnight. This chilling process allows the layers to set properly and ensures a delightful experience when serving. Once set, your No-Bake Biscoff Cheesecake Cups are ready to impress when you unveil them at your next gathering or simply enjoy them as a treat for yourself!

What to Serve with No-Bake Biscoff Cheesecake Cups
Elevate your dessert experience with complementary dishes and drinks that enhance the delightful Biscoff flavor.
-
Fresh Berries: Juicy strawberries or blueberries add a burst of freshness, balancing the creamy sweetness of the cheesecake. Their vibrant colors also create an inviting presentation.
-
Coffee: A rich, aromatic brew or a warm cappuccino brings out the caramel notes in the Biscoff cookies, making for a cozy pairing that’s perfect for after-dinner indulgence.
-
Chocolate Drizzle: Drizzling some melted dark chocolate gives an elegant touch and adds a decadent layer of flavor that complements the Biscoff beautifully.
-
Whipped Cream: Lightly sweetened whipped cream adds a fluffy texture that complements the creamy filling of the cheesecake cups. It adds a classic element to your dessert.
-
Caramel Sauce: A drizzle of warm caramel sauce brings an extra layer of sweetness and richness, enhancing the dessert’s decadent character while introducing a gooey texture.
-
Mint Leaves: Fresh mint leaves provide a burst of color and a refreshing herbal note that contrasts beautifully with the rich flavors. They also elevate the visual appeal on the plate.
-
Sparkling Water: A glass of refreshing sparkling water with a slice of lemon will cleanse the palate and balance out the richness of the cheesecake.
-
Nutty Biscotti: Crunchy biscotti pairs perfectly for a textural contrast and is a delightful option for dipping alongside your cheesecake cups. Enjoy the combination of flavors!
Each pairing invites a unique experience, making your No-Bake Biscoff Cheesecake Cups even more memorable.
No-Bake Biscoff Cheesecake Variations
Feel free to let your creativity shine as you customize this delightful dessert!
- Fruit Layer: Add a layer of fresh berries or a berry compote between the crust and filling for a refreshing burst of flavor. Think strawberries, blueberries, or raspberries adding both color and sweetness!
- Chocolate Swirl: For a chocolate twist, mix cocoa powder into the cheesecake filling or drizzle melted dark chocolate on top for a luscious finish that will entice chocolate lovers.
- Nutty Crunch: Incorporate chopped nuts, like almonds or hazelnuts, into the crust for added crunch and flavor. They bring an enjoyable texture contrast to the creamy filling!
- Spiced Delight: Enhance the flavor profile by adding a sprinkle of cinnamon or nutmeg to the filling. It adds warmth and a cozy touch, reminding you of homemade treats during the holidays.
- Caramel Drizzle: Drizzle a rich caramel sauce over the top just before serving. This sweet layer complements the Biscoff cookies and elevates the dessert into an unforgettable indulgence.
- Dairy-Free Version: Swap cream cheese for vegan cream cheese and use coconut cream and coconut oil for the filling and crust, making a creamy dessert that everyone can enjoy.
- Herbal Infusion: Try infusing some finely chopped fresh mint or basil into the filling for a surprising yet delightful twist that adds an aromatic quality to the cheesecake cups.
Don’t forget, if you’re craving something different, you can always explore other irresistible desserts like my Strawberry Crunch Cheesecake or the delightful Cheesecake Pumpkin Swirl. Enjoy your baking adventure!
How to Store and Freeze No-Bake Biscoff Cheesecake
Refrigerator: Keep your No-Bake Biscoff Cheesecake Cups covered in the fridge for up to 3 days. This helps maintain their creamy texture and prevents drying out.
Freezer: For longer storage, you can freeze these cheesecake cups for up to 2 months. Ensure they’re in airtight containers or wrapped tightly to prevent freezer burn.
Thawing: When ready to enjoy, transfer the cheesecake cups from the freezer to the fridge for several hours or overnight to thaw gradually.
Reheating: Since this dessert is served cold, there’s no need for reheating. Just grab a spoon and indulge straight from the fridge!
Make Ahead Options
These No-Bake Biscoff Cheesecake Cups are perfect for meal prep, making them a fantastic option for busy weeknights or gatherings! You can prepare the crust and filling up to 24 hours in advance, ensuring you save time when guests arrive. Simply press the crust into the cups and store them covered in the refrigerator. Make the cheesecake filling and layer it into the cups just before serving to maintain its light and airy texture. Drizzle the melted Biscoff spread over the top, garnish, and chill for a minimum of 4 hours or overnight for best results. This way, you’ll enjoy delicious, restaurant-quality desserts with minimal effort when the moment calls for a sweet treat!
Expert Tips for No-Bake Biscoff Cheesecake
-
Cream Cheese Prep: Ensure your cream cheese is at room temperature for a smooth filling; cold cream cheese can lead to lumps.
-
Perfect Whip: Whip the heavy cream to stiff peaks for a light and airy texture; over-whipping can cause curdling, so watch closely!
-
Crust Compression: Press the crust firmly into the cups to avoid a crumbly base, ensuring stability when filled with the cheesecake.
-
Layering Technique: Use a piping bag for easy and beautiful layering of the cheesecake filling, making your No-Bake Biscoff Cheesecake visually appealing.
-
Chill Time: Allow adequate chilling time of at least 4 hours (preferably overnight) to ensure the cheesecake sets perfectly and the flavors meld beautifully.

No-Bake Biscoff Cheesecake Cups Recipe FAQs
What type of Biscoff biscuits should I use for the crust?
I recommend using Lotus Biscoff biscuits, as their unique caramelized flavor is essential for the dessert. If you can’t find them, graham crackers are a suitable substitute, though the flavor profile will differ slightly.
How should I store the No-Bake Biscoff Cheesecake Cups?
Keep your cheesecake cups covered in the refrigerator for up to 3 days to maintain creaminess. To store them correctly, place them in an airtight container or cover them tightly with plastic wrap. This will help prevent them from drying out.
Can I freeze No-Bake Biscoff Cheesecake Cups?
Absolutely! You can freeze these delightful cheesecake cups for up to 2 months. Be sure to use airtight containers or wrap them securely in plastic wrap to avoid freezer burn. This way, you can easily pull out a serving whenever that sweet craving hits!
What should I do if my cheesecake filling is too thick?
If you find your filling is too thick, it might be that the cream cheese wasn’t blended smoothly enough. Simply add a tablespoon of heavy cream to the mixture and whip until it reaches your desired fluffiness. This adjustment will help maintain that light and airy texture typical of a perfect No-Bake Biscoff Cheesecake.
Are there any allergies to consider with this recipe?
Definitely! The recipe contains dairy (cream cheese and heavy cream), so it’s not suitable for those with lactose intolerance or dairy allergies. You can use vegan cream cheese and coconut cream as alternatives. Also, watch out for allergies to nuts if you decide to swap Biscoff spread with almond or peanut butter.
Decadent No-Bake Biscoff Cheesecake You Can’t Resist!
Ingredients
Equipment
Method
- Crush the Biscoff biscuits into fine crumbs using a food processor or rolling pin. Melt the unsalted butter and combine with the cookie crumbs. Spoon into dessert cups and press down to create a crust.
- In a mixing bowl, whip the heavy cream until stiff peaks form. In another bowl, beat cream cheese, powdered sugar, Biscoff spread, and vanilla until smooth. Fold in whipped cream.
- Transfer the filling into a piping bag and pipe it into the dessert cups over the crust, smoothing the surface with a spatula.
- Melt the Biscoff spread and drizzle it over the cheesecake filling. Sprinkle reserved cookie crumbs and add halved Biscoff cookies on top.
- Cover and refrigerate for at least 4 hours or overnight to allow the cheesecake to set.
Leave a Reply